Enable SSO
Create a new App registration on Azure for SSO
- Go to the Azure portal → Microsoft Entra ID.
- Make sure you are in the correct subscription.
- From Overview, expand Manage from the top navigation and click App registration.
- Register a new application by clicking New Registration:
- Define the app display name
- For Social Sign In with Microsoft, choose "Accounts in any organizational directory (Any Microsoft Entra ID tenant - Multitenant) and personal Microsoft accounts (e.g. Skype, Xbox)"
- Under the Redirect URI (optional Select the Web application type using the dropdown menu
- Provide the Redirect URI:
https://<**FQDN for Penfield App**>/public/self-service/methods/oidc/callback/microsoft - Click Register.
For reference: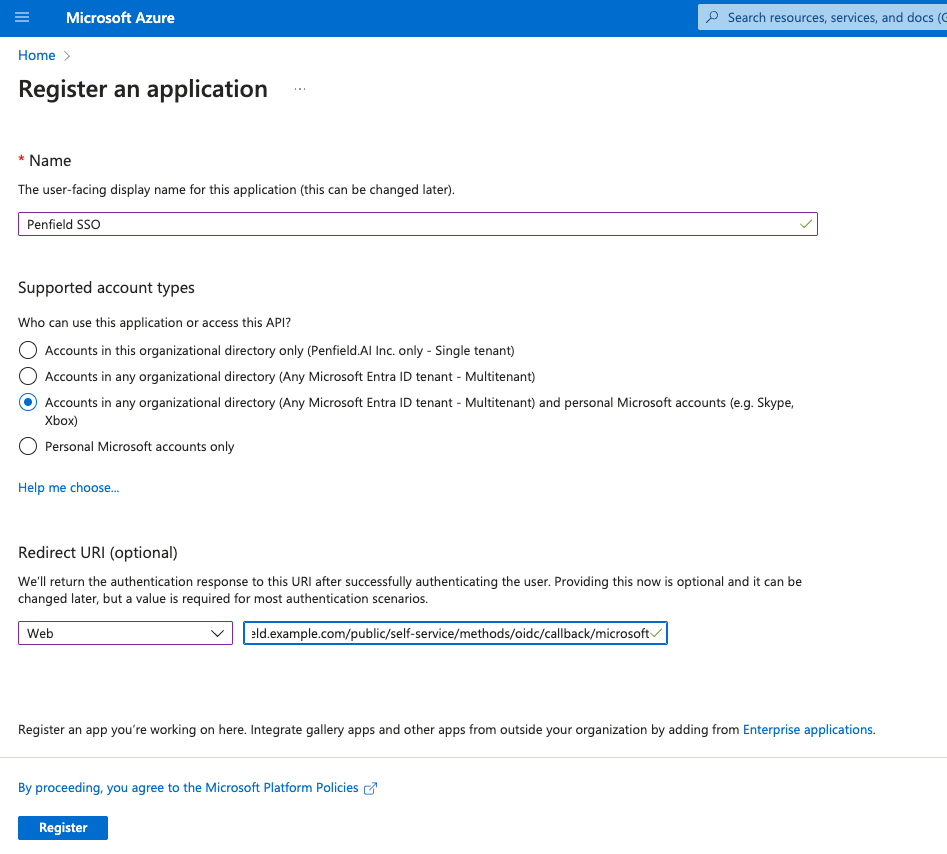
- Inside the registered App, expand Manage and click Branding & Properties.
- Scroll down to Publisher verification section and click on Add MPN ID to verify publisher. Use
5457809as MPN ID and check the boxBy proceeding, you agree to the Microsoft Platform Policiesand click Verify and save. This should verify the publisher.
- Go to Certificates & secrets and create a new client secret and copy the value of the client secret.
- Go to Overview tab and copy the followings:
- Application (client) ID
- Directory (tenant) ID
Update Penfield app configuration (Kratos)
-
Make sure you have these values: CLIENT_ID (Application ID) TENANT_ID (Directory ID) CLIENT_SECRET
-
To enable SSO in penfield-app, run the below command from the root of Github repo that you have cloned previously and follow the instructions.
enable SSO./run.sh -c