Penfield and Microsoft Sentinel integration
In order to pull incident data from Microsoft Sentinel, sentinel integration need to be setup with penfield product. This document provide the detailed view of the integration setup.
Microsoft Sentinel account setup
Click on New Registration
-
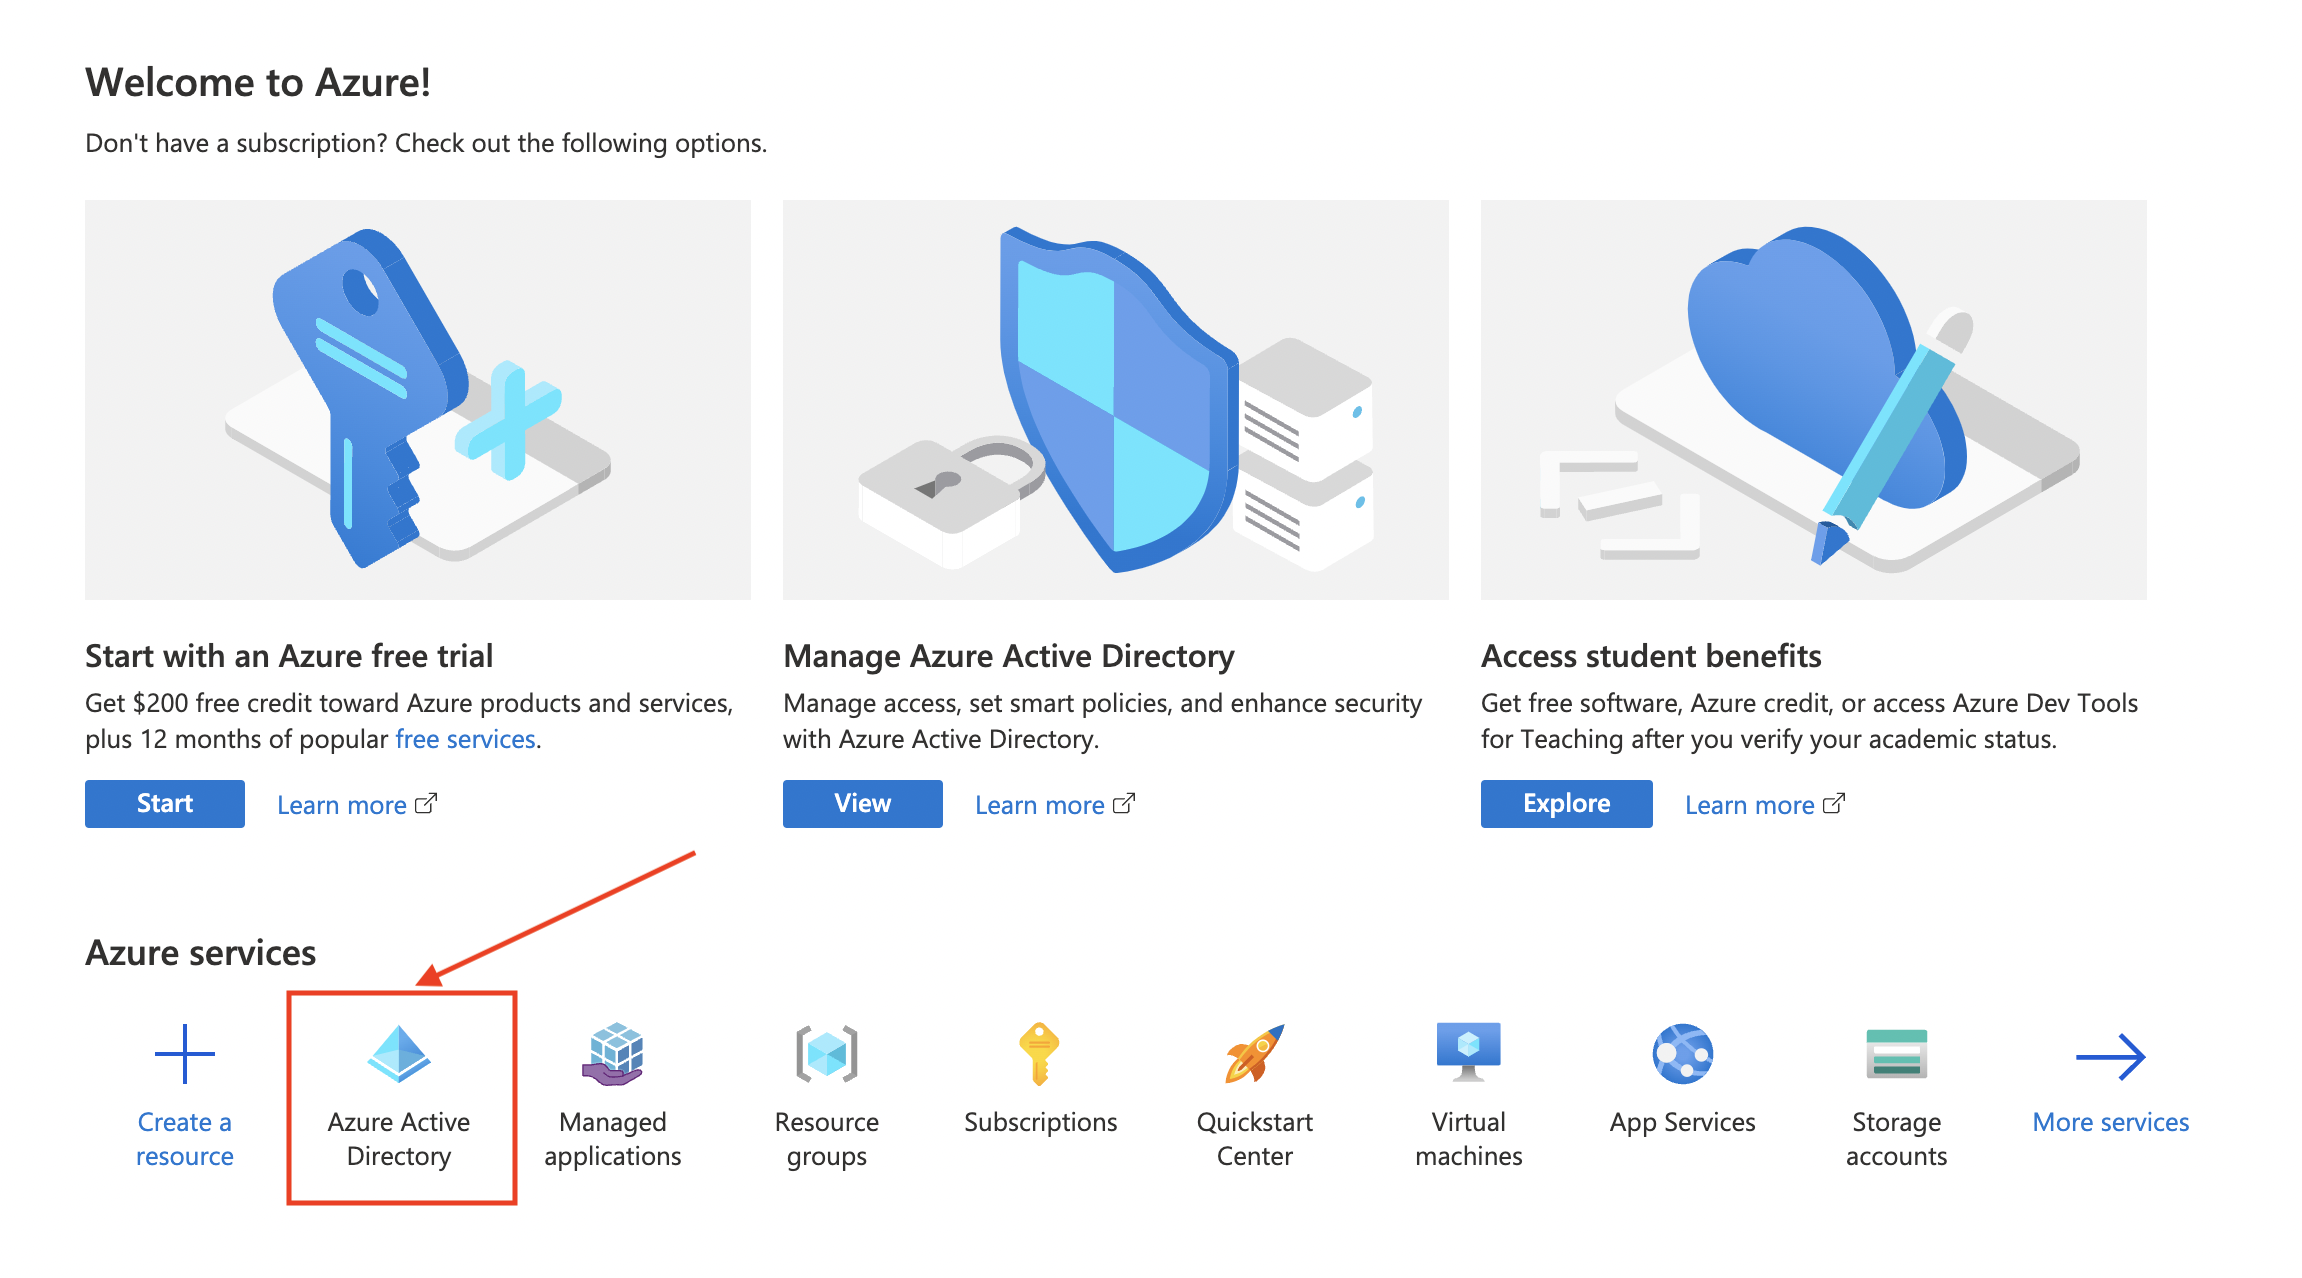
Login to https://portal.azure.com/#home
-
Navigate to Azure Active Directory
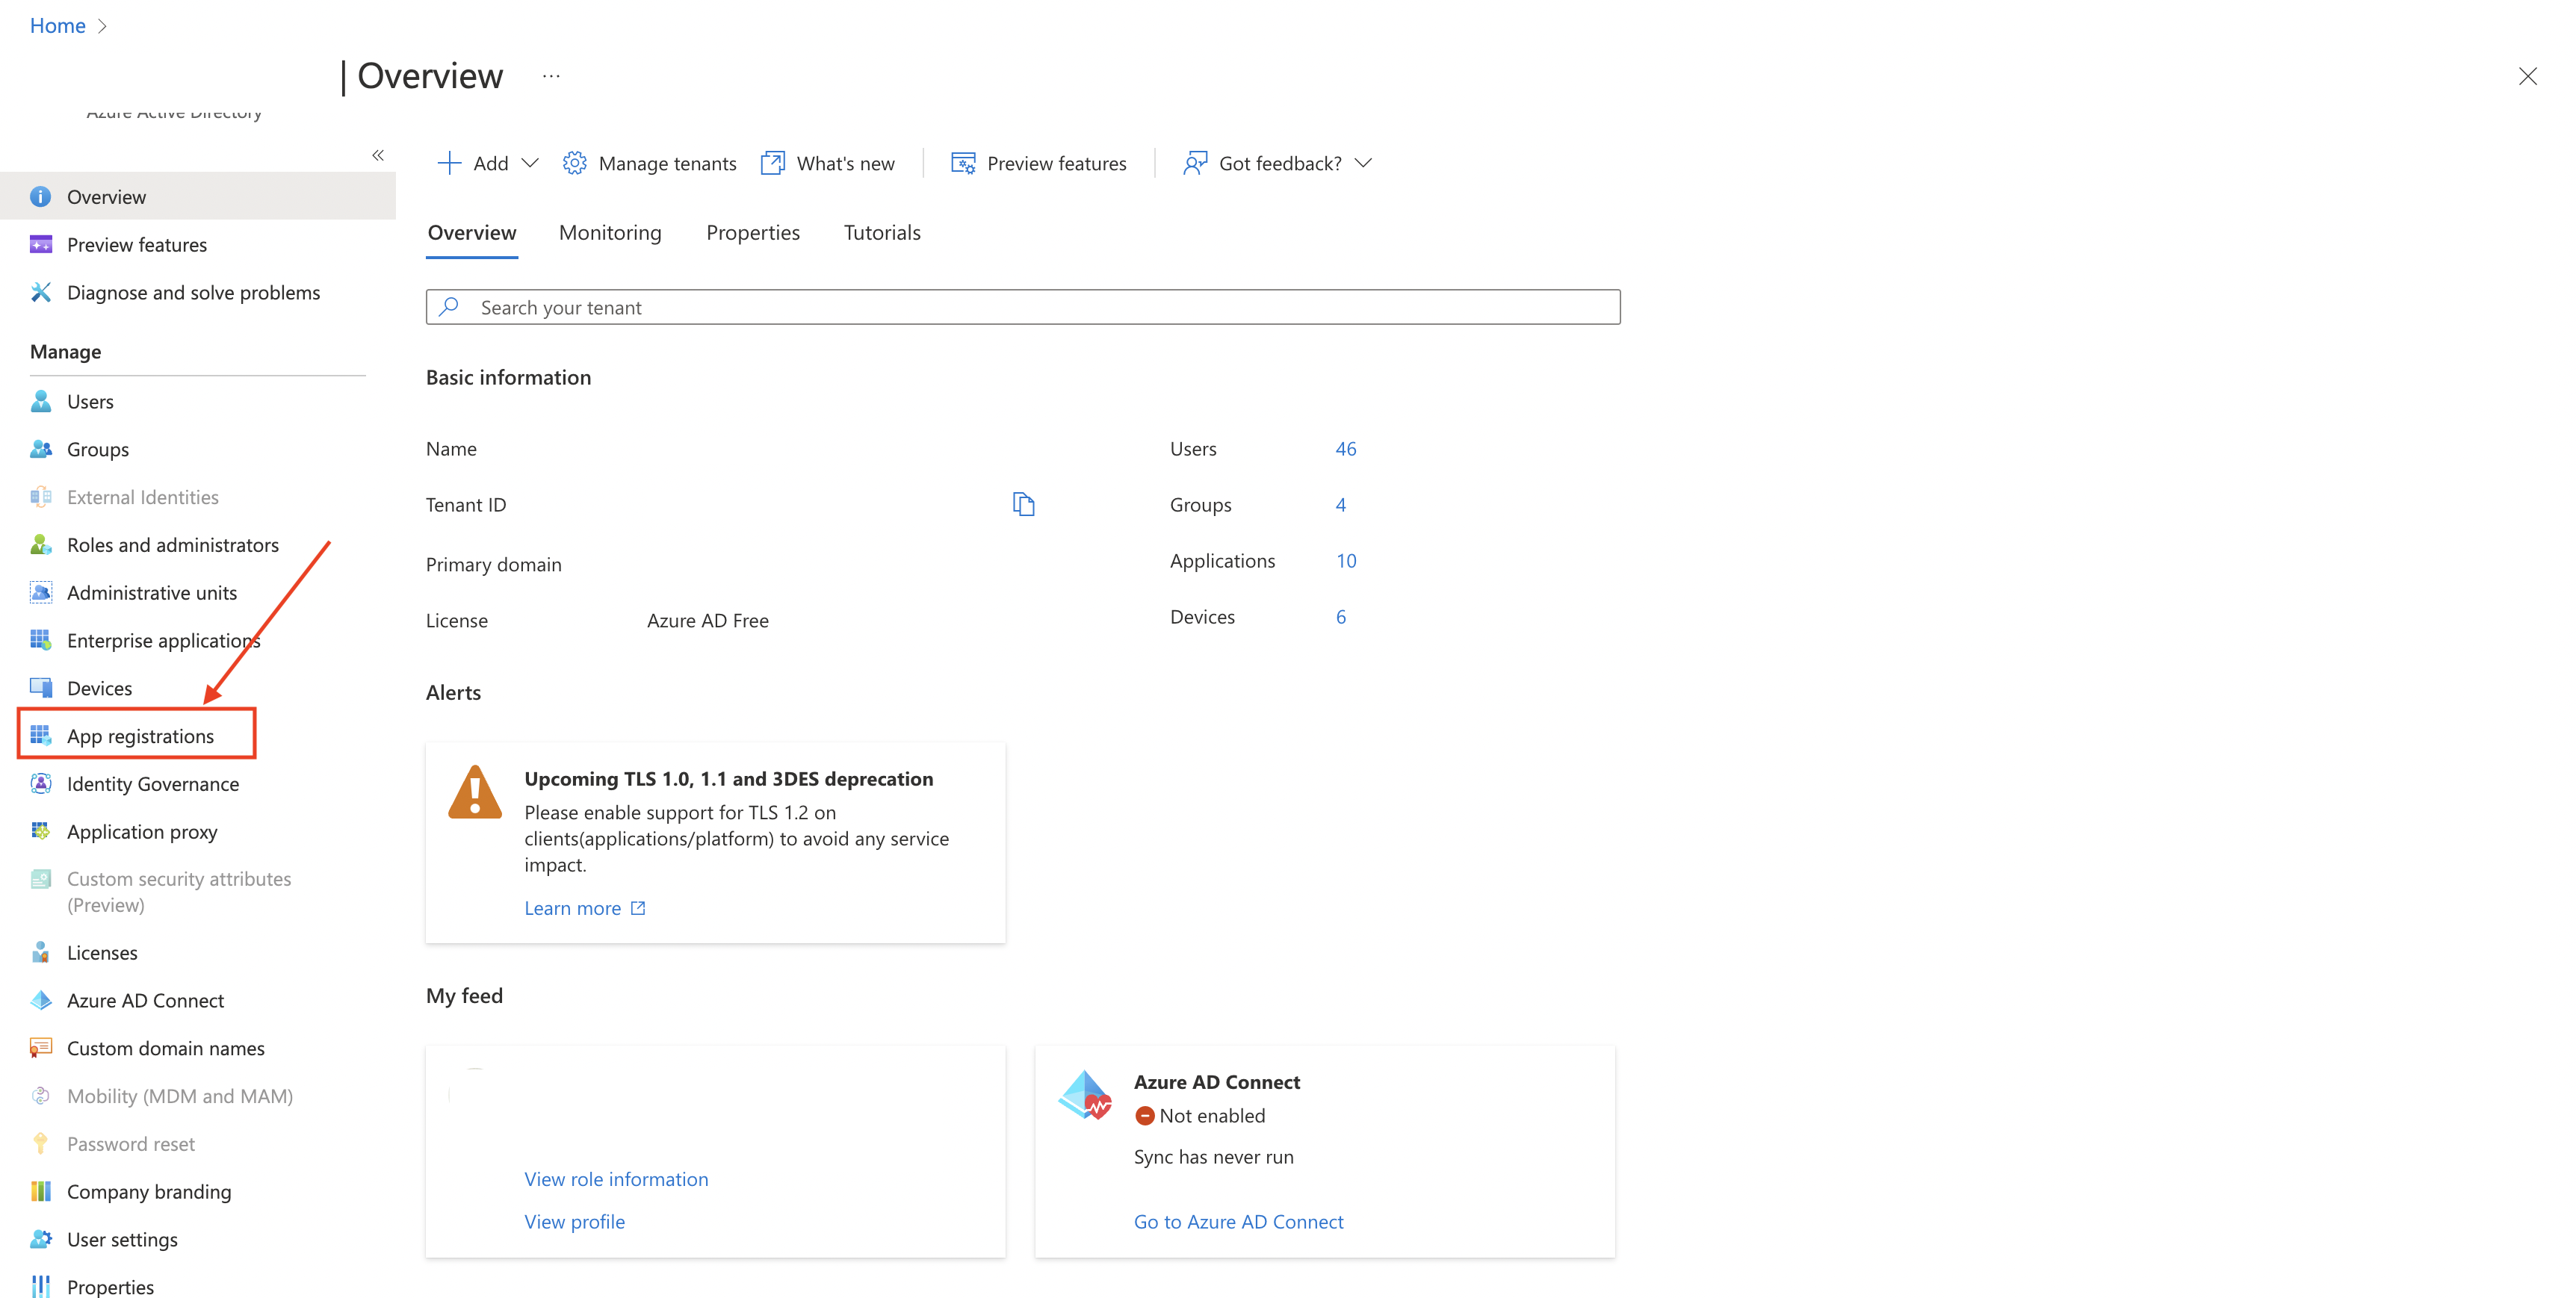
-
Navigate to App Registration
-
Click on New Registration
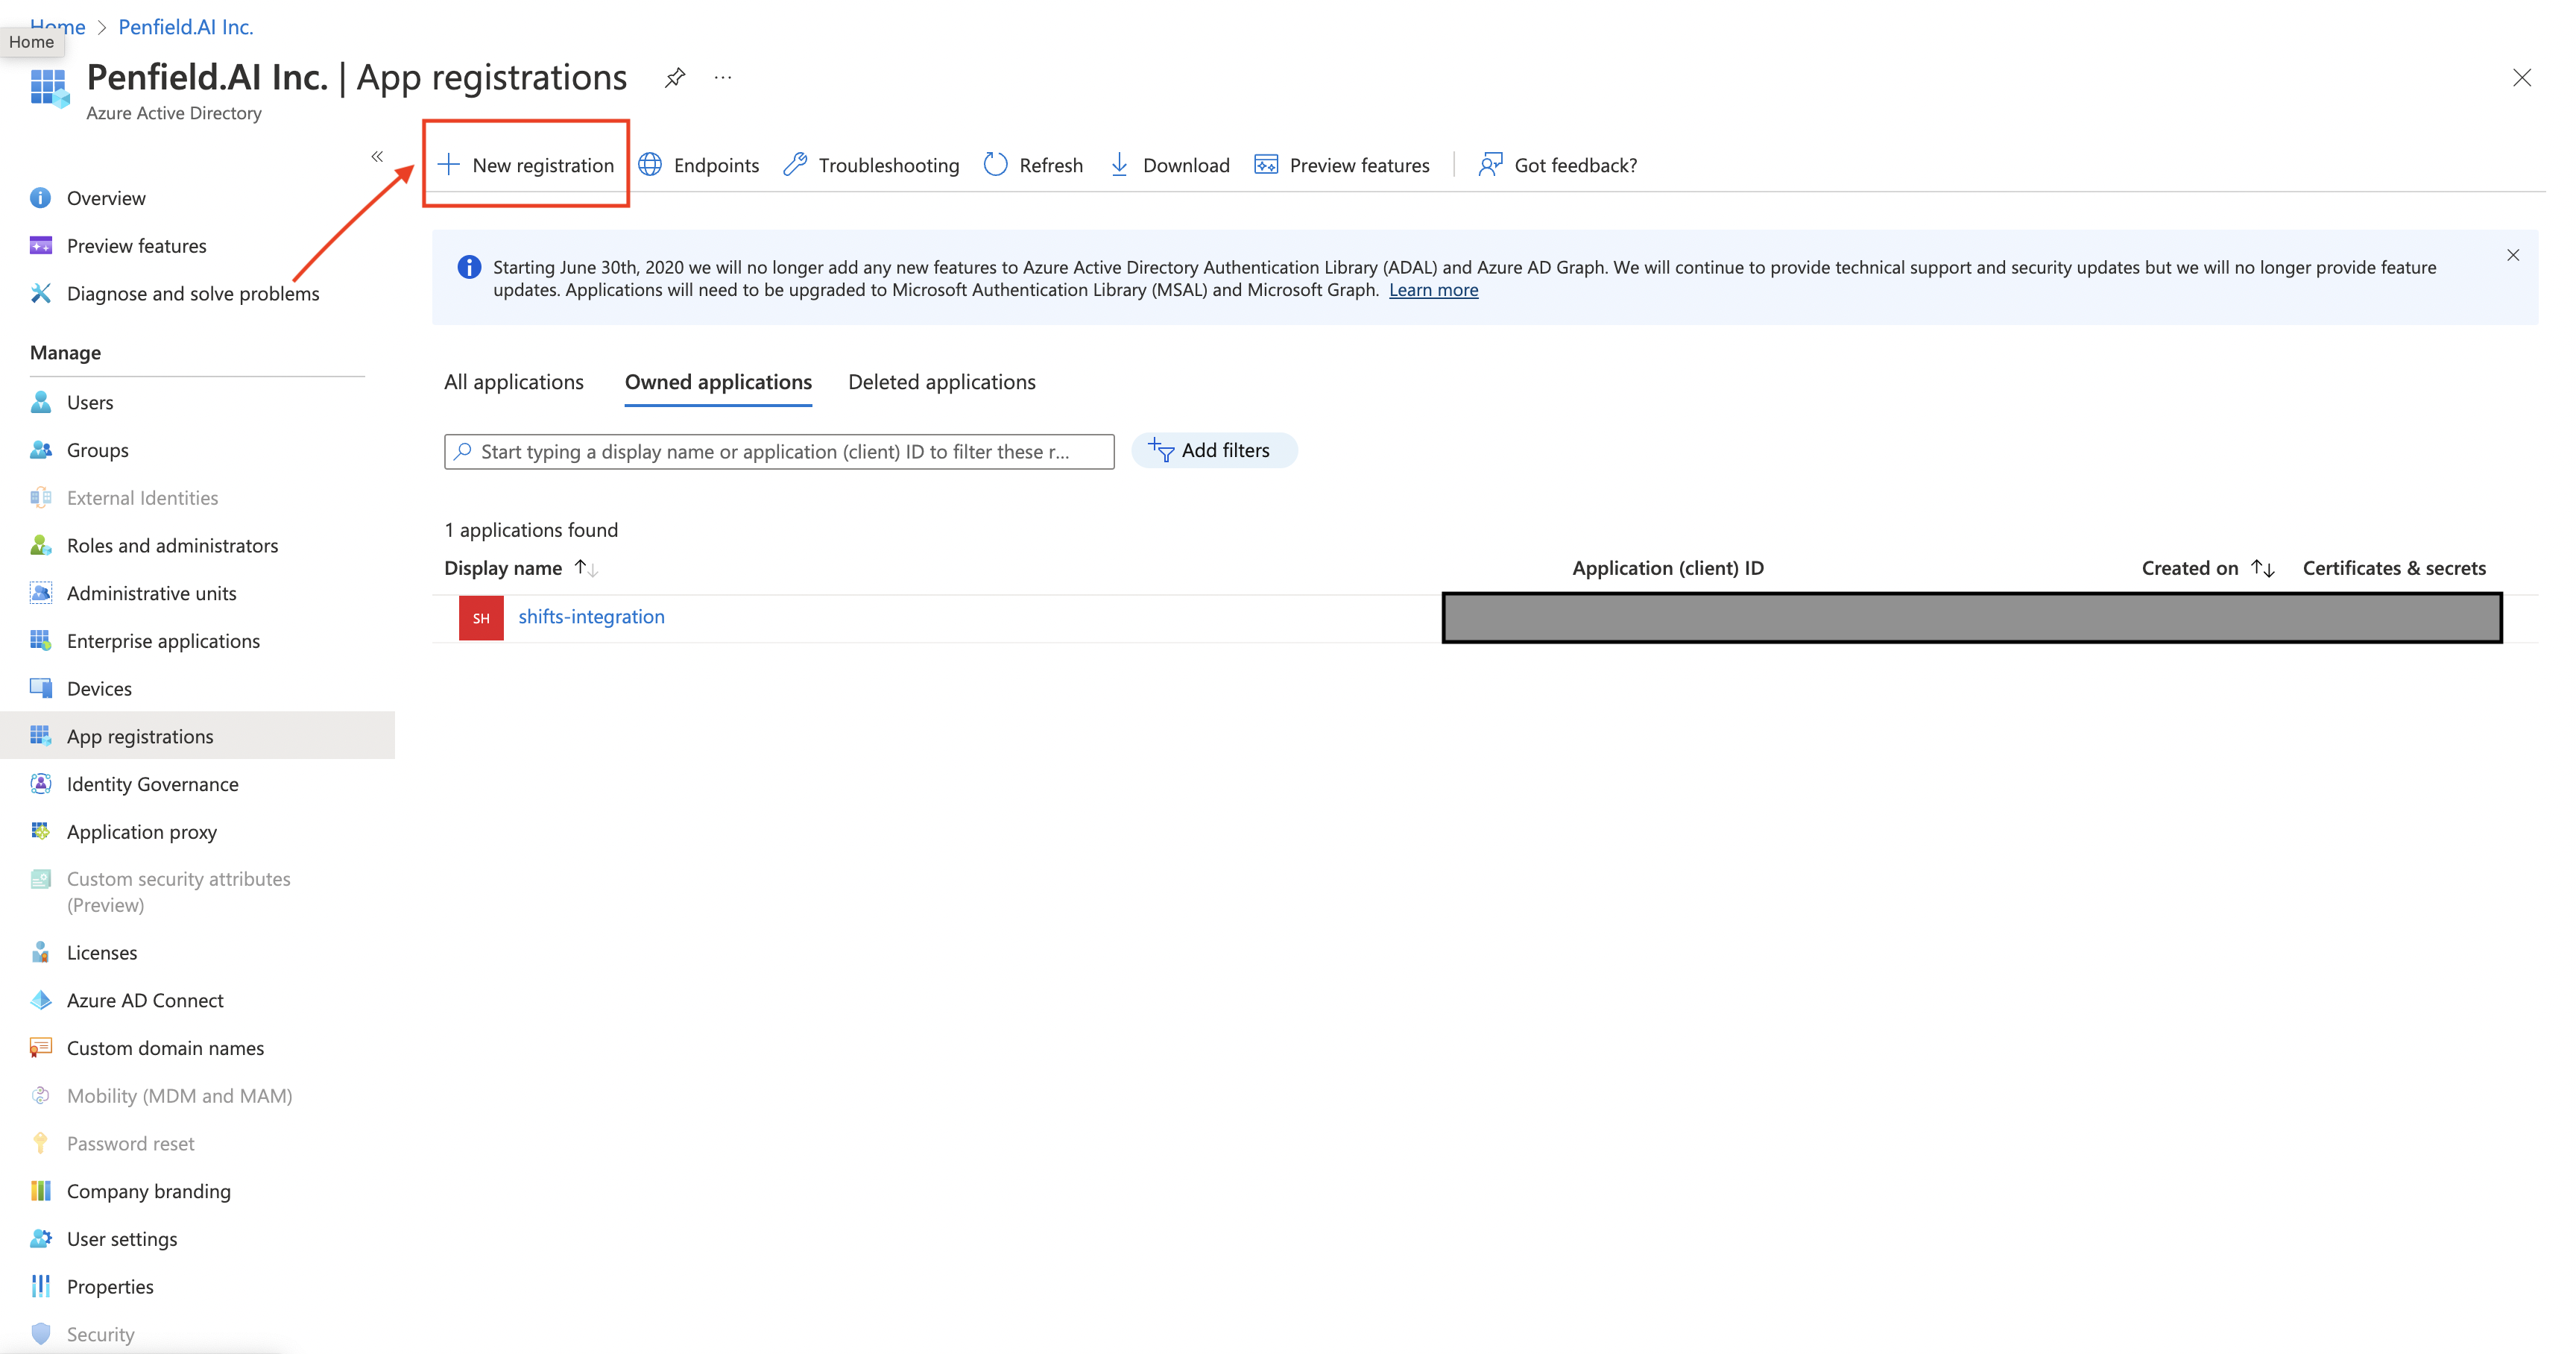
-
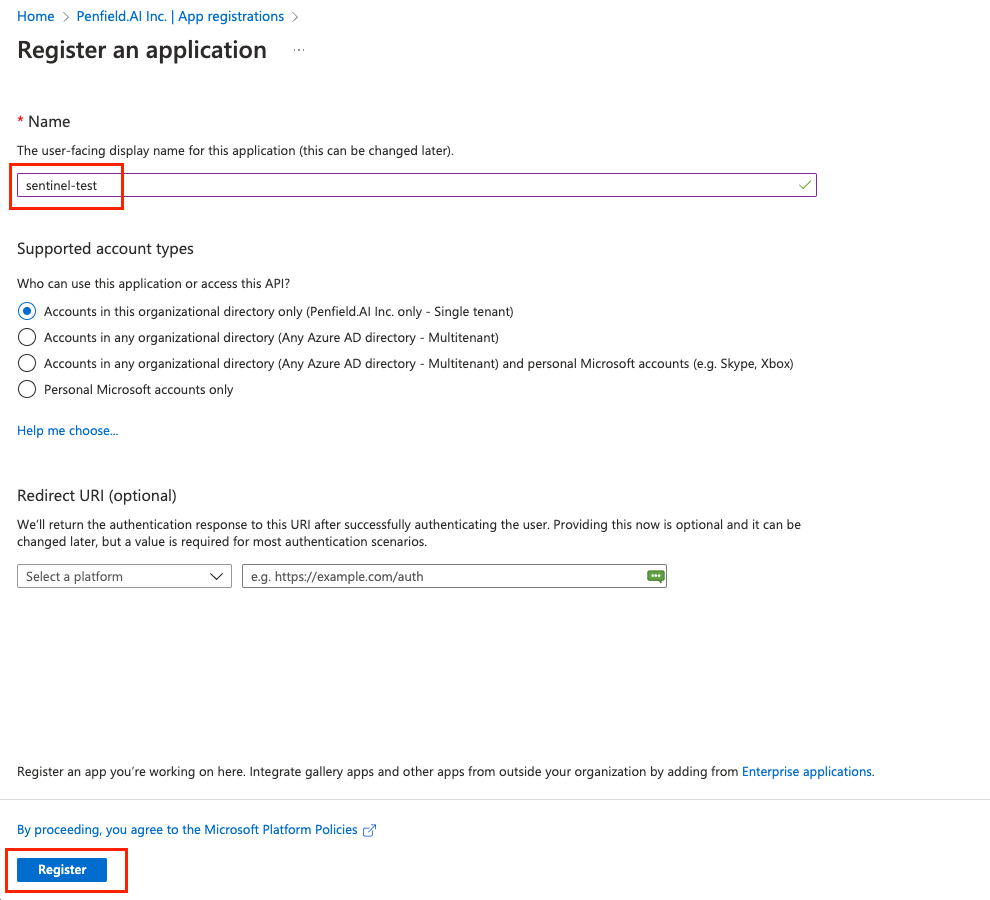
Please fill out the form and then click on Register. Please fill out the form with the following values
- Choose appropriate Name as required
- Under Supported account types, select the
Accounts in this organizational directory only (<Company Name> only - Single tenant)option. - Redirect URI is not needed.
-
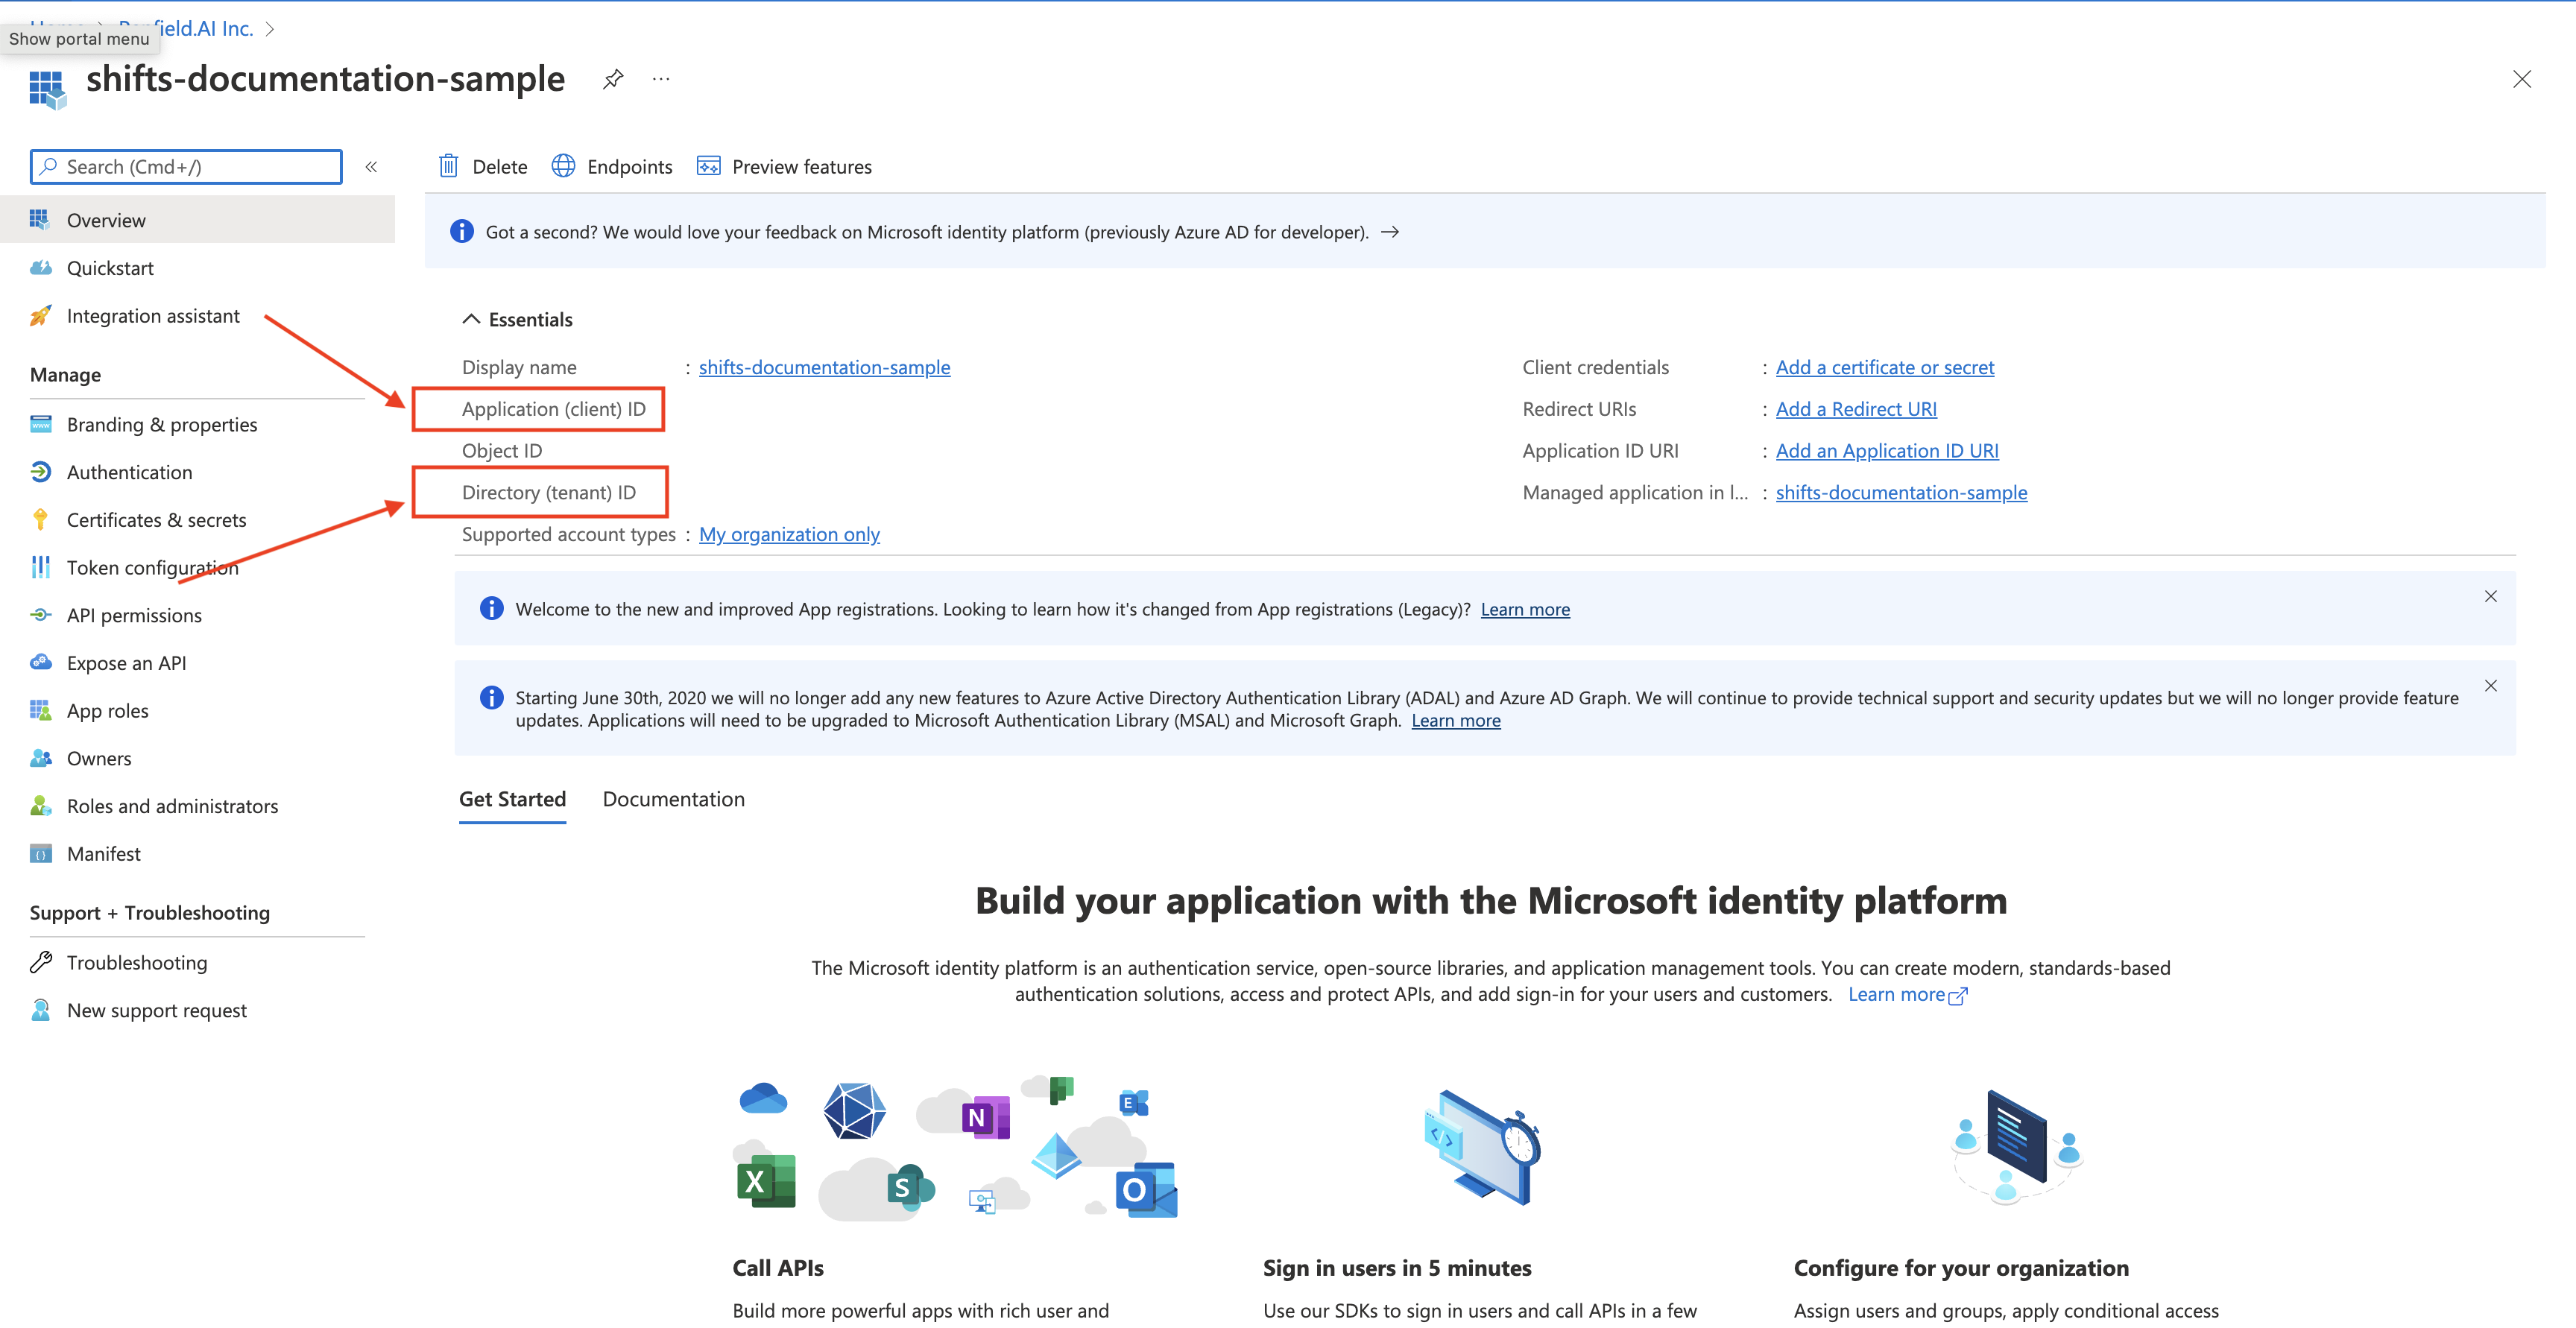
Copy the Application (client) ID and the Directory (tenant) ID
-
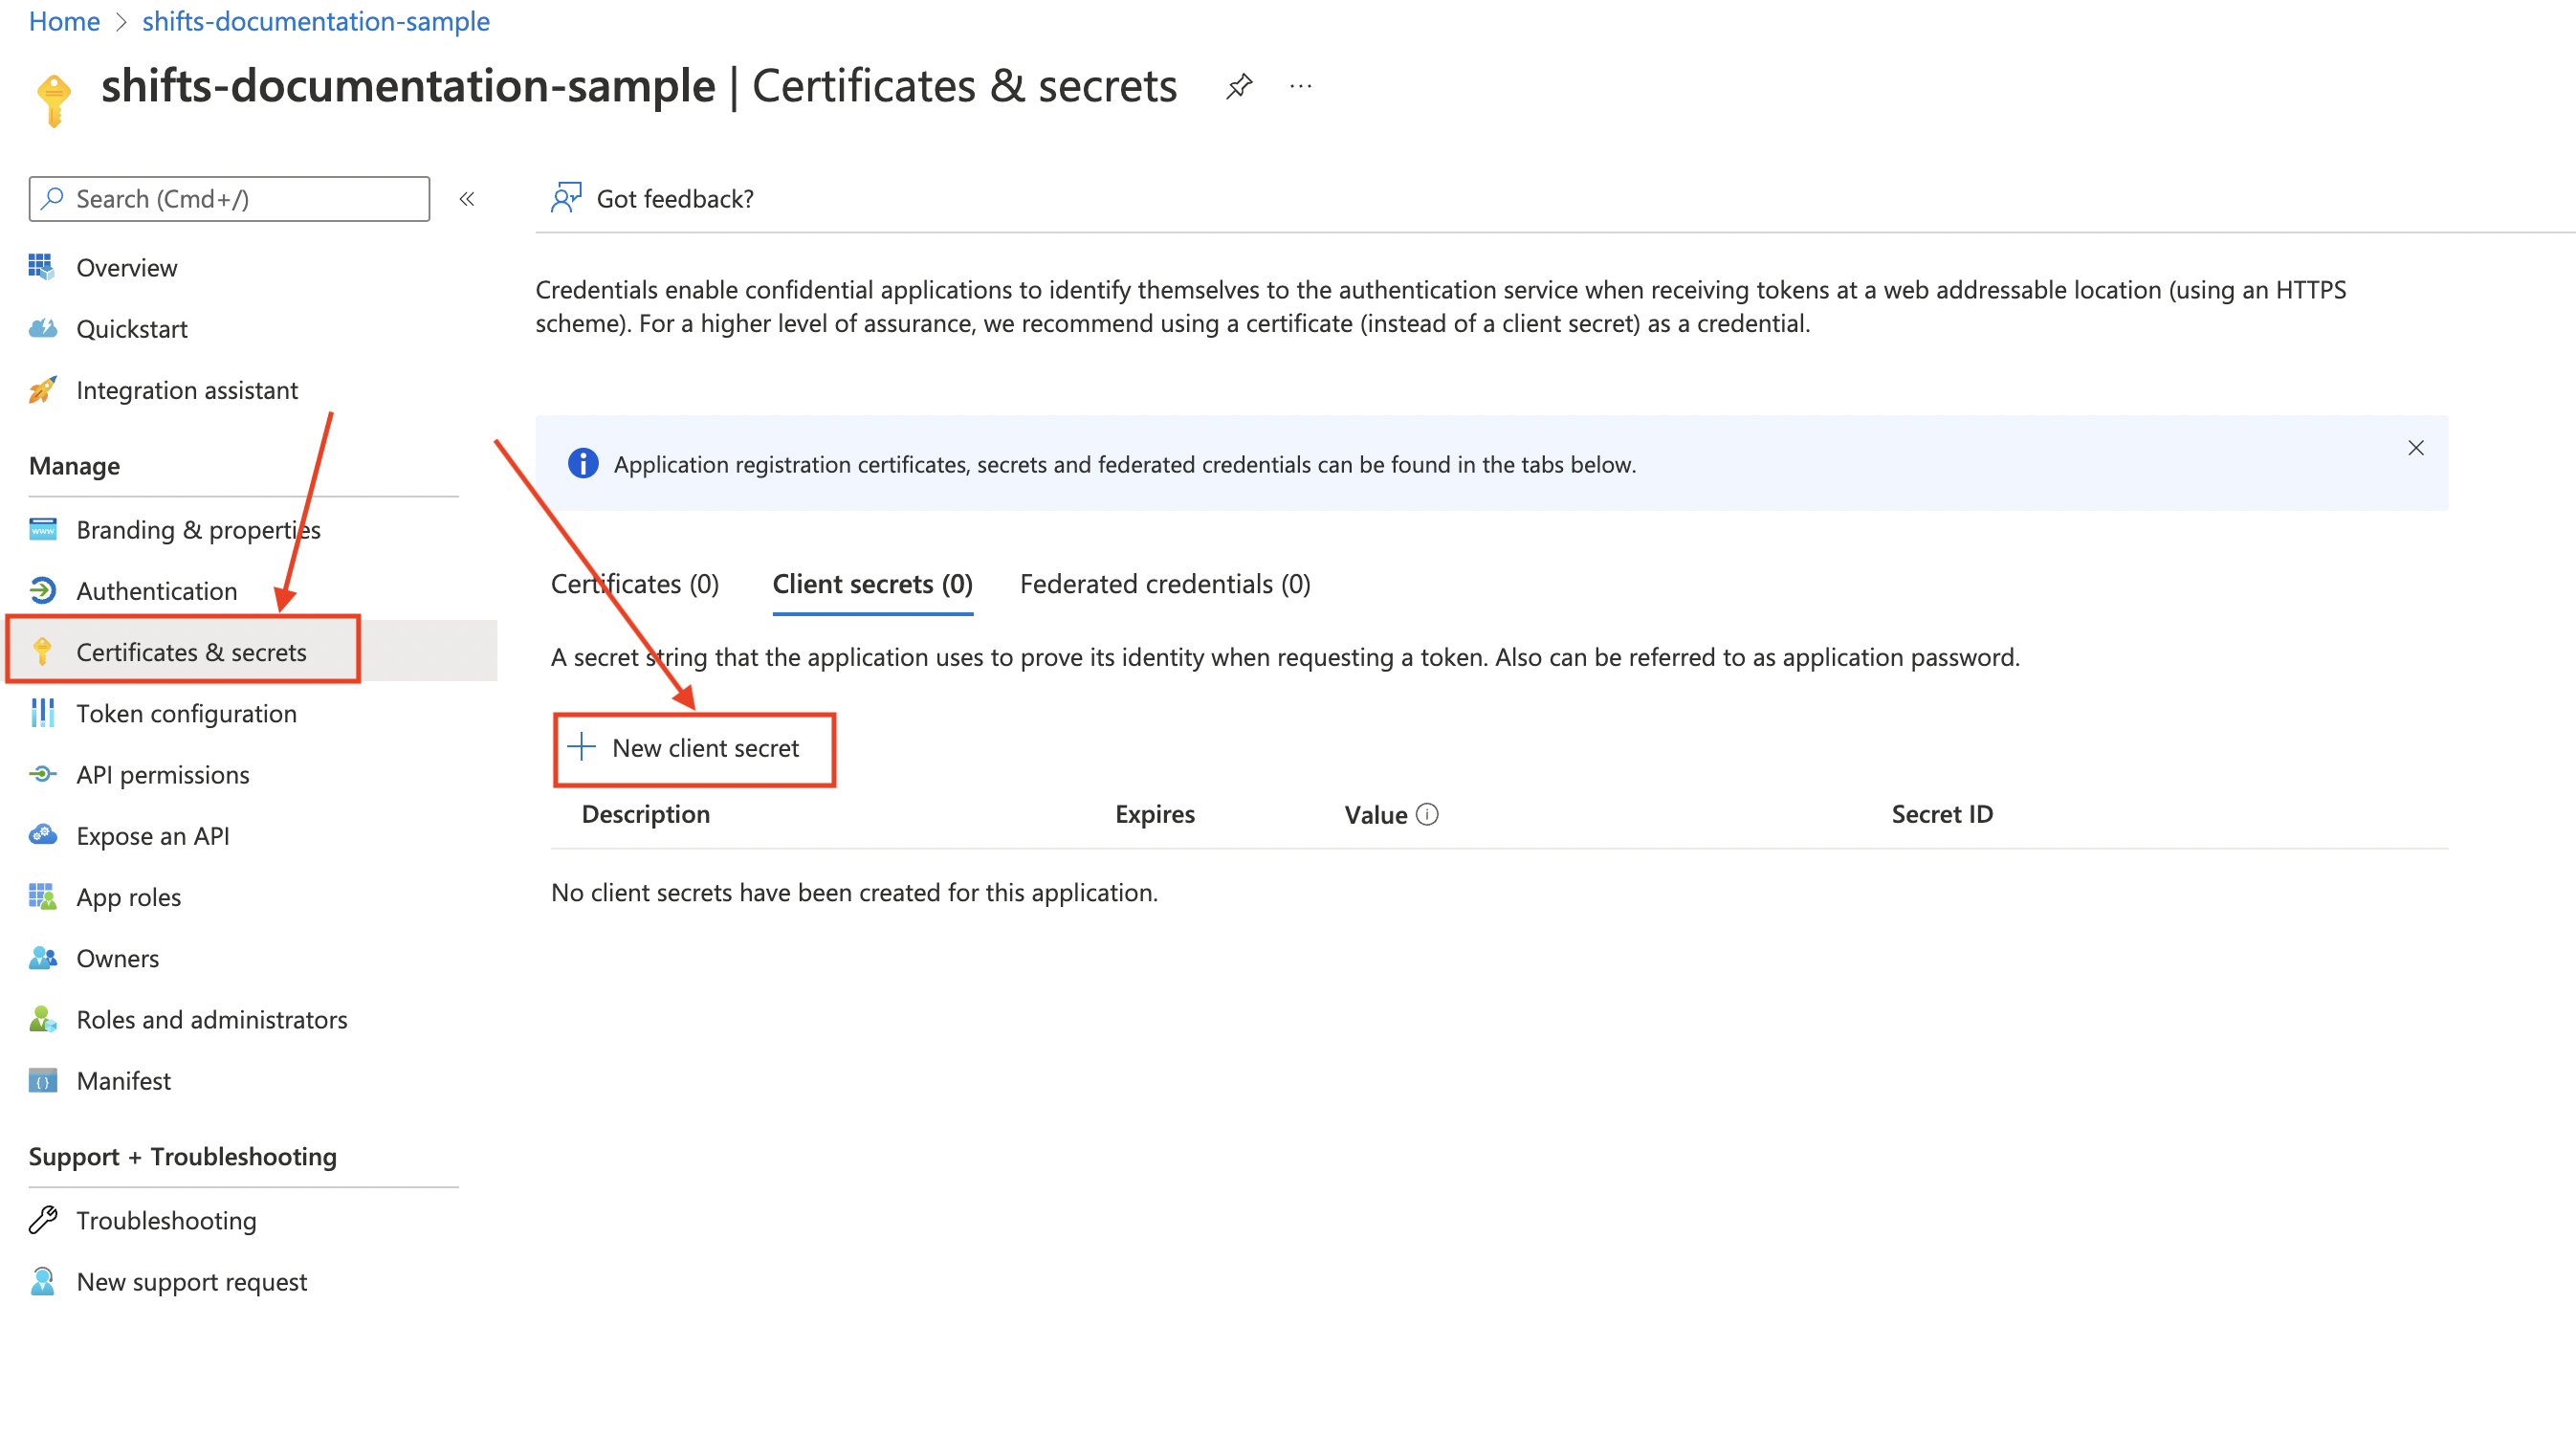
Navigate to Certificates & Secret, then click on New client secret
-
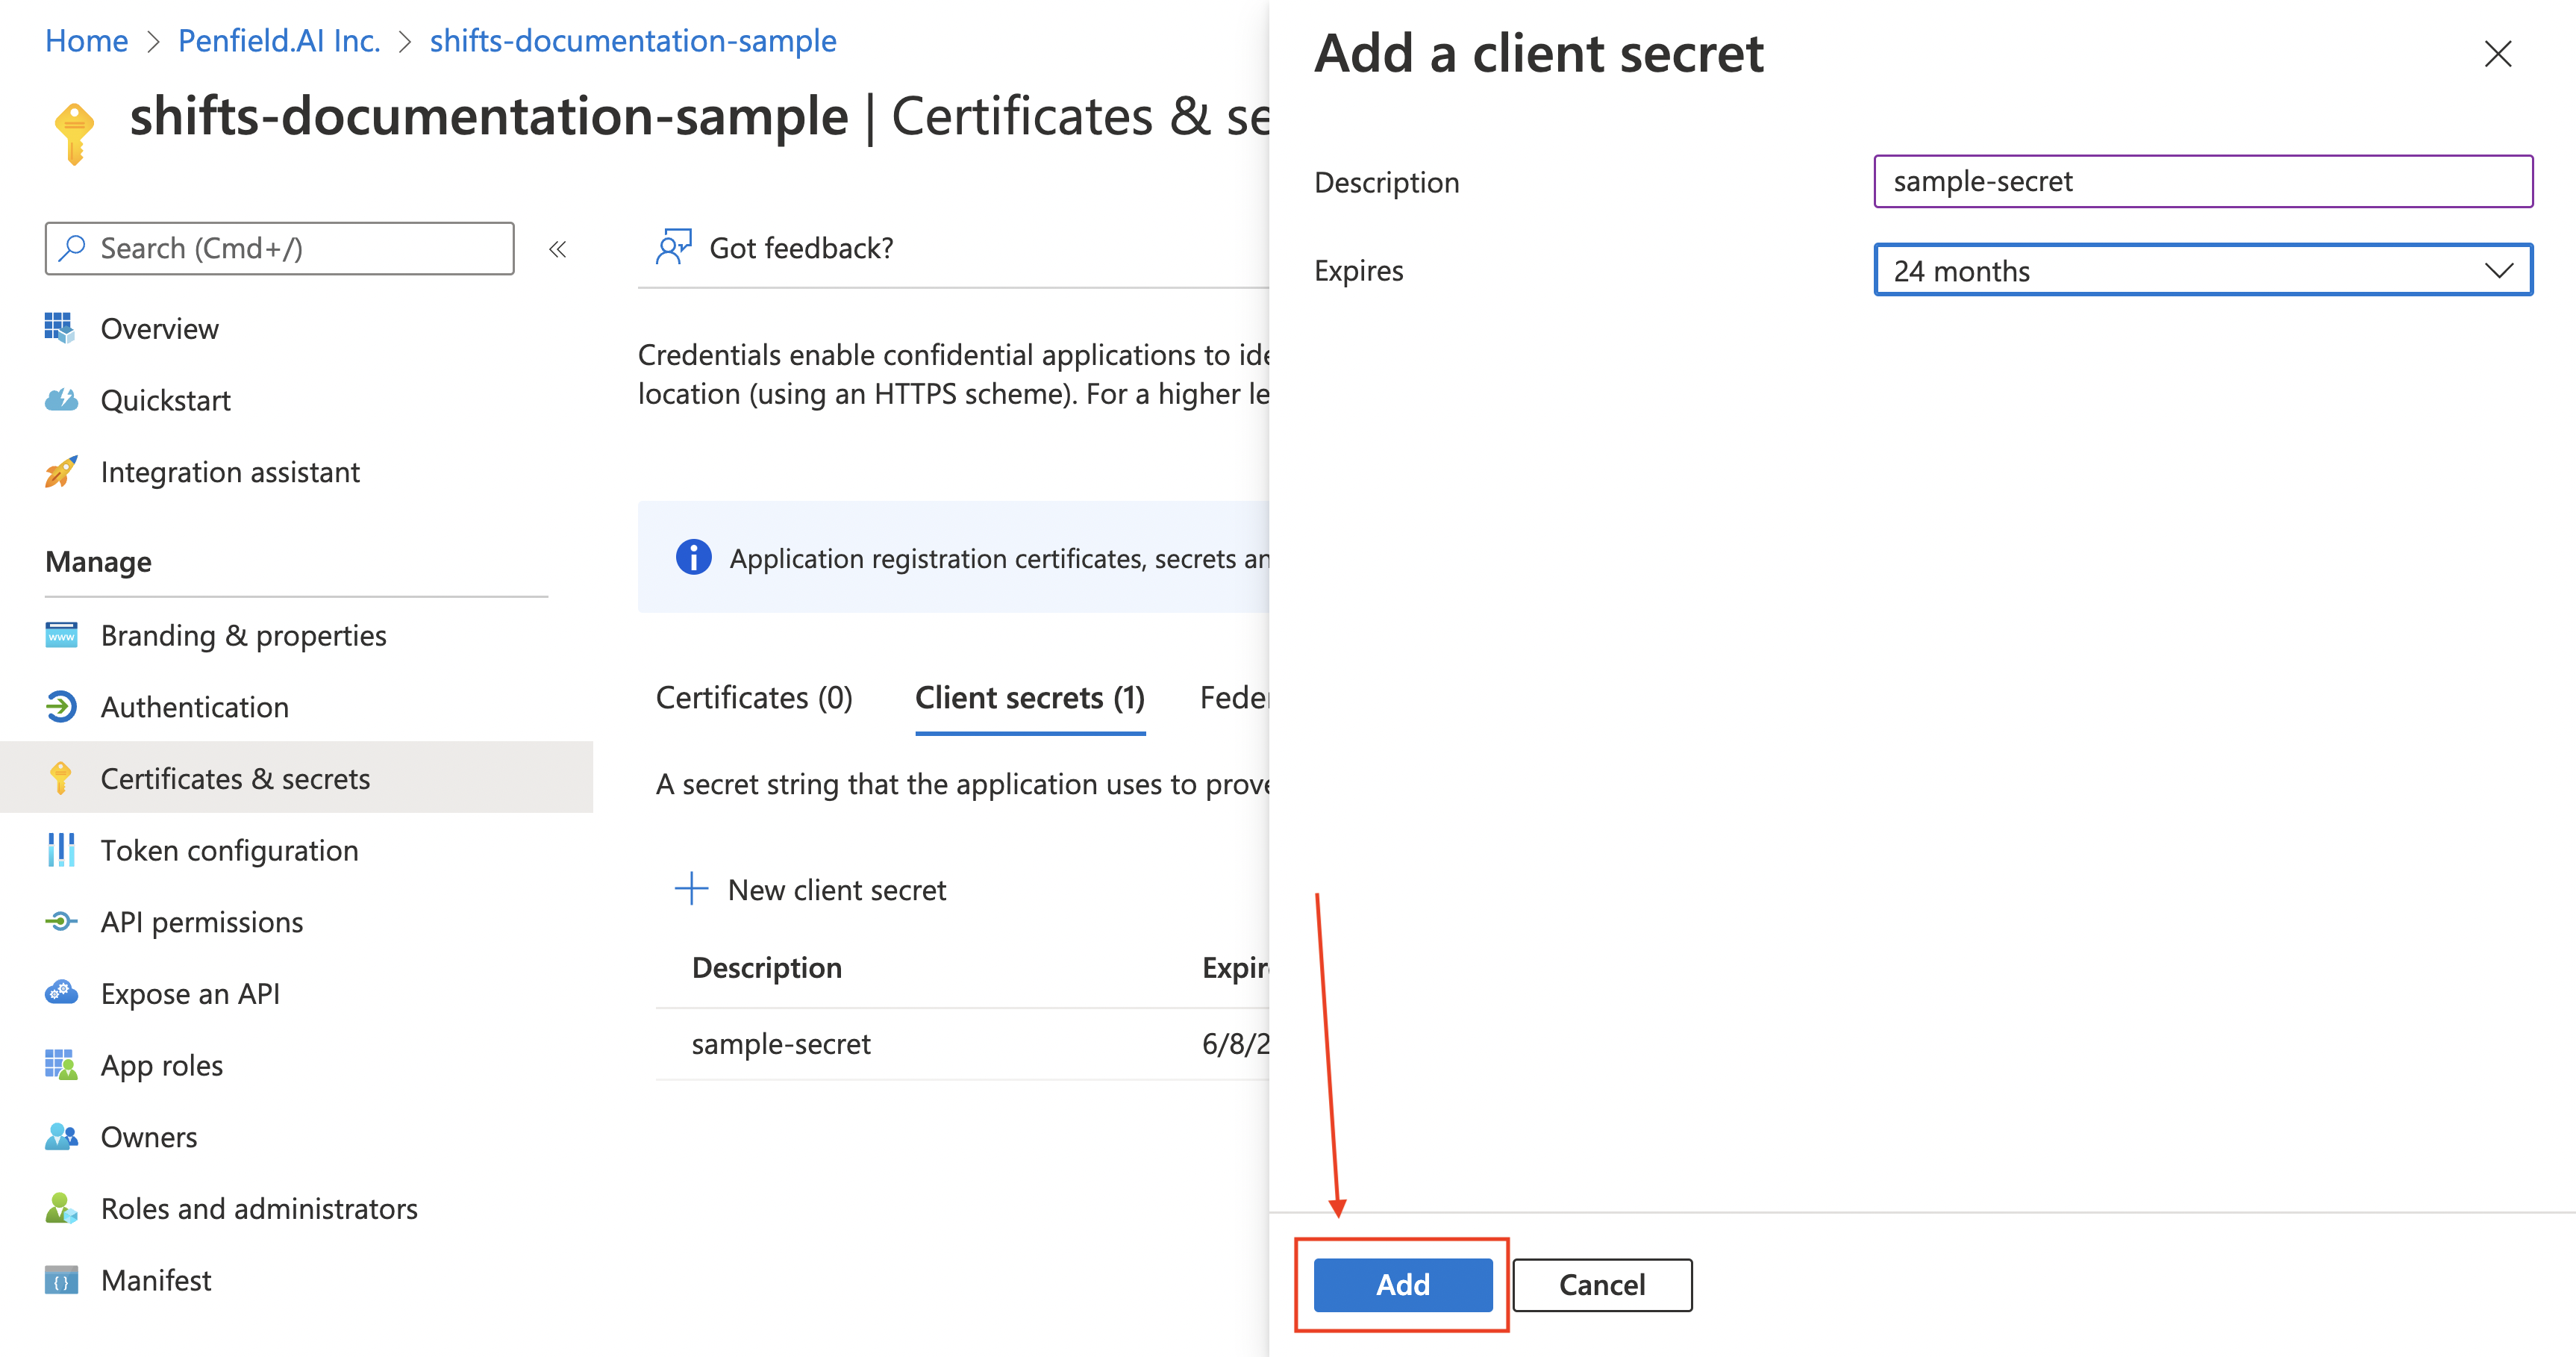
Fill in the details for the fields in the form that is shown in the side panel. Click Add
-
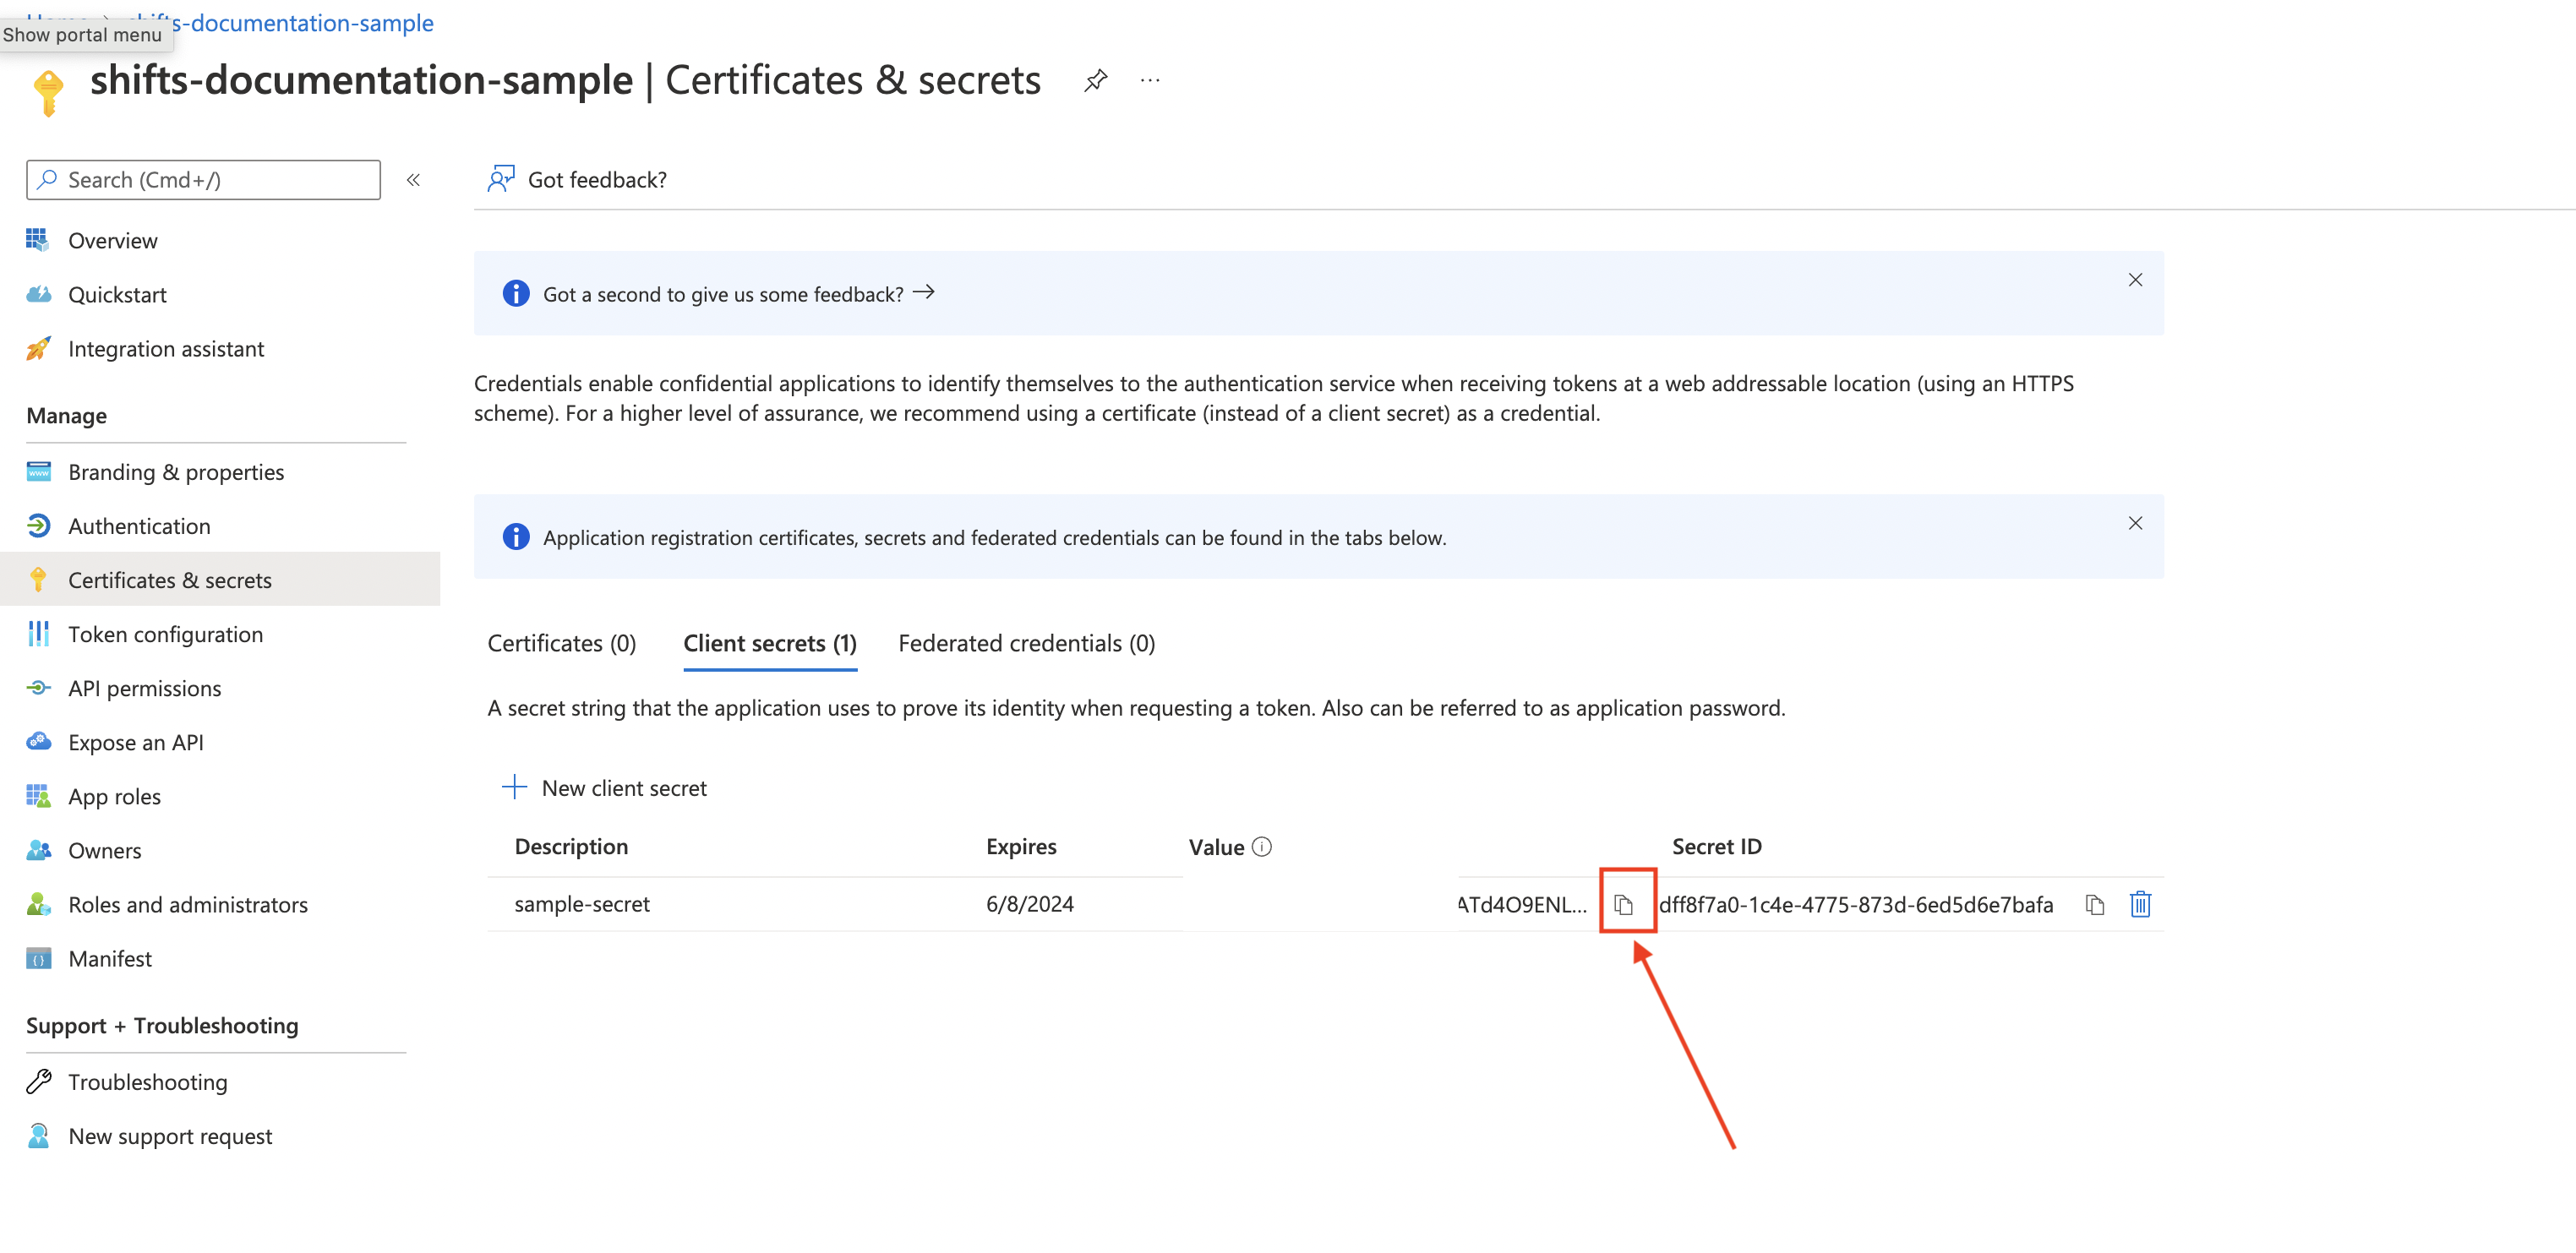
Copy the secret value
-
Assign a role to the registered app.
- In the Azure portal, Go to Subscriptions, select the subscription in which sentinel is setup → Access control (IAM)
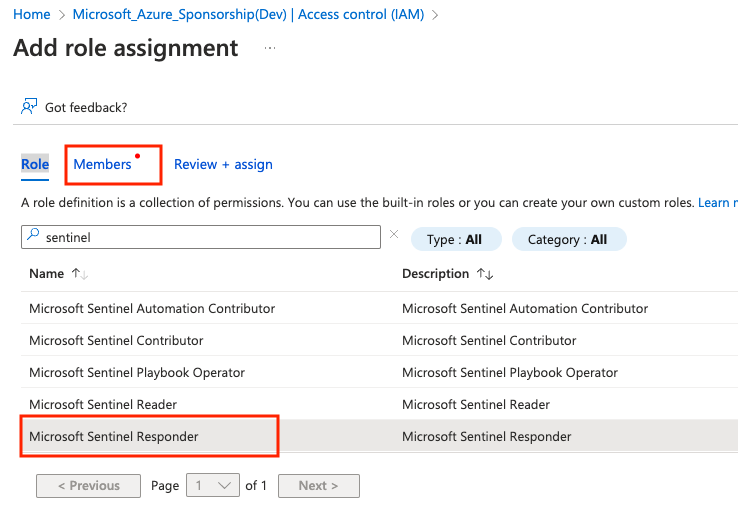
- Click Add >> Add role Assignment

- Select the Microsoft Sentinel Responder role , Go to Members.
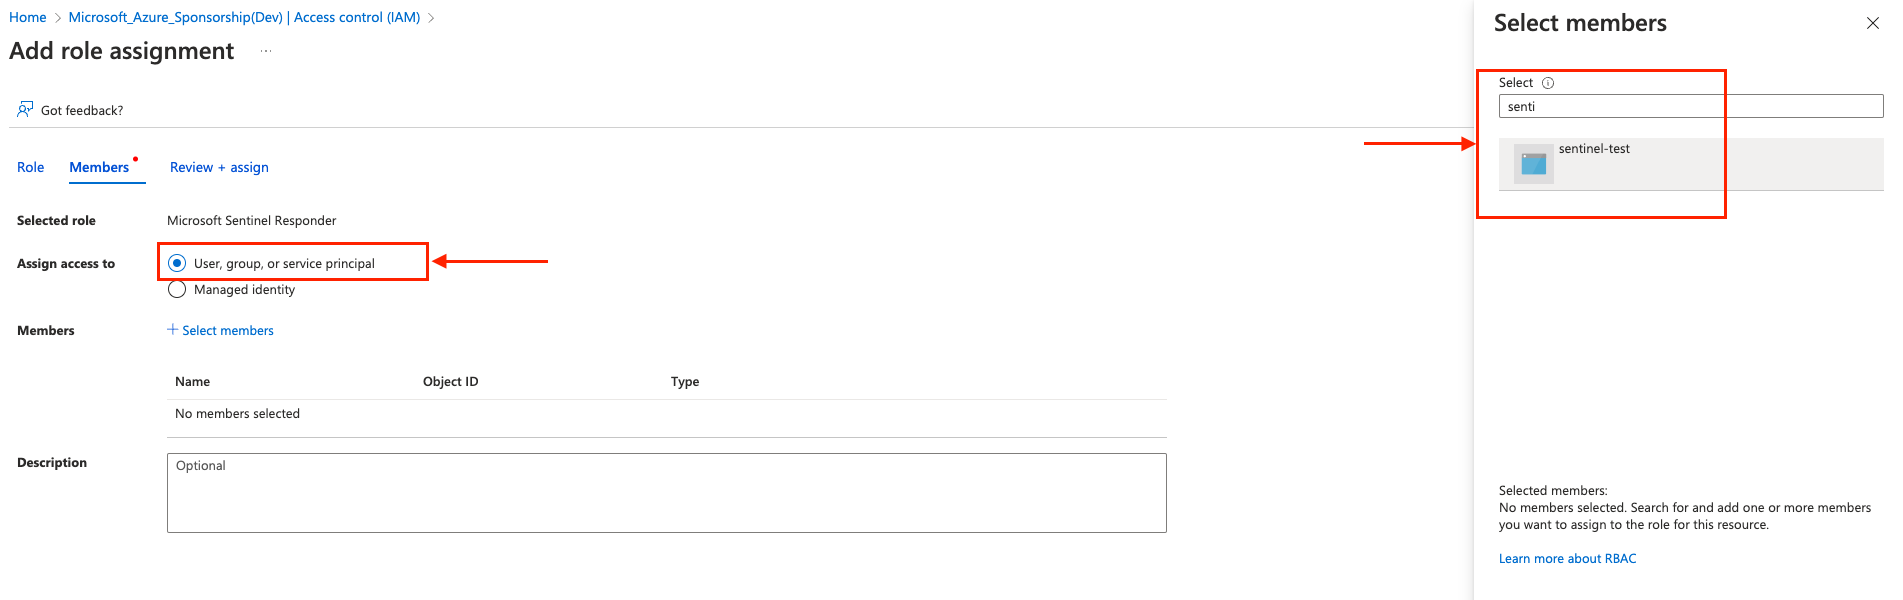
- In the Assign access to choose User, group, or service principal and in the members on the right choose the app that was created previously in step 5 and click Review+ assign.
-
At this step account setup is completed. Please note down following values:
Here is the list of values that will be needed:
- tenantID - Directory (tenant) ID (Step 6)
- clientID - Application (client) ID (Step 6)
- clientSecret - Step 9
- azure subscription ID where sentinel is setup
- sentinel workspace name
- sentinel resource group name
If you are deploying penfield.ai product as a self-service please proceed with next steps, otherwise send these values to Penfield team secure means like onetimesecret or other secret management tool you use.
Update Penfield-app configuration
-
Following are the required values in order to enable this integration. If you have multiple sentinel instances in different subscriptions you will need following values for each sentinel instance. Please keep them handy before you proceed further:
Name Description name Name of organization corresponds to Sentinel instance, Avoid spaces and special characters. subscription_id Subscription id of Sentinel instance. workspace_name Workspace name of Sentinel instance. resource_group_name Resource group name of Sentinel instance. tenant_id Directory (tenant) ID of app that has access to Sentinel instance. client_id Application (client) ID of app that has access to Sentinel instance. client_secret Client secret of app that has access to Sentinel instance. -
Prepare the value of SENTINEL_INSTANCES. String value is constructed in this format, replace
VALUEfrom the above values accordingly in the below string and then encode into base64.[{"name": "VALUE(name corresponds to your organization)", "subscription_id": "VALUE", "workspace_name": "VALUE","resource_group_name": "VALUE", "tenant_id": "VALUE", "client_id": "VALUE", "client_secret": "VALUE"}]- if you have multiple sentinel instances in different subscriptions, you need to do sentinal account setup in each of the subscription (follow all the above 11 steps for each account) and secret
SENTINEL_INSTANCESvalue will be like:[{"name": "VALUE1(name corresponds to your organization)", "subscription_id": "VALUE1", "workspace_name": "VALUE1","resource_group_name": "VALUE1", "tenant_id": "VALUE1", "client_id": "VALUE1", "client_secret": "VALUE1"},{"name": "VALUE2(name corresponds to your organization)", "subscription_id": "VALUE2", "workspace_name": "VALUE2","resource_group_name": "VALUE2", "tenant_id": "VALUE2", "client_id": "VALUE2", "client_secret": "VALUE2"}]
- if you have multiple sentinel instances in different subscriptions, you need to do sentinal account setup in each of the subscription (follow all the above 11 steps for each account) and secret
-
Make sure you set the kubectl context to the right cluster. You can check the current context with
kubectl config current-contextand set the context withkubectl config use-context <context-name> -
Update the helm chart values.yaml file to enable Sentinel integration, Find the following block and make sure the following service is enabled:
enable Sentinel integration# Enable Sentinel integration
sentinel-inbound-integration:
enabled: true
incidentsPull:
enabled: true
processing:
enabled: true -
Update the
penfield-secretssecret:You can either update
penfield-secretsusing ArgoCD or kubectl directly patch the secret, depending on how you have initially deployed it.-
Update using ArgoCD: Added the below value to the existing
penfield-secretssecret, You may need to encrypt the secret before updating if you are using secret manager. Do not forget to replace the VALUE with the ones from the previous step.update penfield-secretsdata:
SENTINEL_INSTANCES: [{"name": "VALUE(name corresponds to your organization)", "subscription_id": "VALUE", "workspace_name": "VALUE","resource_group_name": "VALUE", "tenant_id": "VALUE", "client_id": "VALUE", "client_secret": "VALUE"}] -
Update using kubectl:
update penfield-secrets# Set your environment variables, update the value from the previous step
export NAME=REPLACE_VALUE
export SUBSCRIPTION_ID=REPLACE_VALUE
export WORKSPACE_NAME=REPLACE_VALUE
export RESOURCE_GROUP_NAME=REPLACE_VALUE
export TENANT_ID=REPLACE_VALUE
export CLIENT_ID=REPLACE_VALUE
export CLIENT_SECRET=REPLACE_VALUE
# Patch the secret, run the below command in your terminal
kubectl patch secret penfield-secrets -n penfield-app -p='{"stringData":{"SENTINEL_INSTANCES": "[{\"name\": \"'"$NAME"'\", \"subscription_id\": \"'"$SUBSCRIPTION_ID"'\", \"workspace_name\": \"'"$WORKSPACE_NAME"'\", \"resource_group_name\": \"'"$RESOURCE_GROUP_NAME"'\", \"tenant_id\": \"'"$TENANT_ID"'\", \"client_id\": \"'"$CLIENT_ID"'\", \"client_secret\": \"'"$CLIENT_SECRET"'\"]}]"}}'
-
-
Update the deployment:
If you are using ArgoCD, you can update the deployment by merging the changes to your version control.
If you are using helm, you can update the deployment by running the following command:
helm upgrade \
   --install penfield-app penfieldai/penfieldai \
   --namespace penfield-app \
   --values penfield-values.yaml