Manage users and permissions
Penfield uses role-based access control (RBAC). A user's role determines what they can view and manage.
Only a Super Admin can open the user-management page and manage roles.
Roles
| Role | Permissions |
|---|---|
| Super Admin | Manages users and role assignments, system settings, integrations, and all operational and reporting features. |
| Admin | Has broader visibility into all views and reports. An Admin cannot manage users, roles, or system configuration. |
| Analyst | Performs day-to-day analyst work within the user's assigned scope. An Analyst cannot manage users, roles, or system configuration. |
Use the Super Admin role only for users who need to manage operational features. A Super Admin cannot change their own role or delete their own account, and the last Super Admin cannot be demoted or deleted.
Authentication modes
The Users page displays the deployment's authentication mode:
- Local mode: Penfield manages user accounts, profile details, password-setup links, and roles.
- SSO mode: Your identity provider manages user access and profile information. Penfield manages only the user's Penfield role.
Follow the instructions for your deployment's mode.
Open the Users page
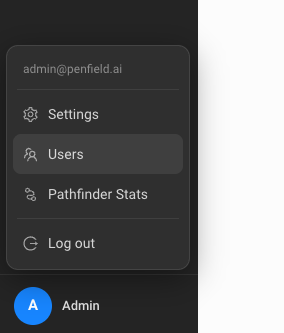
- In the left sidebar, select your name at the bottom.
- In the profile menu, select Users.
The Users page displays the deployment's authentication mode and the users you are authorized to manage.
Local mode
View and find users
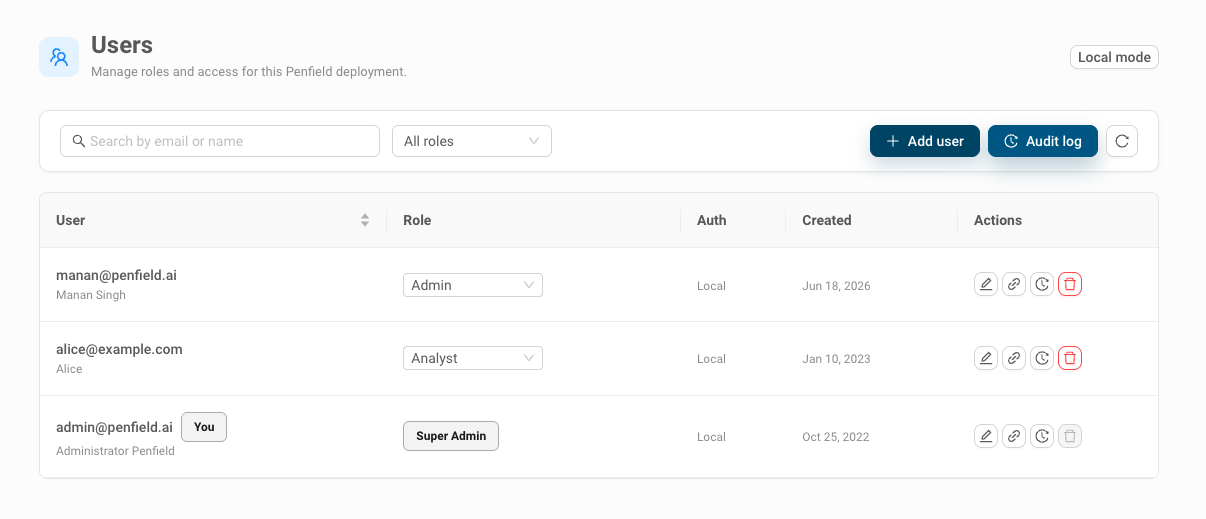
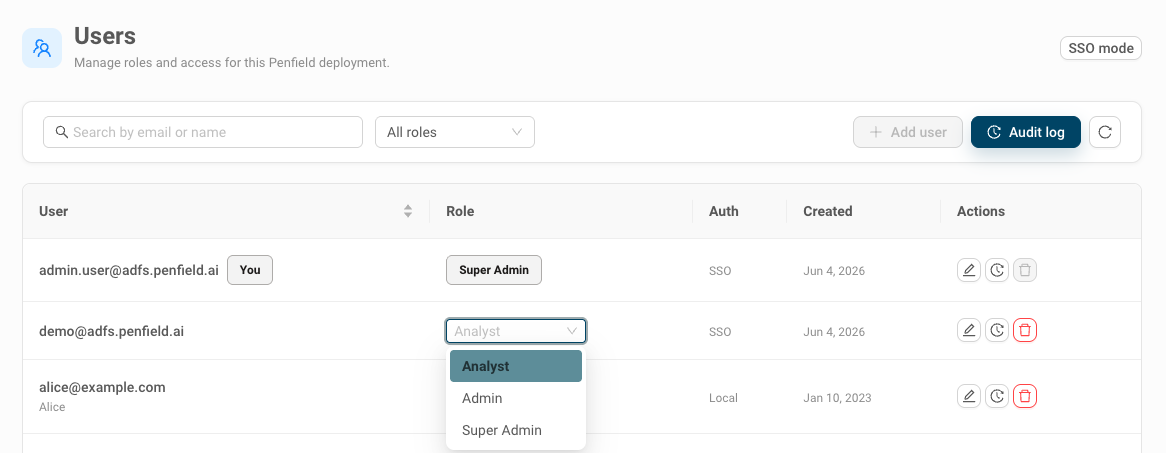
The Users page lists each user's email, name, role, authentication method, creation date, and available actions.
Use Search by email or name to find a user, or select All roles to filter the list by role. Select the refresh button to reload the list.
Add one user
- Select Add user.
- On the Single invite tab, enter the user's email address.
- Select the user's initial role.
- Optionally enter the user's first and last name.
- Select Create user.
- Select Copy recovery link and send the link to the user through a secure channel.
The user follows the recovery link to set their password and activate the account.
A recovery link is a one-time secret. Anyone with the link can set the user's password. It expires after 7 days, so share it securely and do not open it on the user's behalf.
Add multiple users
- Select Add user, then select the Bulk invite tab.
- Enter email addresses separated by commas or new lines. You can enter more than 10 users; Penfield processes them in batches of up to 10 at a time.
- Select the role to assign to all users in the batch.
- Select Invite users.
- Securely share each generated recovery link with its corresponding user.
If users require different roles, invite them in separate batches or update their roles after creation.
Change a user's role
In the Role column, select a new role from the user's dropdown. The change takes effect immediately and is recorded in the audit log.
Edit a user
- In the Actions column, select Edit.
- Update the email address, first name, or last name.
- Select Save changes.
Create a password setup or recovery link
Use this action when a local user needs to set or reset their password:
- In the Actions column, select Send recovery link.
- Select Copy recovery link.
- Send the one-time link to the user through a secure channel.
Creating a new recovery link invalidates the previous recovery flow for that user.
Delete a user
- In the Actions column, select Delete.
- Review the confirmation message.
- Select Delete to permanently remove the account and end its active sessions.
Deletion cannot be undone. To restore access later, create a new user account.
SSO mode
In SSO mode, authentication and account access are controlled by your organization's identity provider, such as Microsoft Entra ID or Active Directory Federation Services (AD FS).
Add or remove users
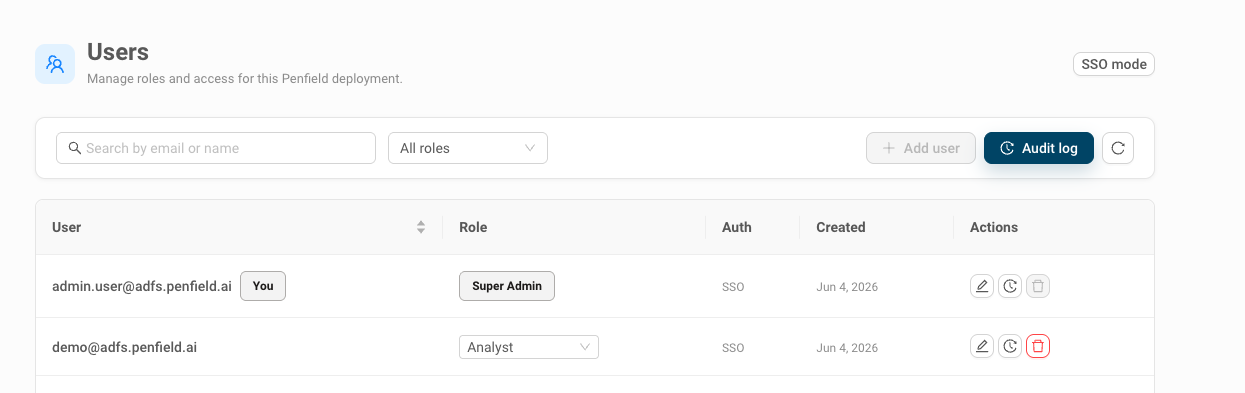
When SSO is enabled, the Add user button is disabled in Penfield. To add or remove users, use your identity provider (IdP).
When an authorized user signs in to Penfield for the first time, Penfield creates their user record with the Analyst role by default.
Penfield manages only the user's role. User access and account lifecycle remain managed by the IdP.

Change a user's Penfield role
After the user has signed in at least once:
- Open Users in Penfield.
- Find the user by email or name.
- In the Role column, select Analyst, Admin, or Super Admin.
The role controls authorization inside Penfield; it does not change the user's identity-provider groups or assignments.
Email addresses, names, passwords, multifactor authentication, and application access remain managed by the identity provider. Password setup and recovery links are therefore unavailable in SSO mode.
View the user audit log
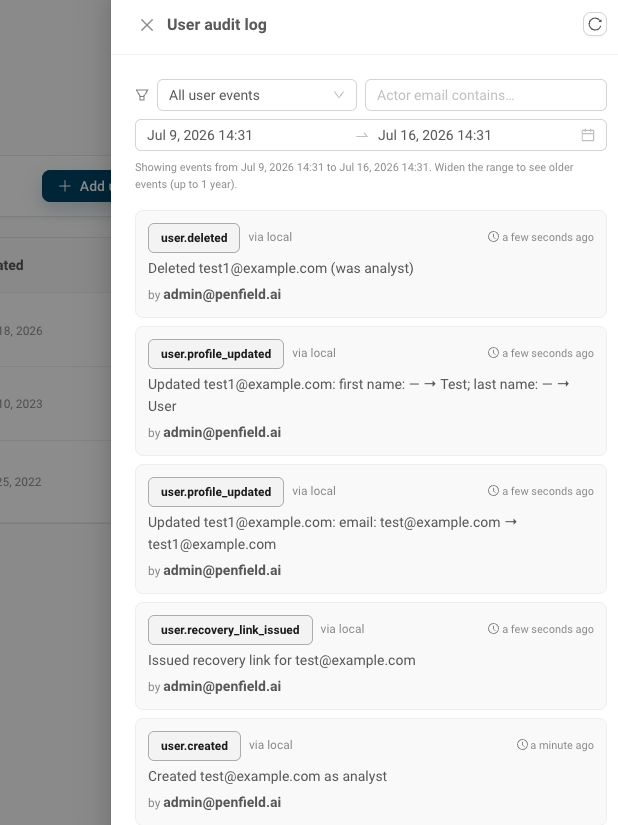
Select Audit log to review user-management activity. The log records events such as:
- users created or deleted;
- profile details updated;
- roles changed; and
- recovery links issued.
Each event includes the acting administrator, target user, authentication method, and timestamp. Filter events by type, actor email, or date range, and select refresh to load recent events.