Penfield and Microsoft Sentinel integration (Logic App)
Overview
This document outlines the process of integrating Microsoft Sentinel with the Penfield Platform. The integration involves three main steps:
- Building Azure Logic App Playbooks to push relevant Incident Data to Penfield Platform via Penfield's API.
- Setup Alerting in Logic Apps to notify Penfield team of any issues.
- Creating Automation Rules in Sentinel to trigger specific playbooks when certain incident conditions are met.
Architecture
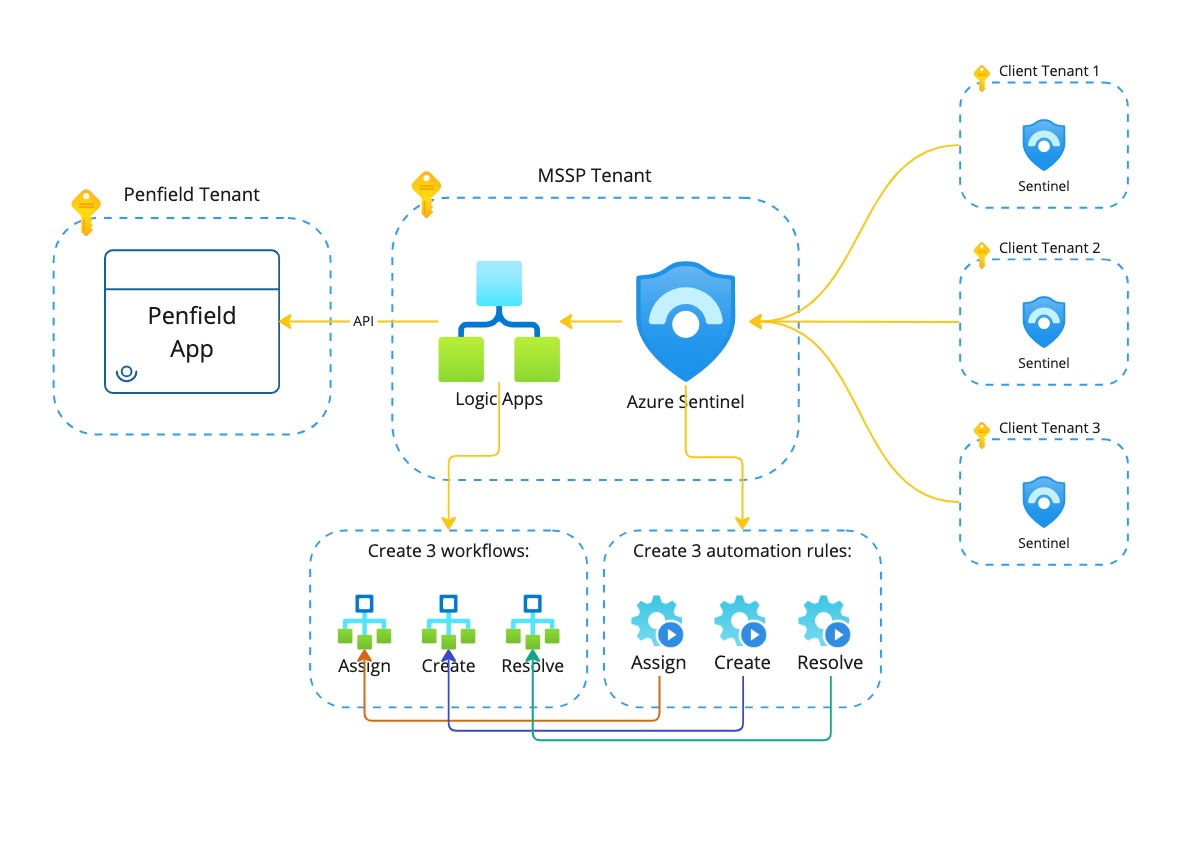
This diagram illustrates the integration architecture between Microsoft Sentinel and the Penfield Platform, highlighting the flow of incident data and the components involved in the Logic App setup. Leveraging Logic Apps simplifies deployment by enabling creation within the MSSP tenant, avoiding the need for individual integrations with each tenant subscription.
Prerequisites
- Access to Microsoft Azure portal
- Permissions to create and manage Logic Apps and Microsoft Sentinel
- Penfield API endpoint and API key (provided by Penfield)
Logic Apps Types
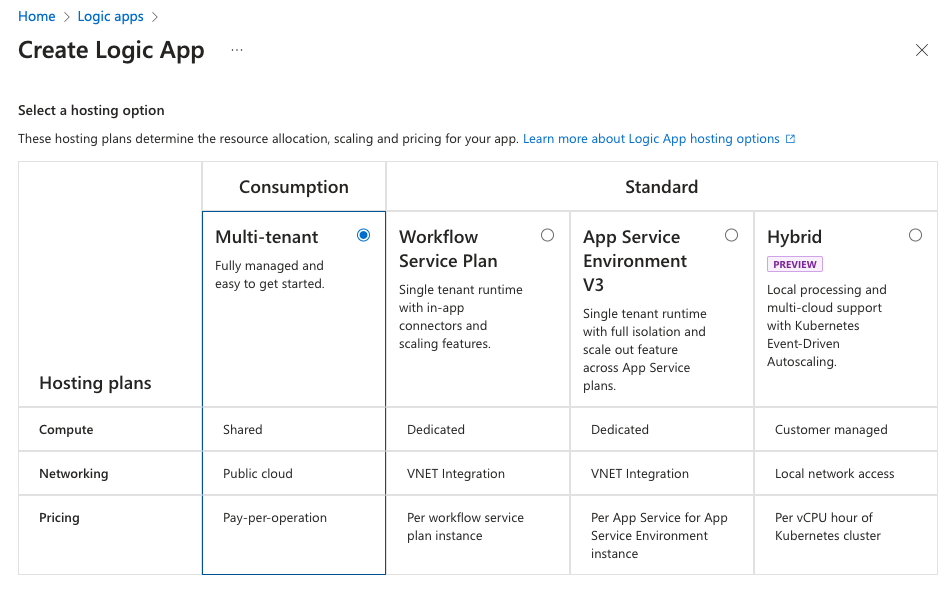
There are two types of Logic Apps: Consumption and Standard. If you are using the Penfield-hosted SaaS solution choose the one that is appropriate for you. If you are self-hosting the Penfield solution and the load balancer is whitelisting specific IPs to reach to penfield application, then we highly recommend to use the Standard Logic App, because with the Standard Logic App, you can restrict the outgoing IP (by creating a network and application gateway). Otherwise, the outgoing IP could change at any time, making it difficult to whitelist the required IP in the Load Balancer.
You will need to create three different Logic Apps if you choose the Consumption-based option, since in a Consumption-based Logic App you can only create one workflow, whereas in a Standard Logic App, you can create multiple workflows within a single Logic App.
Step 1: Building Azure Logic App Playbooks
If you choose to create Consumption Logic Apps, refer to section 1.1. If you prefer to create Standard Logic Apps, refer to section 1.2.
1.1 Create a Logic App [Consumption based]
- In the Azure portal, search for "Logic Apps”

- Click "Create" to create a new Logic App and select Consumption.
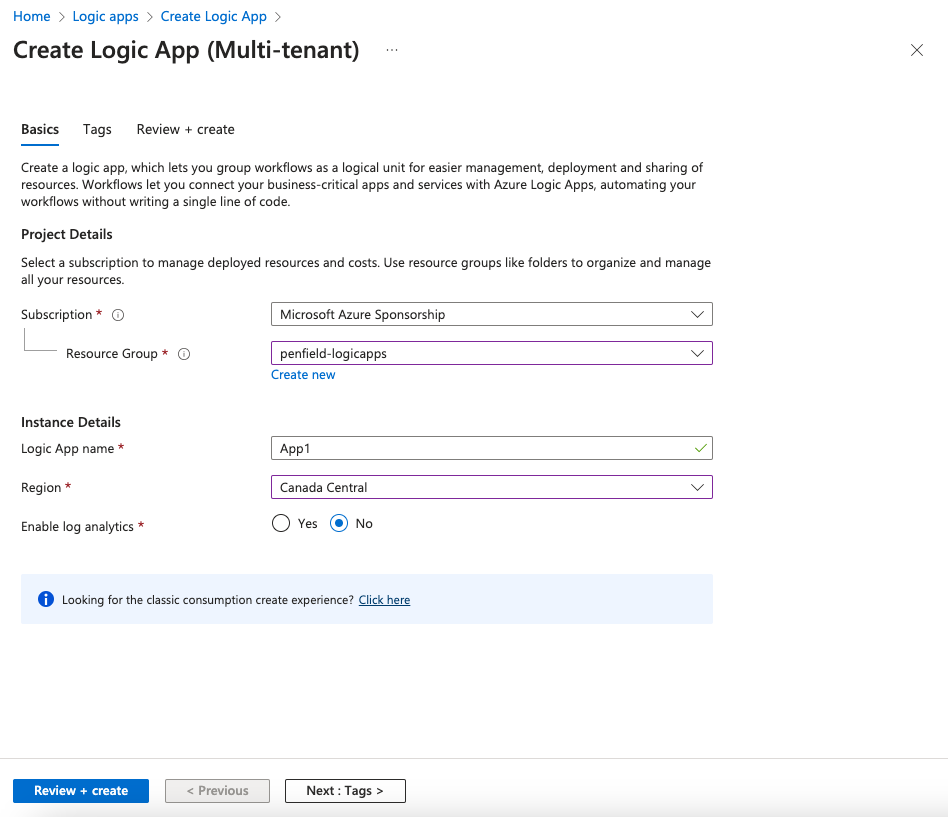
- Fill in the required details:
- Resource Group: Select or create a new one.
- Logic App name: e.g., "Penfield-Sentinel-New-Incident".
- Region: Choose appropriate region.
- Enable log analytics: Choose Yes or No based on your organizational policies.
- Click "Review + Create" and then "Create".
- Once it is created go to the app and Click Logic app designer to create the workflow.
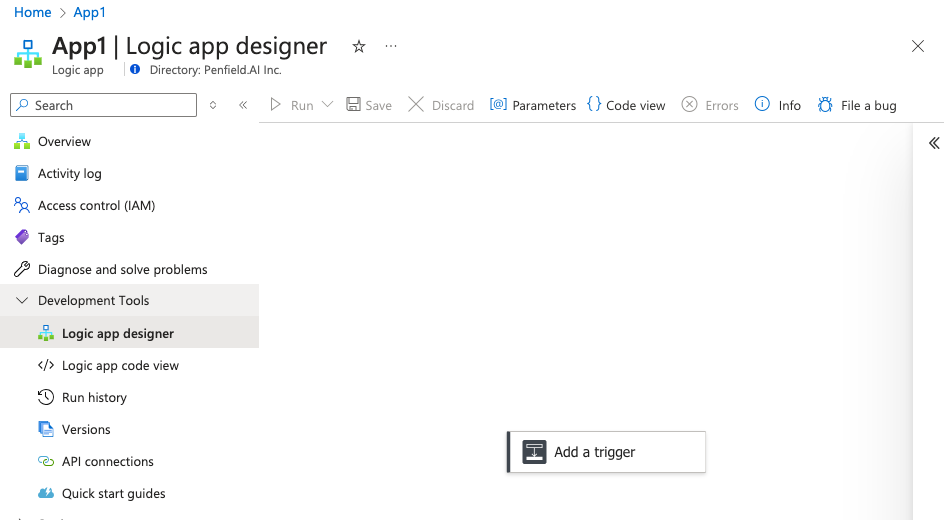
NOTE: Jump to section 1.3 Create Workflows to create the workflow, starting from the step Select Add Trigger.
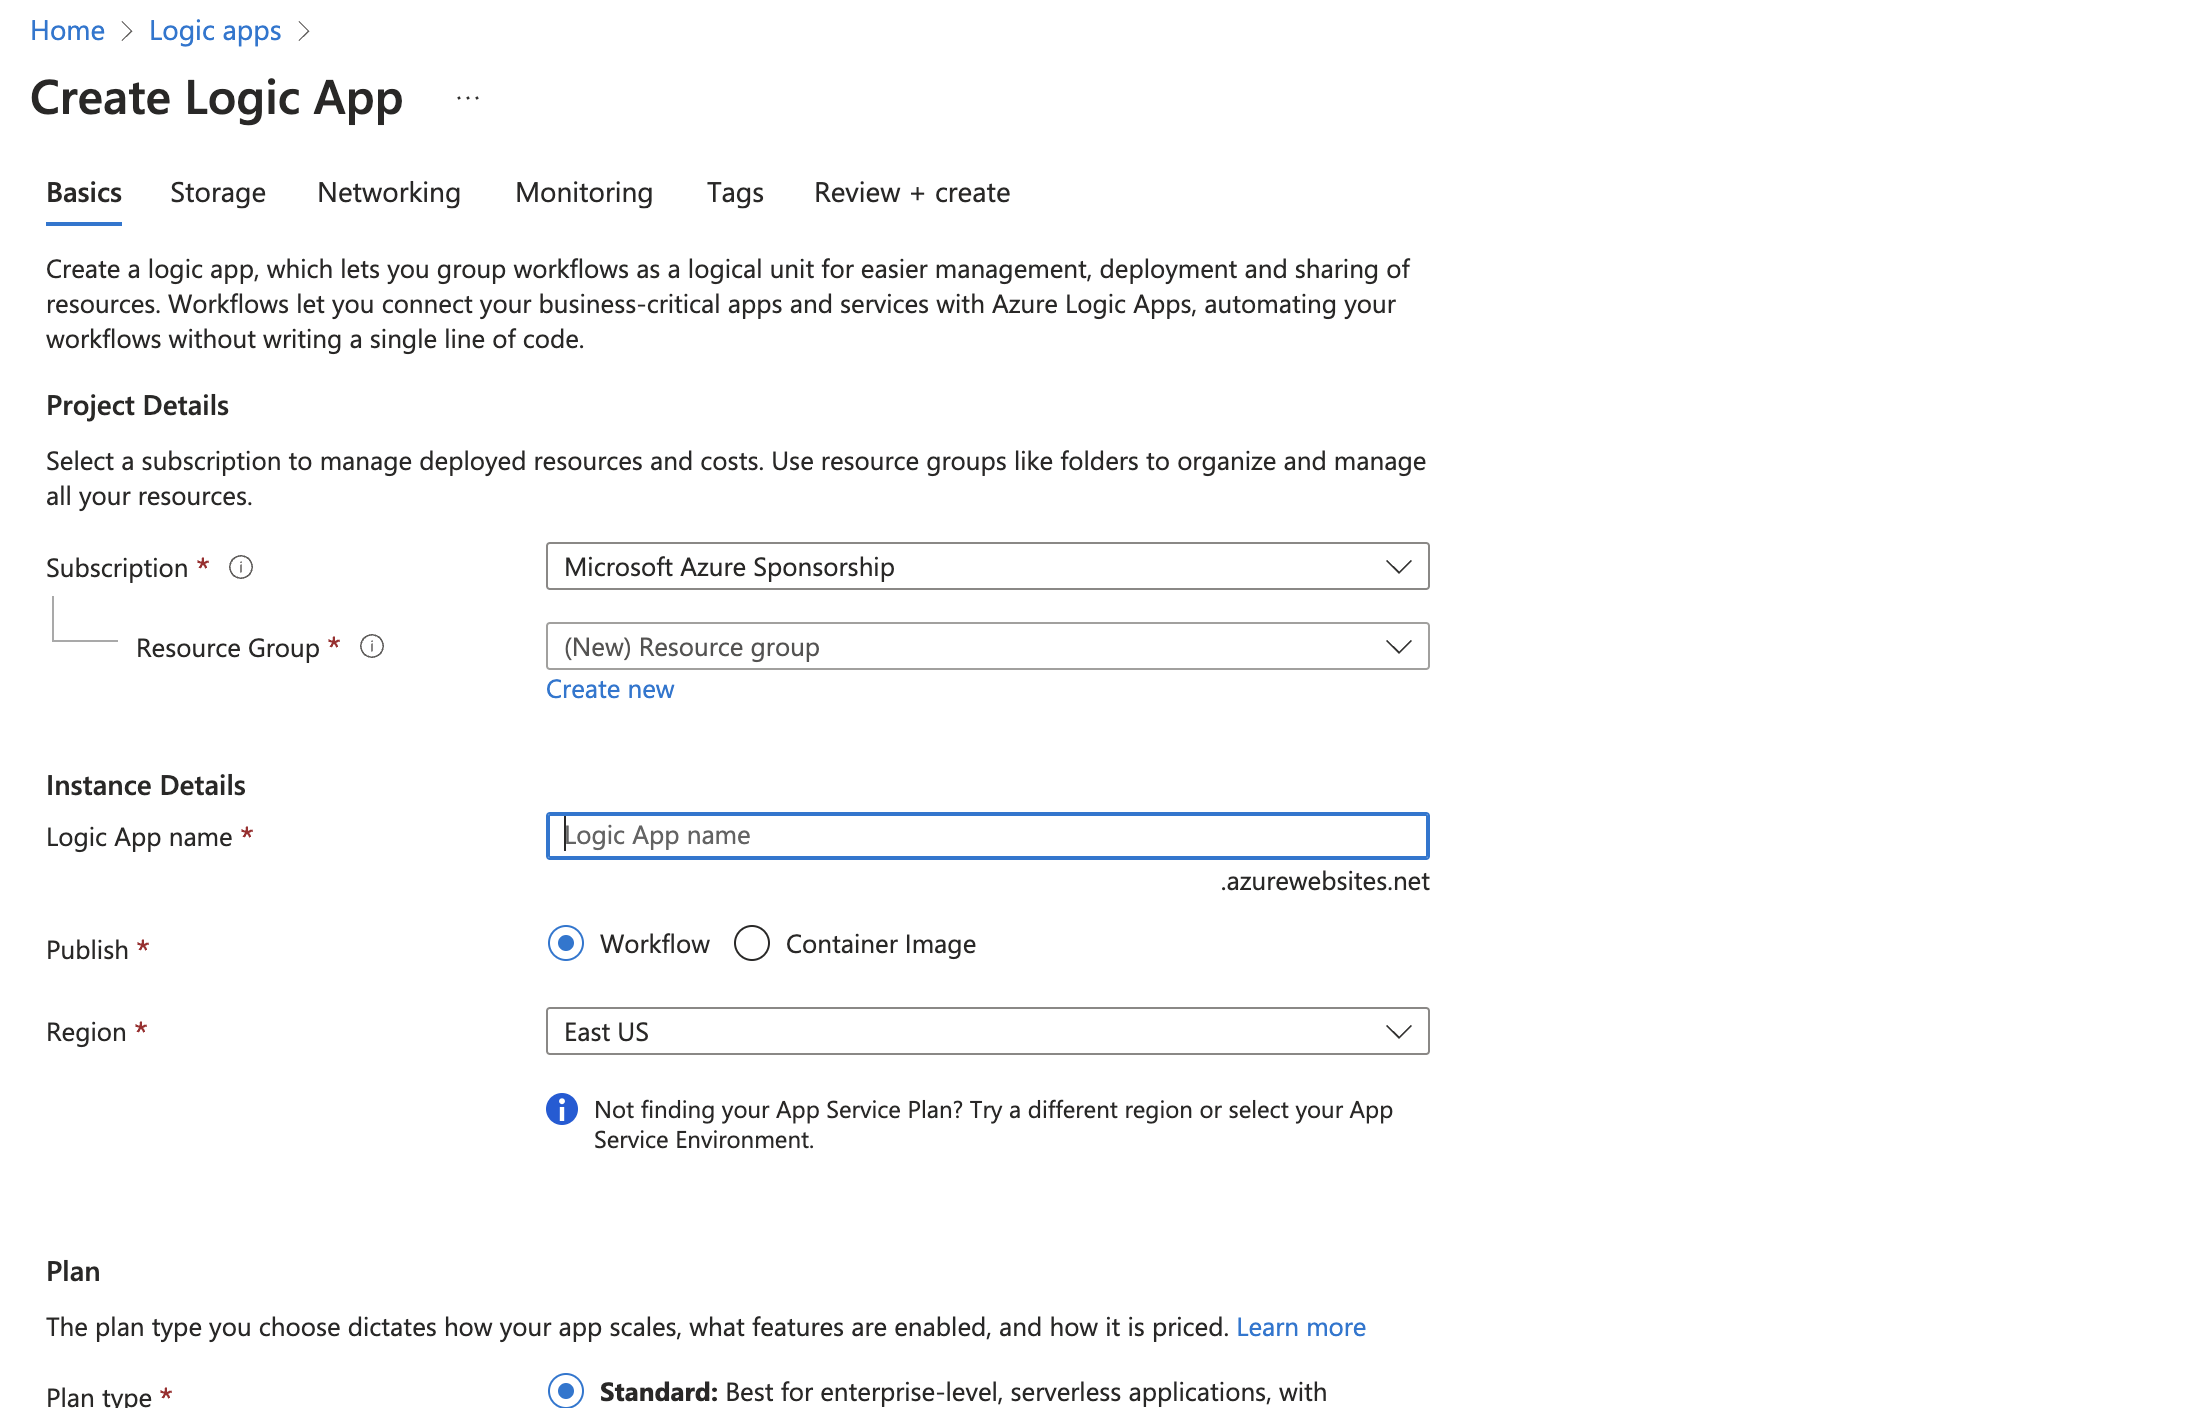
1.2 Create a Logic App [Standard]
- In the Azure portal, search for "Logic Apps”

- If you already have a Logic App built for Sentinel, you may choose to utilize that instead and jump to 1.3 Create Workflows.
- Click "Create" to create a new Logic App
- Fill in the required details:
- Resource Group: Select or create a new one.
- Logic App name: e.g., "Penfield-Sentinel-Integration".
- Region: Choose appropriate region.
- Plan type: Standard.
- Click "Review + Create" and then "Create".
1.3 Create Workflows
Create 3 Workflows: Next we need to create 3 workflows.
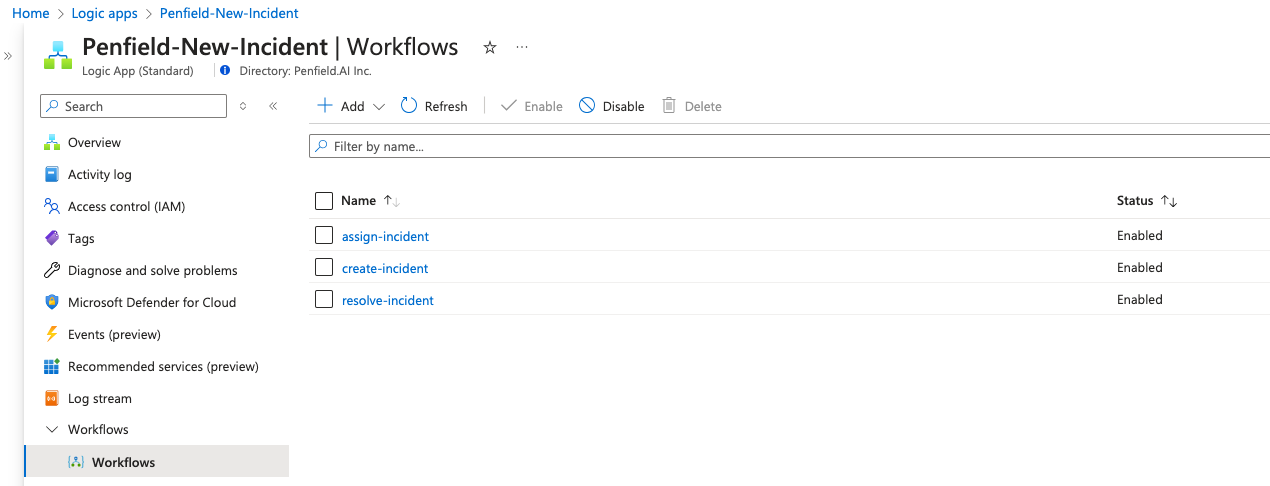
Workflow 1: create-incident
-
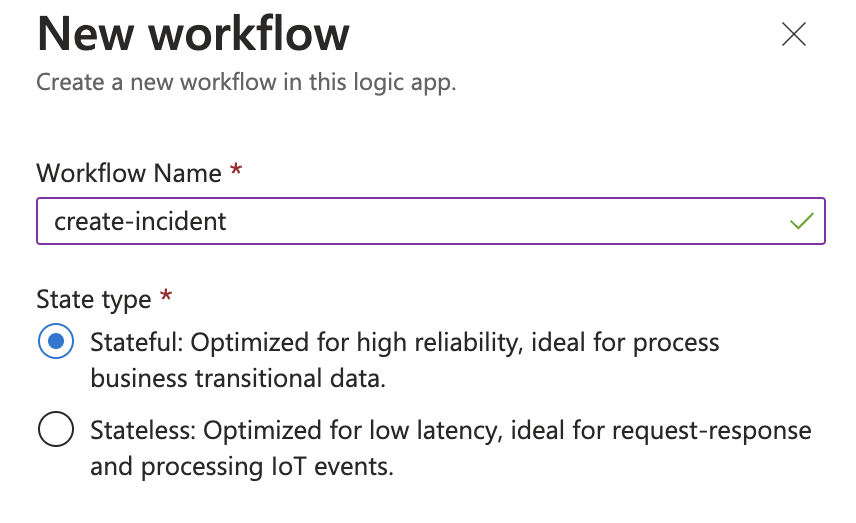
Select Add and fill in Workflow Name
-
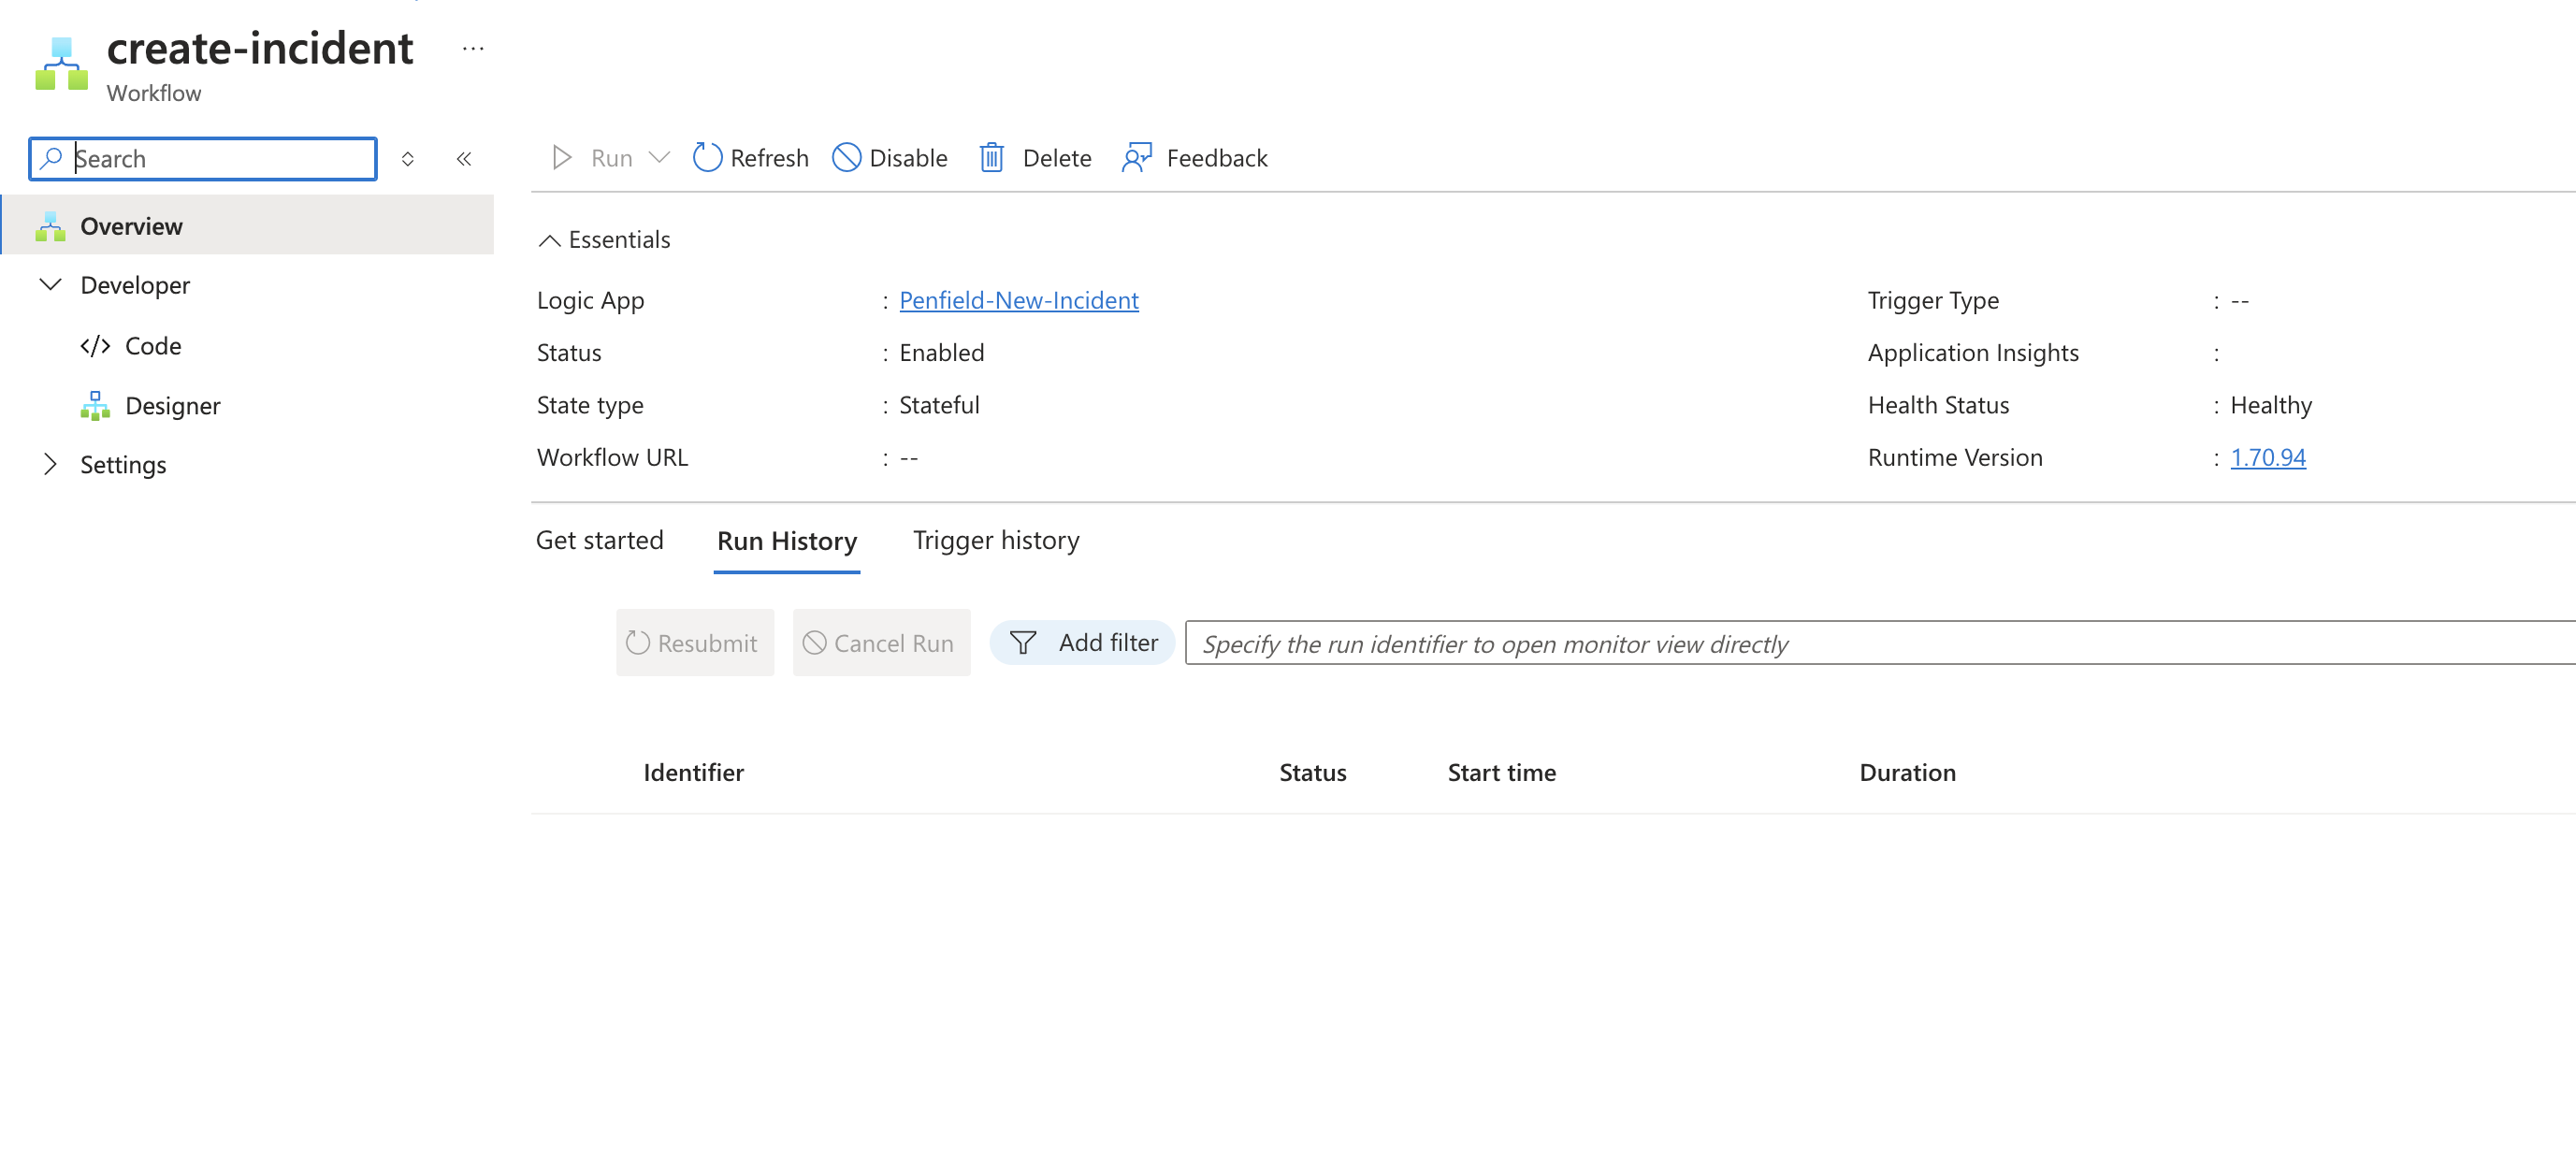
Select Designer
-
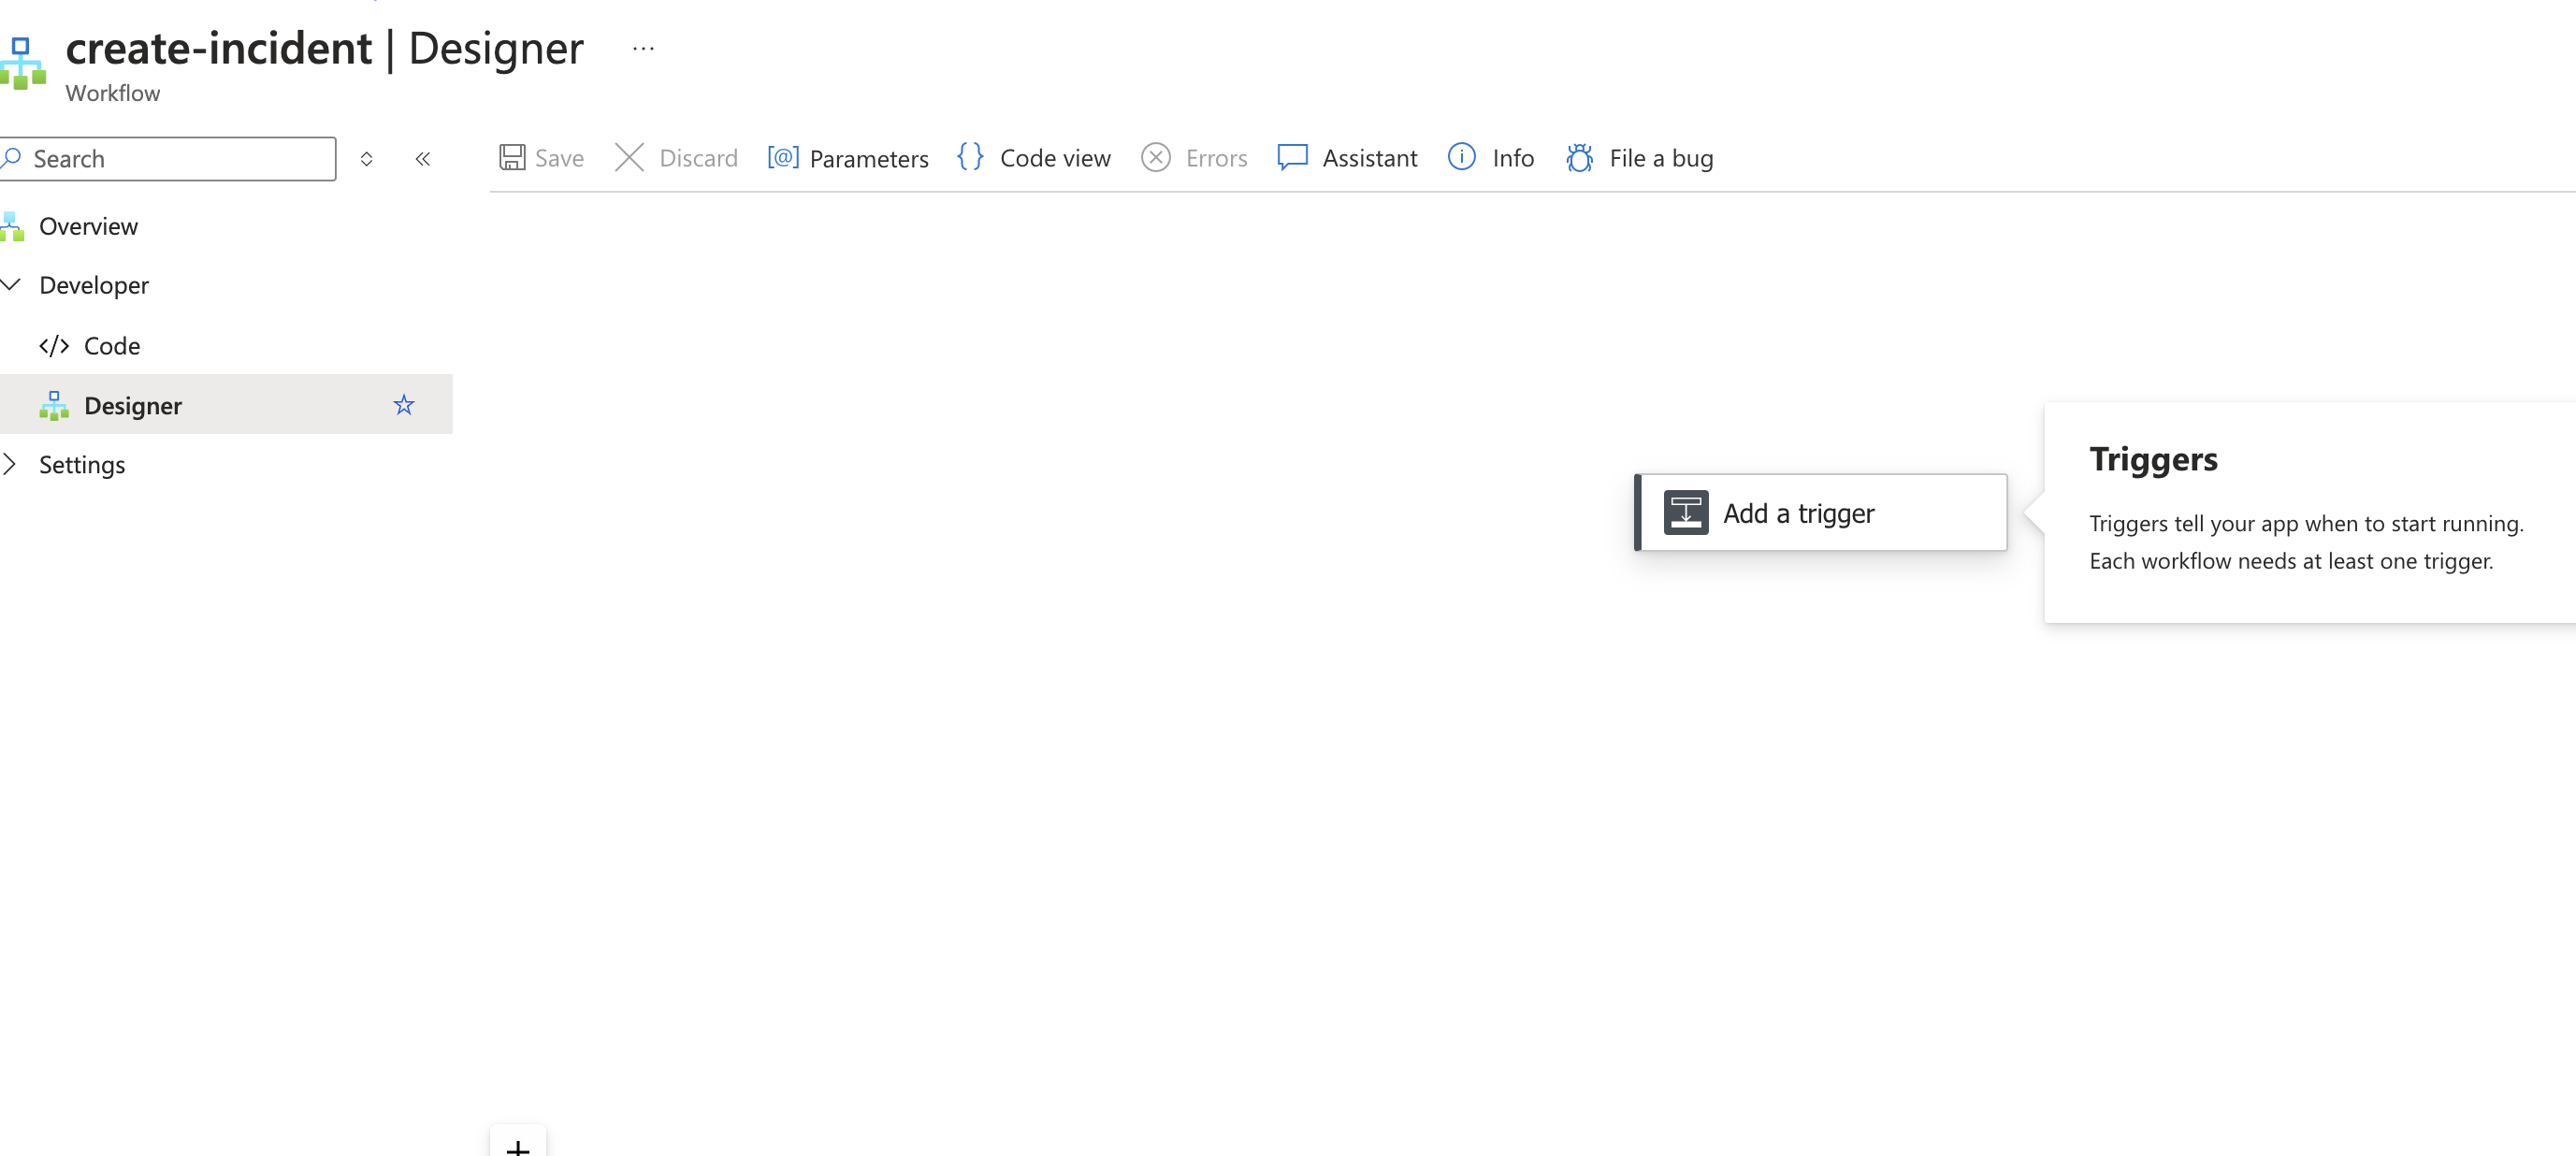
Select Add Trigger
-
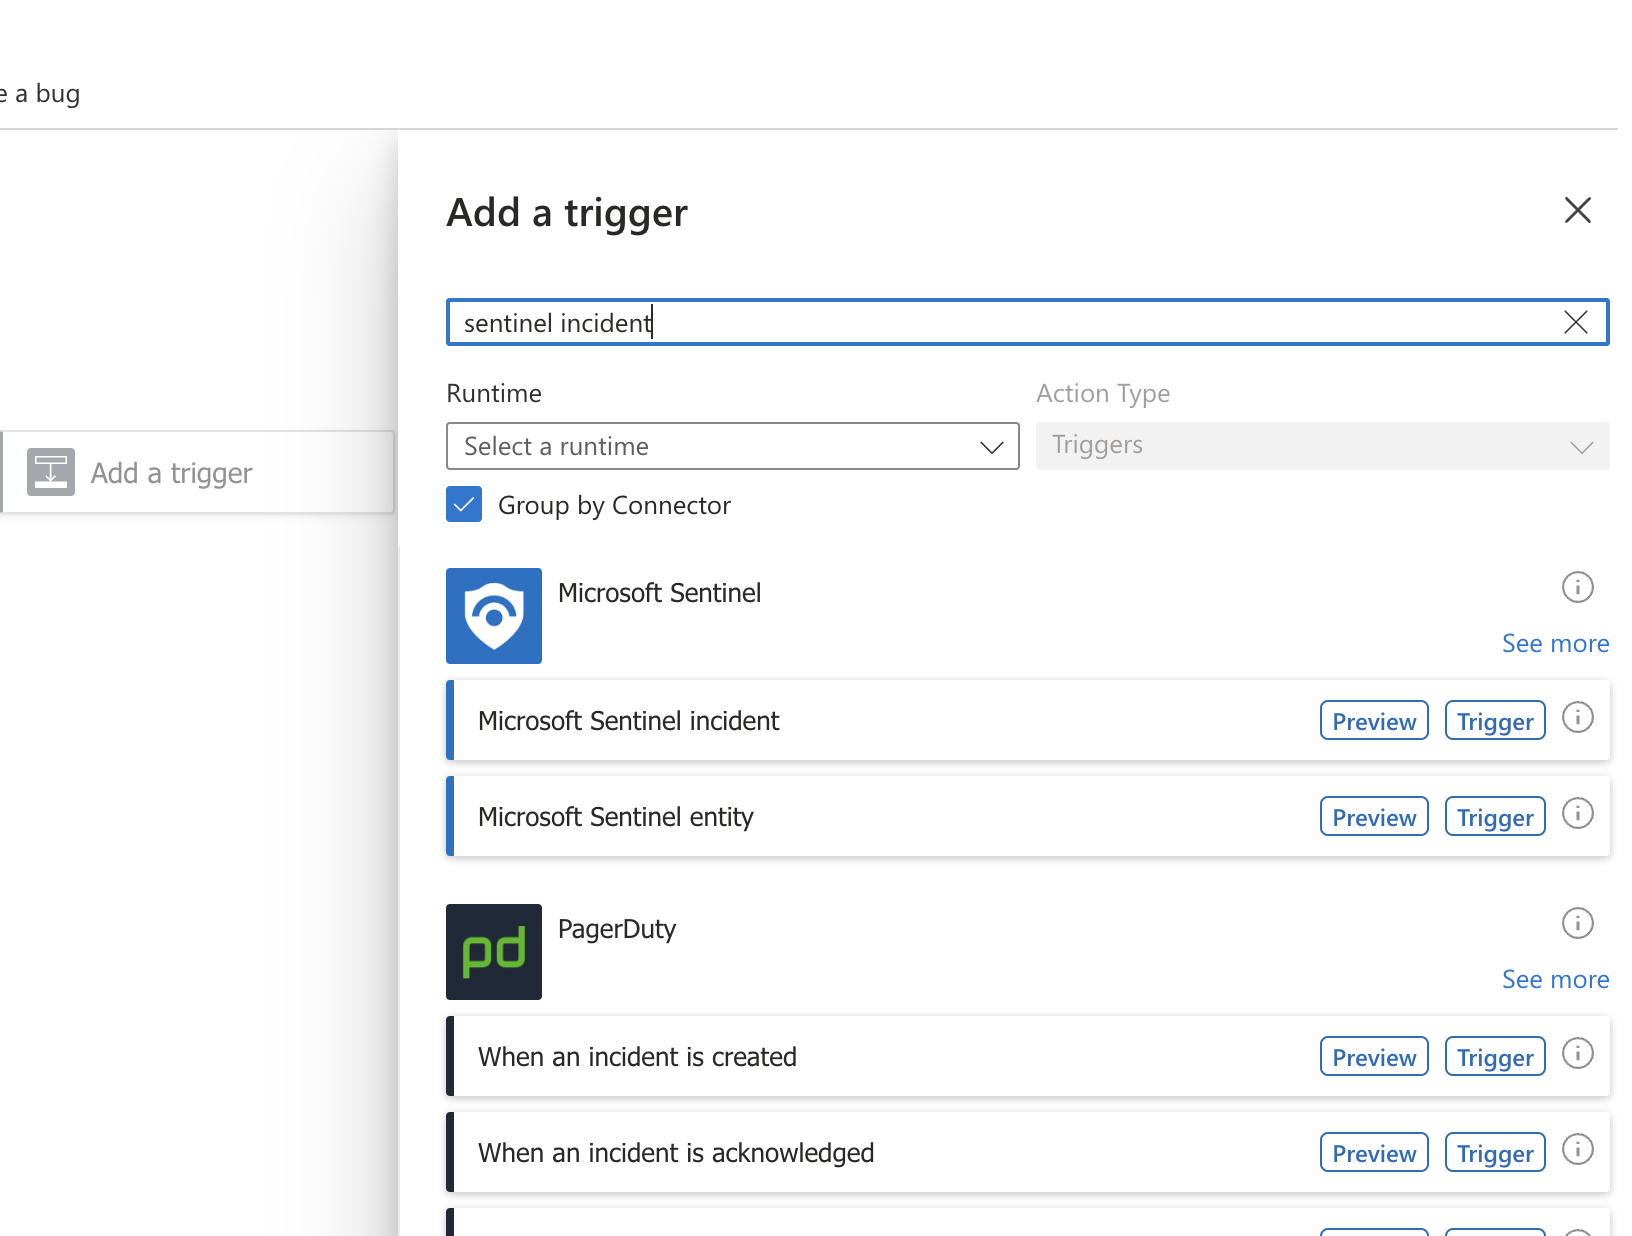
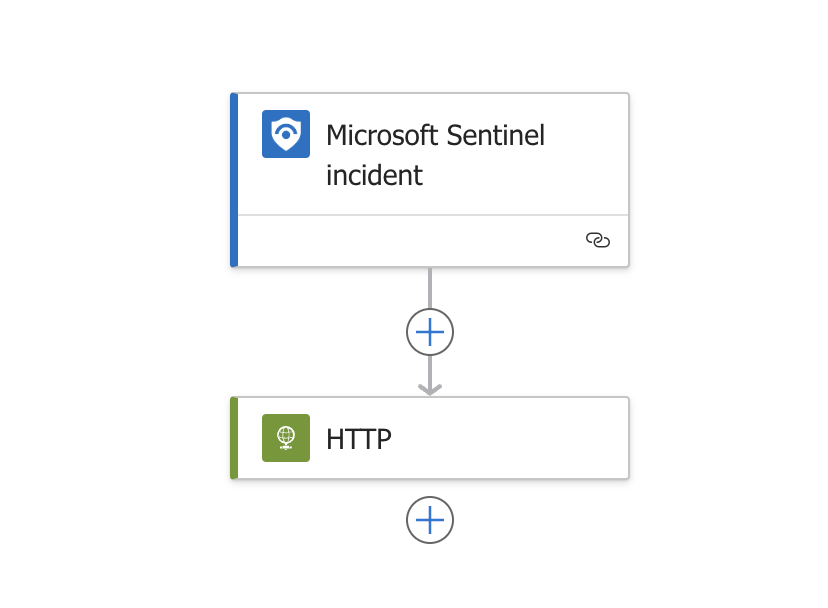
Search for “Microsoft sentinel Incident” and select “Microsoft Sentinel incident” fom the list.
-
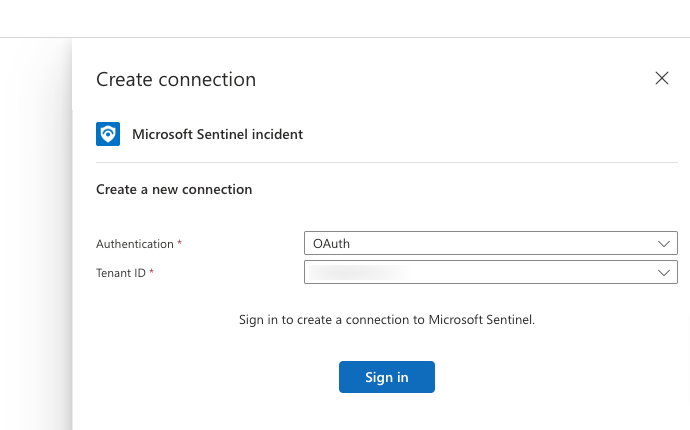
Connect to sentinel by choosing correct Tenant ID.
-
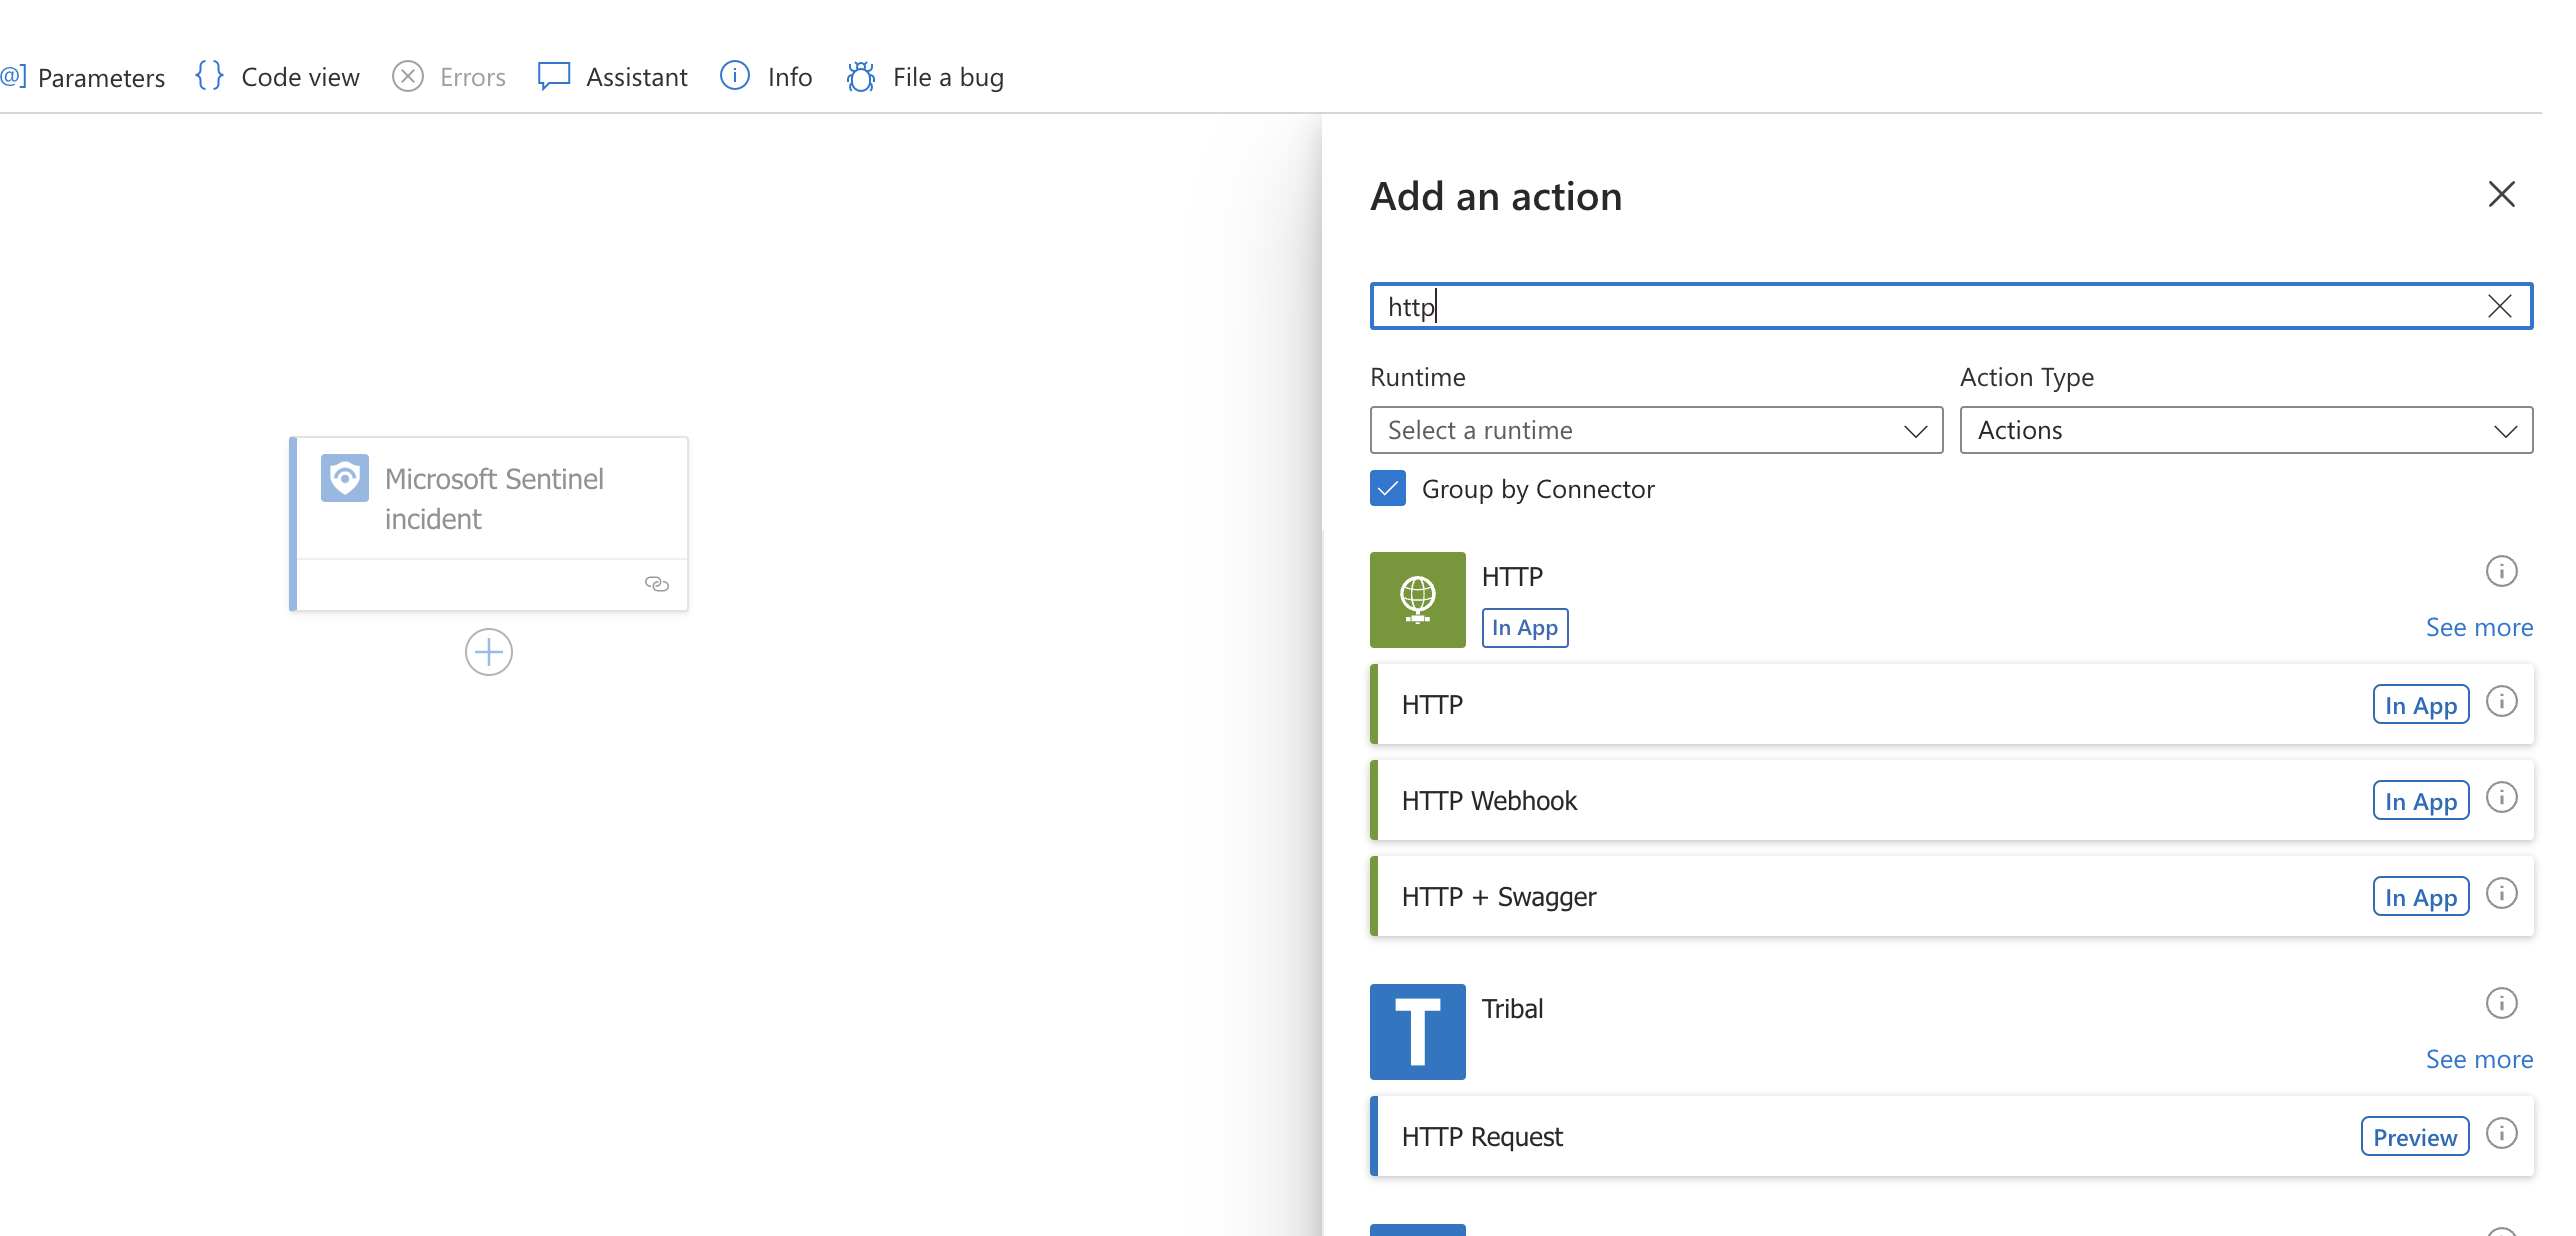
Select (+) under Microsoft Sentinel incident and then search for “HTTP” and select
-
Configure the HTTP action:
- Method: POST
- URI: [Provided by Penfield] (https://[FQDN]/api/v1/external/incidents)
- Headers:
- Content-Type: application/json
- x-api-key: [Provided by Penfield]
- Body: see below
- Body:
{
  "type": "create",
  "incident": {
    "severity": "@{coalesce(triggerBody()?['object']?['properties']?['severity'], 'Unknown')}",
    "description": "@{coalesce(replace(coalesce(triggerBody()?['object']?['properties']?['description'], ''), '\\\"', '\\\\\\\"'), 'No description provided')}",
    "incident_number": "@{coalesce(triggerBody()?['object']?['properties']?['incidentNumber'], 'Unknown')}",
    "incident_title": "@{coalesce(triggerBody()?['object']?['properties']?['title'], 'Untitled Incident')}",
    "incident_id": "@{coalesce(last(split(triggerBody()?['object']?['id'], '/')), 'Unknown')}",
    "incident_status": "@{coalesce(triggerBody()?['object']?['properties']?['status'], 'Unknown')}",
    "assignee": "@{coalesce(triggerBody()?['object']?['properties']?['owner']?['userPrincipalName'], 'Unassigned')}",
    "updated_at": "@{coalesce(triggerBody()?['object']?['properties']?['lastModifiedTimeUtc'], utcNow())}",
    "tactics": "@{if(empty(triggerBody()?['object']?['properties']?['tactics']), '[]', string(triggerBody()?['object']?['properties']?['tactics']))}",
    "client_id": "@{coalesce(triggerBody()?['workspaceId'], 'Unknown')}",
    "classification": "@{coalesce(triggerBody()?['object']?['properties']?['classification'], 'Unclassified')}",
    "classification_reason": "@{coalesce(triggerBody()?['object']?['properties']?['classificationReason'], 'Not specified')}",
    "classification_comment": "@{coalesce(triggerBody()?['object']?['properties']?['classificationComment'], '')}",
    "event_time": "@{utcNow()}"
  }
}
Note: Please contact Penfield team should you have privacy concerns. The Penfield platform can be configured to anonymize/pseudonymize specific fields before they are saved. Alternatively, you may choose not to push specific fields to Penfield - the control is yours but please consult Penfield.
End state should look something like this:
- Select save.
Workflow 2: assign-incident
Follow the same steps as Workflow 1, but use the following JSON structure in the HTTP action body.
{
  "type": "assign",
  "incident": {
    "severity": "@{coalesce(triggerBody()?['object']?['properties']?['severity'], 'Unknown')}",
    "description": "@{coalesce(replace(coalesce(triggerBody()?['object']?['properties']?['description'], ''), '\\\"', '\\\\\\\"'), 'No description provided')}",
    "incident_number": "@{coalesce(triggerBody()?['object']?['properties']?['incidentNumber'], 'Unknown')}",
    "incident_title": "@{coalesce(triggerBody()?['object']?['properties']?['title'], 'Untitled Incident')}",
    "incident_id": "@{coalesce(last(split(triggerBody()?['object']?['id'], '/')), 'Unknown')}",
    "incident_status": "@{coalesce(triggerBody()?['object']?['properties']?['status'], 'Unknown')}",
    "assignee": "@{coalesce(triggerBody()?['object']?['properties']?['owner']?['userPrincipalName'], 'Unassigned')}",
    "updated_at": "@{coalesce(triggerBody()?['object']?['properties']?['lastModifiedTimeUtc'], utcNow())}",
    "tactics": "@{if(empty(triggerBody()?['object']?['properties']?['tactics']), '[]', string(triggerBody()?['object']?['properties']?['tactics']))}",
    "client_id": "@{coalesce(triggerBody()?['workspaceId'], 'Unknown')}",
    "classification": "@{coalesce(triggerBody()?['object']?['properties']?['classification'], 'Unclassified')}",
    "classification_reason": "@{coalesce(triggerBody()?['object']?['properties']?['classificationReason'], 'Not specified')}",
    "classification_comment": "@{coalesce(triggerBody()?['object']?['properties']?['classificationComment'], '')}",
    "event_time": "@{utcNow()}"
  }
}
Workflow 3: resolve-incident
Follow the same steps as Workflow 1, but use the following JSON structure in the HTTP action body.
{
  "type": "resolve",
  "incident": {
    "severity": "@{coalesce(triggerBody()?['object']?['properties']?['severity'], 'Unknown')}",
    "description": "@{coalesce(replace(coalesce(triggerBody()?['object']?['properties']?['description'], ''), '\\\"', '\\\\\\\"'), 'No description provided')}",
    "incident_number": "@{coalesce(triggerBody()?['object']?['properties']?['incidentNumber'], 'Unknown')}",
    "incident_title": "@{coalesce(triggerBody()?['object']?['properties']?['title'], 'Untitled Incident')}",
    "incident_id": "@{coalesce(last(split(triggerBody()?['object']?['id'], '/')), 'Unknown')}",
    "incident_status": "@{coalesce(triggerBody()?['object']?['properties']?['status'], 'Unknown')}",
    "assignee": "@{coalesce(triggerBody()?['object']?['properties']?['owner']?['userPrincipalName'], 'Unassigned')}",
    "updated_at": "@{coalesce(triggerBody()?['object']?['properties']?['lastModifiedTimeUtc'], utcNow())}",
    "tactics": "@{if(empty(triggerBody()?['object']?['properties']?['tactics']), '[]', string(triggerBody()?['object']?['properties']?['tactics']))}",
    "client_id": "@{coalesce(triggerBody()?['workspaceId'], 'Unknown')}",
    "classification": "@{coalesce(triggerBody()?['object']?['properties']?['classification'], 'Unclassified')}",
    "classification_reason": "@{coalesce(triggerBody()?['object']?['properties']?['classificationReason'], 'Not specified')}",
    "classification_comment": "@{coalesce(triggerBody()?['object']?['properties']?['classificationComment'], '')}",
    "event_time": "@{utcNow()}"
  }
}
Step 2: Creating Alerts in Logic Apps
-
In the Azure portal, navigate to your Logic App.
-
Go on Monitoring >>Alerts.
-
Click on Create alert rule to create a new alert.
-
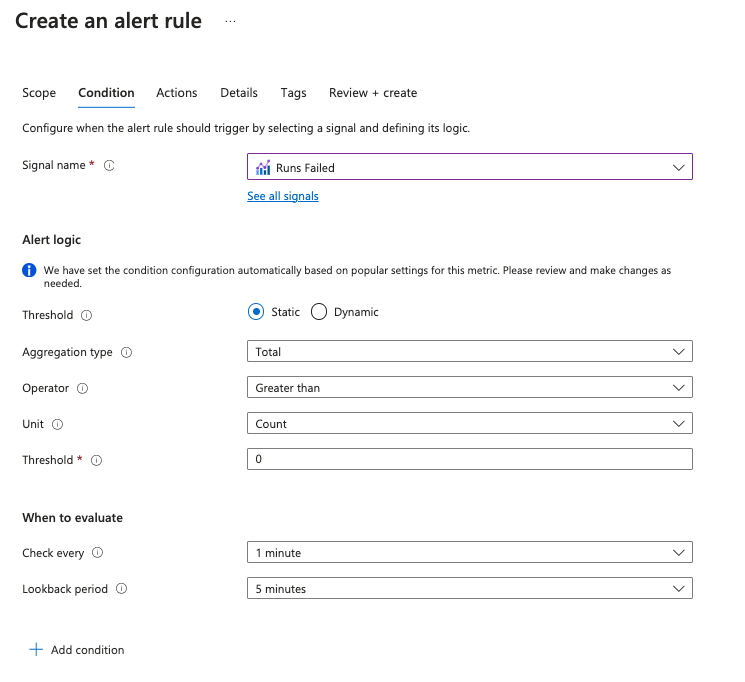
Under Condition
Signal name: Workflow Runs Failure Rate [If you have standard Logic Apps]
Signal name: Runs Failed [If you have consumption Logic Apps]Alert logic:
- Threshold: Static
- Aggregation type: Total
- Operator: Greater than
- Unit: Count [Only applicable for Consumption type Logic Apps]
- Threshold: 0
When to evaluate:
- Check every: 1 minute
- Lookback period: 5 minutes
-
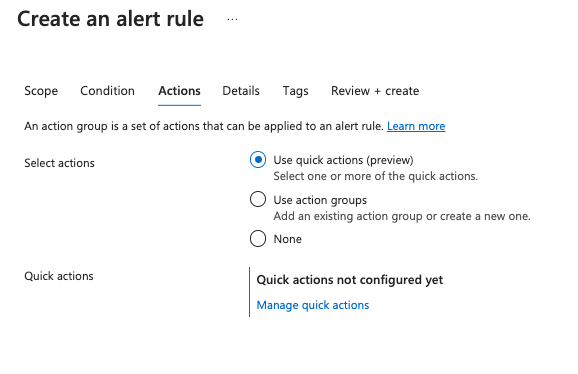
Click Next and set Actions:
Select Actions:
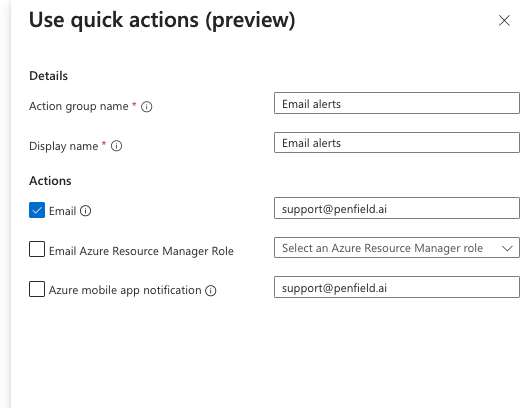
- Use quick actions (preview) and fill Details:
- Action group name: Email alerts
- Display name: Email alerts
- Email: support@penfield.ai [You can also add your internal emails (separated by a semicolon) if you like to get notifications]
- Use quick actions (preview) and fill Details:
-
Click Save and click Next
-
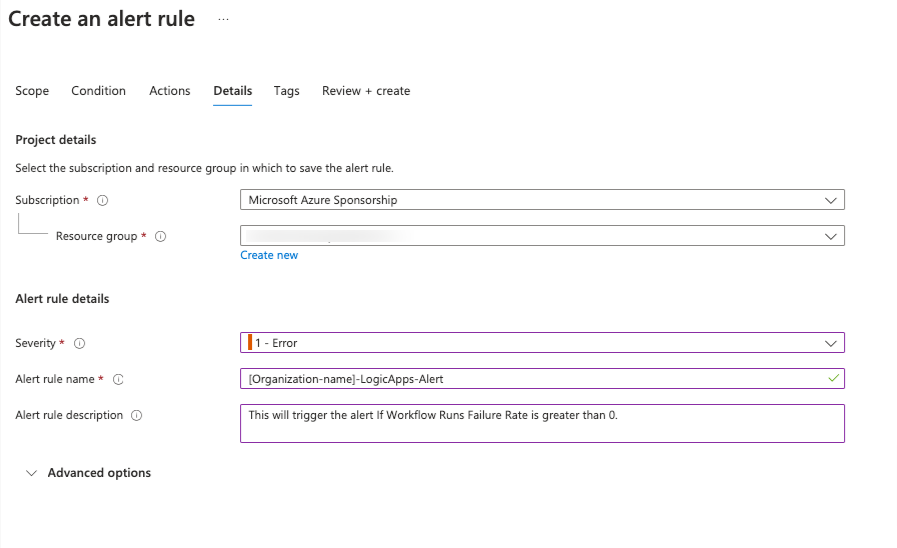
Make sure the Resource Group is correct and Fill the details for Alert Rule:
Alert rule details
- Severity: 1 - Error
- Alert rule name: [your-organization-name]-LogicApps-Alert (Don't forget to use your organization name, to have a unique alert name)
- Alert rule description: This will trigger the alert If Workflow Runs Failure Rate is greater than 0.
-
Click Review + Create review the settings and click Create to create a alert rule.
-
If you are using Logic Apps (consumption), please repeat the above steps for all logic apps.
Step 3: Creating Automation Rules in Sentinel
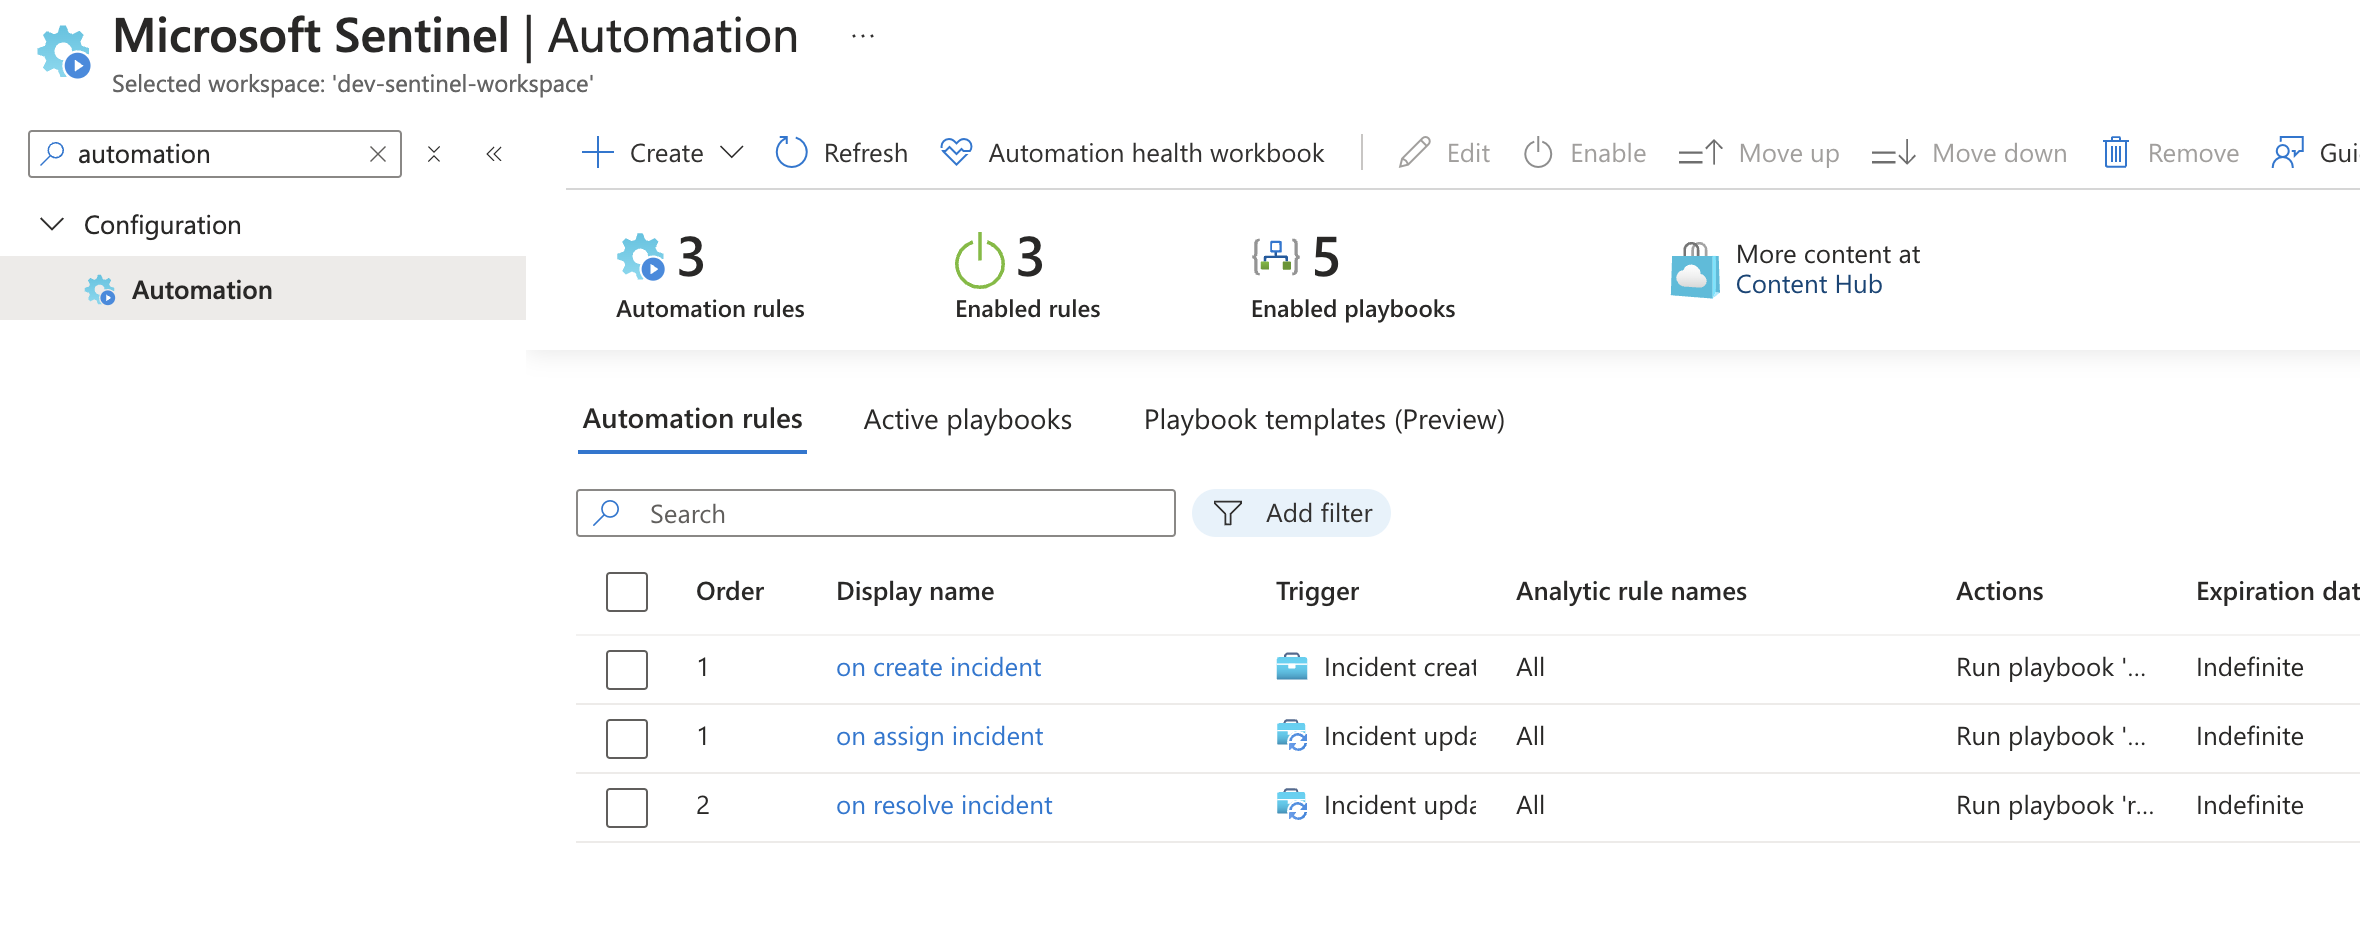
Next, we will create 3 Automation rules on Sentinel to fire when certain conditions are met to trigger our playbooks
3.1 Navigate to Automation Rules
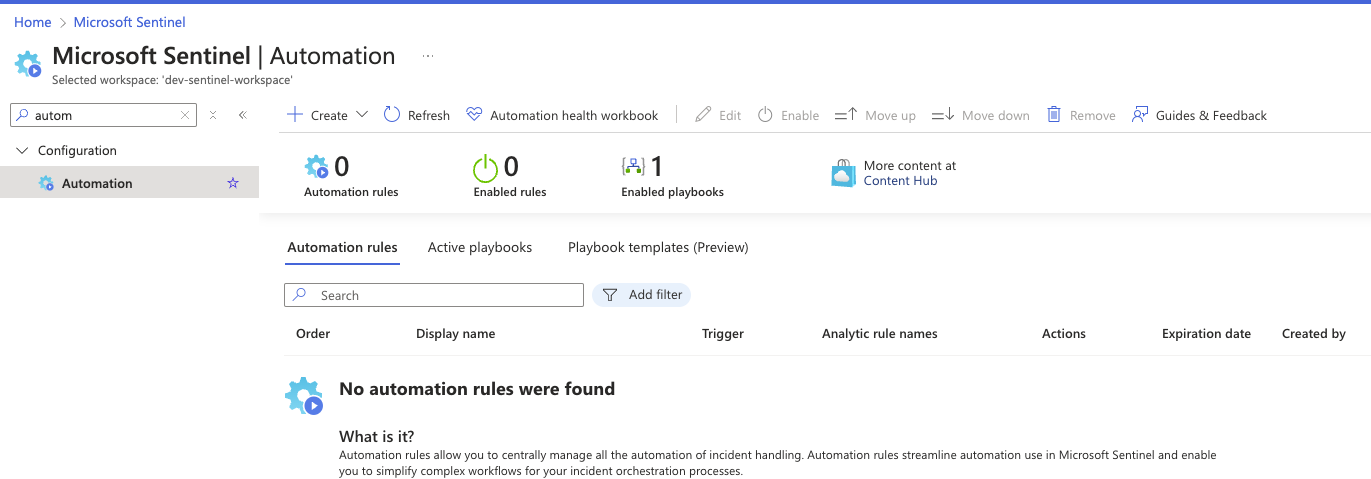
- In the Microsoft Sentinel portal, go to the ""Configuration" >> "Automation" section
- Click "Create" and select "Automation rule"
3.2 Create Automation Rules
Create three automation rules:
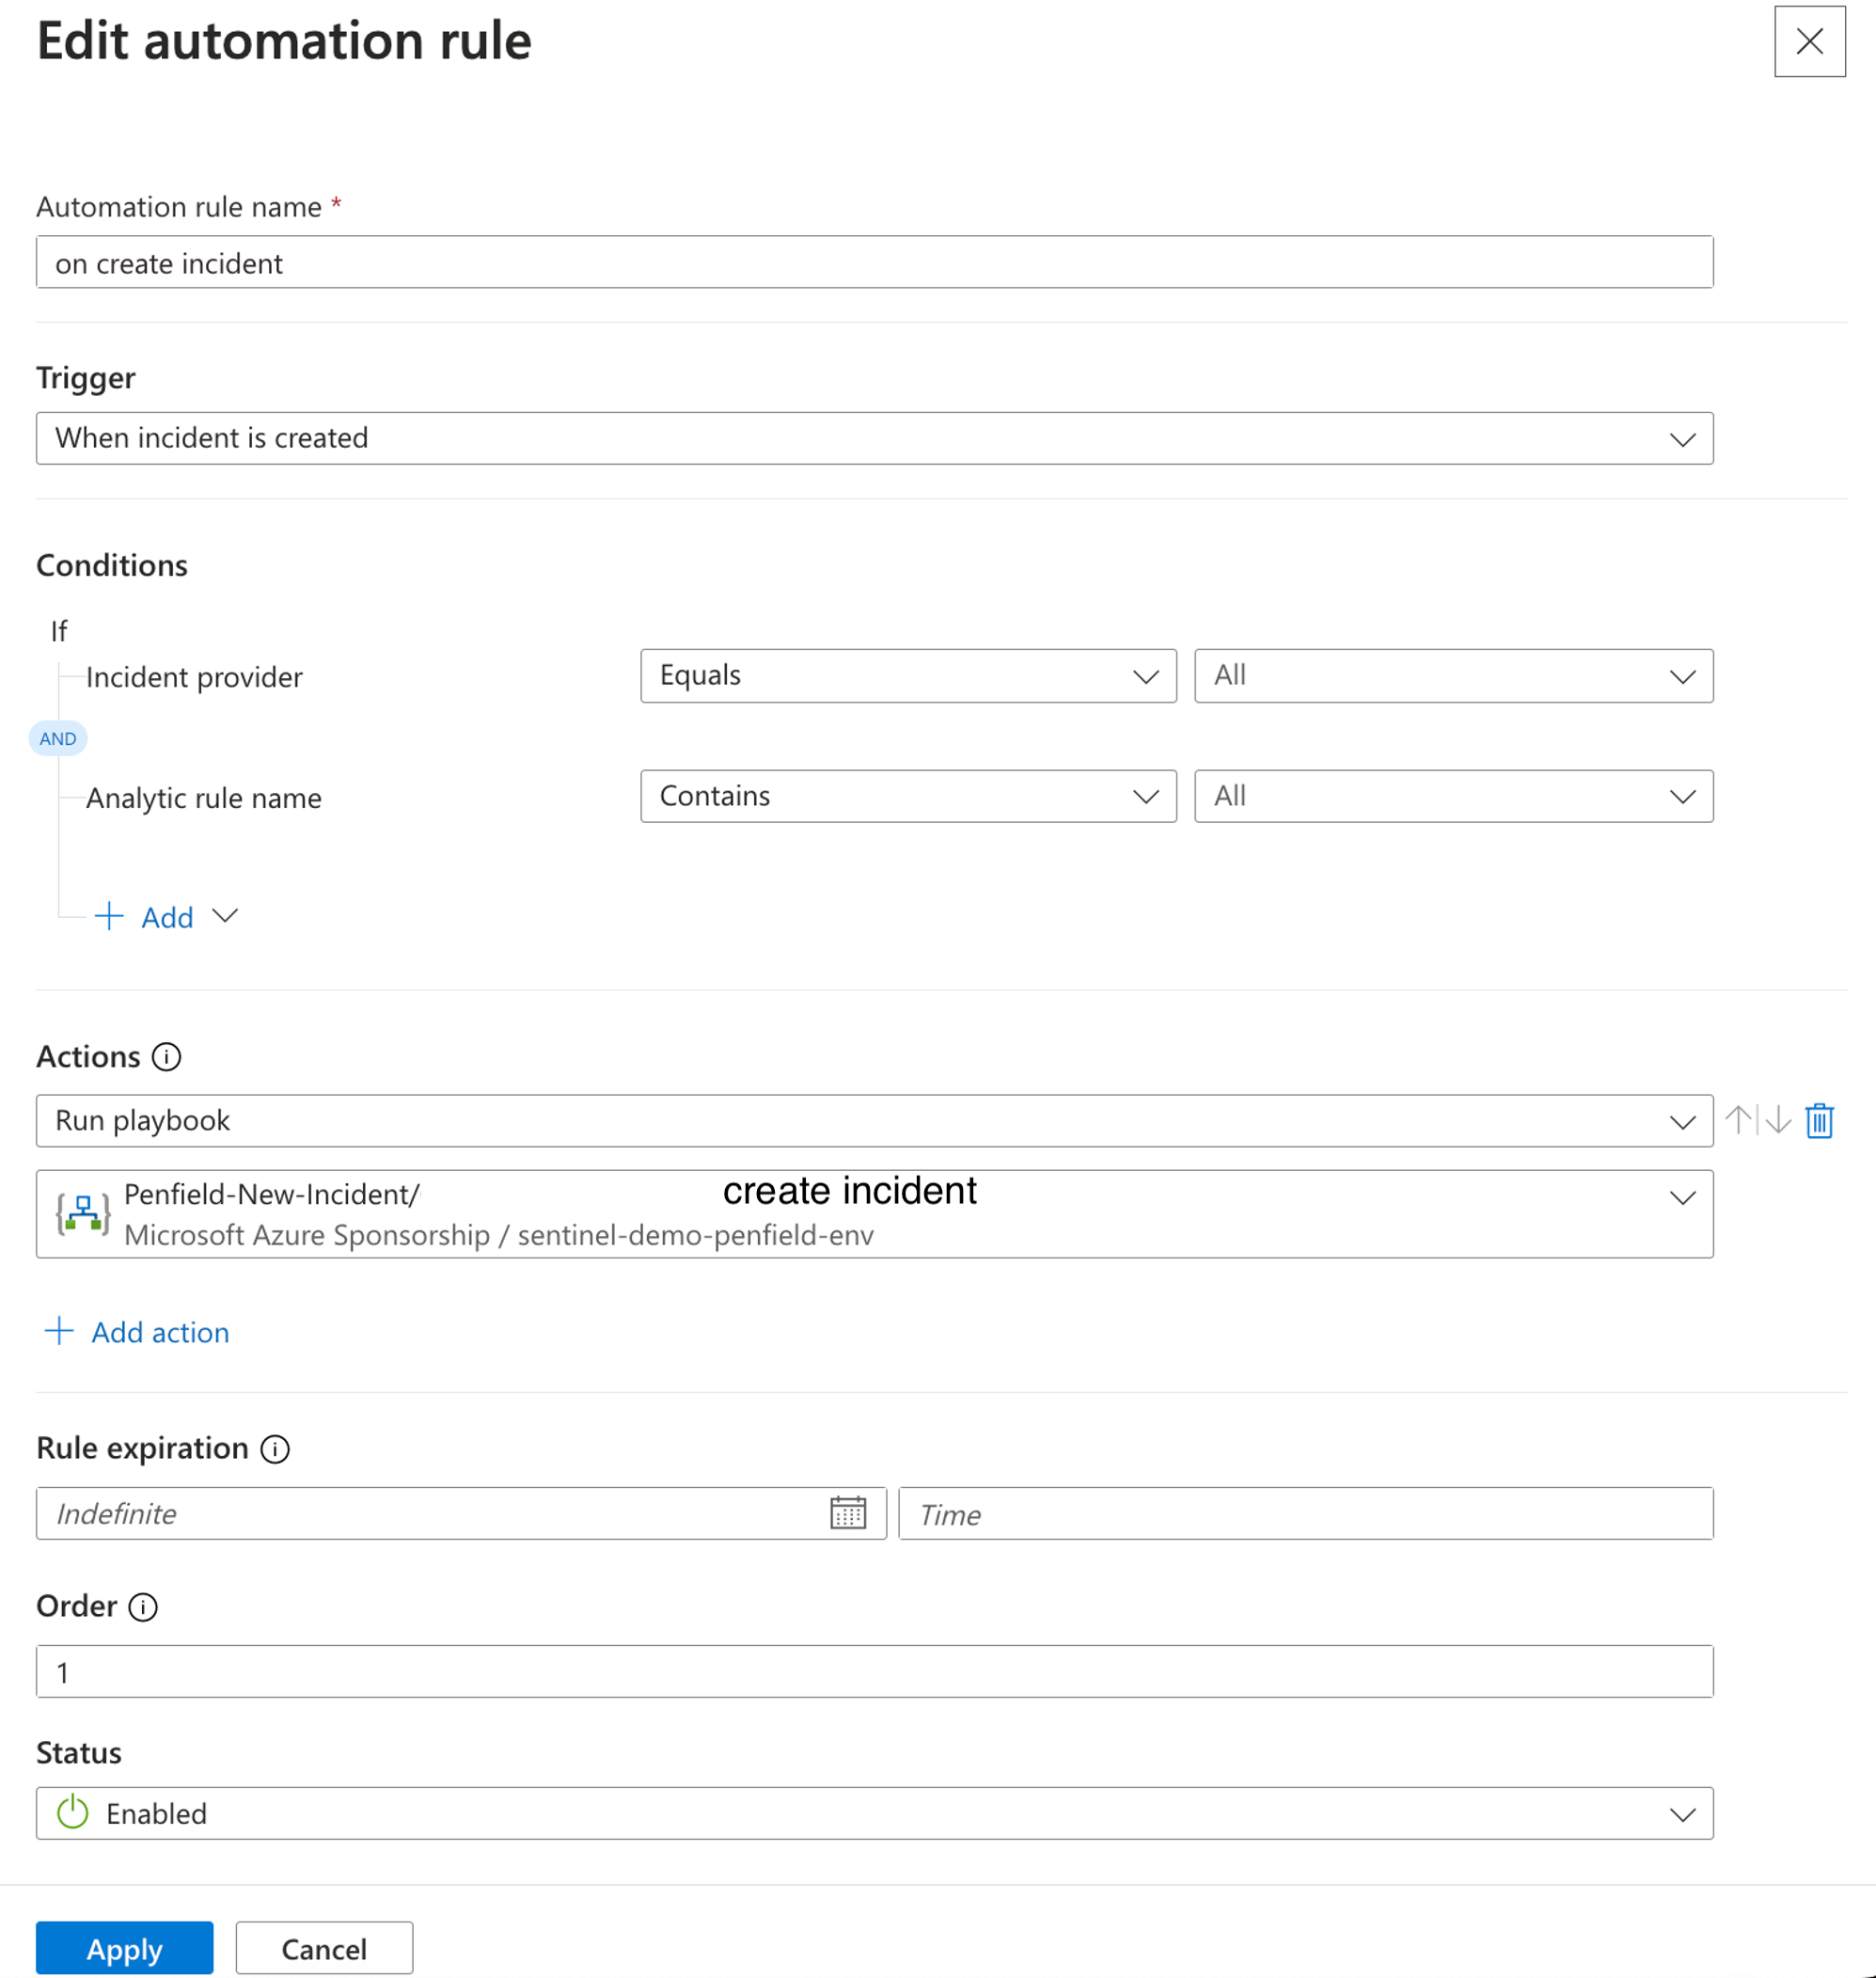
Rule 1: On Create Incident
- Name: "On Create Incident"
- Trigger: "When incident is created"
- Actions: Run playbook "create-incident"
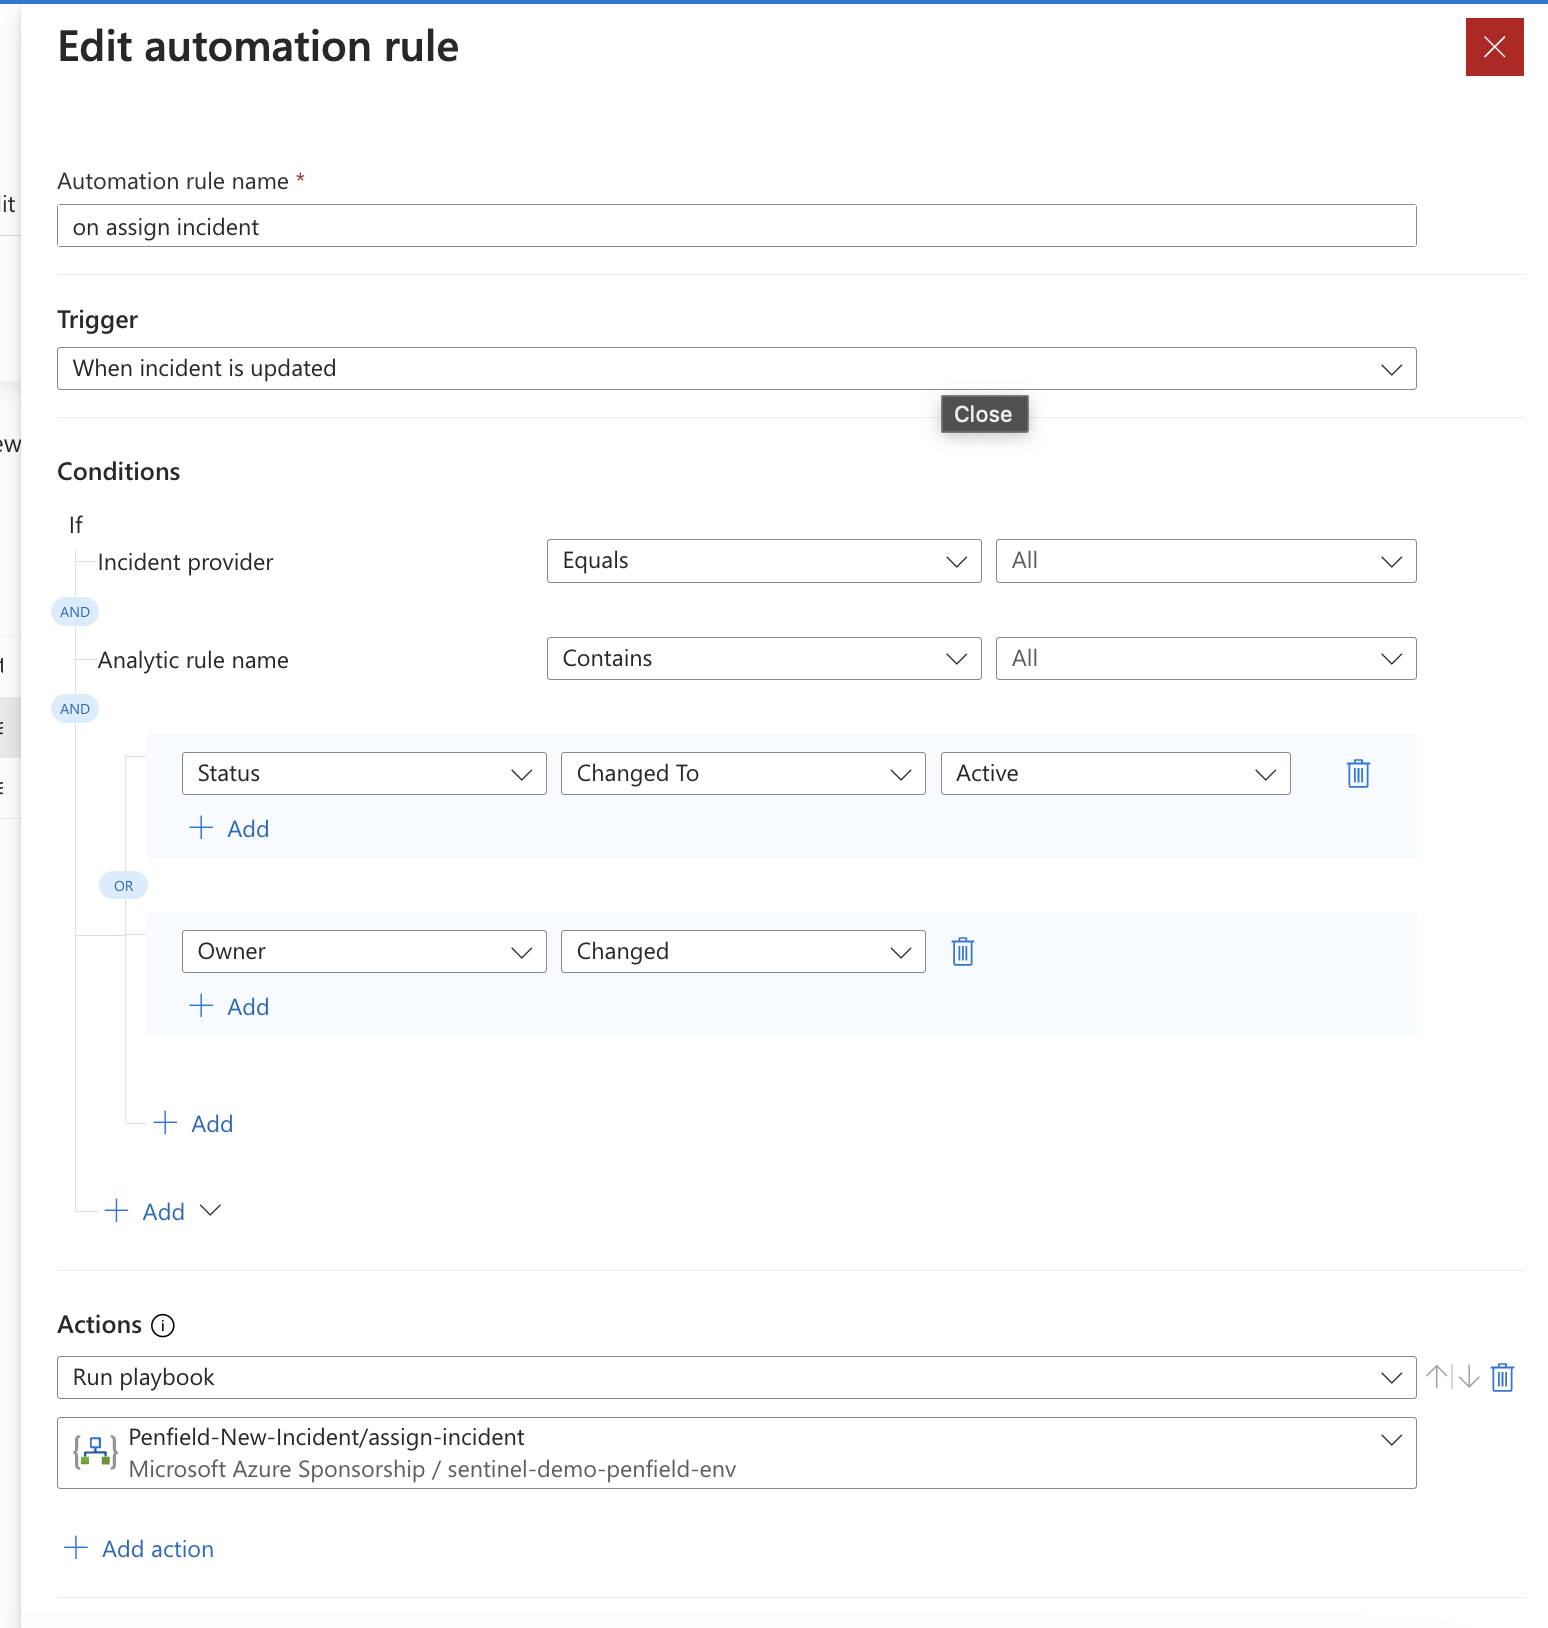
Rule 2: On Assign Incident
- Name: "On Assign Incident"
- Trigger: "When incident is updated"
- Condition: Status changes to "Active" Or Owner “Changed”
- Actions: Run playbook "assign-incident"
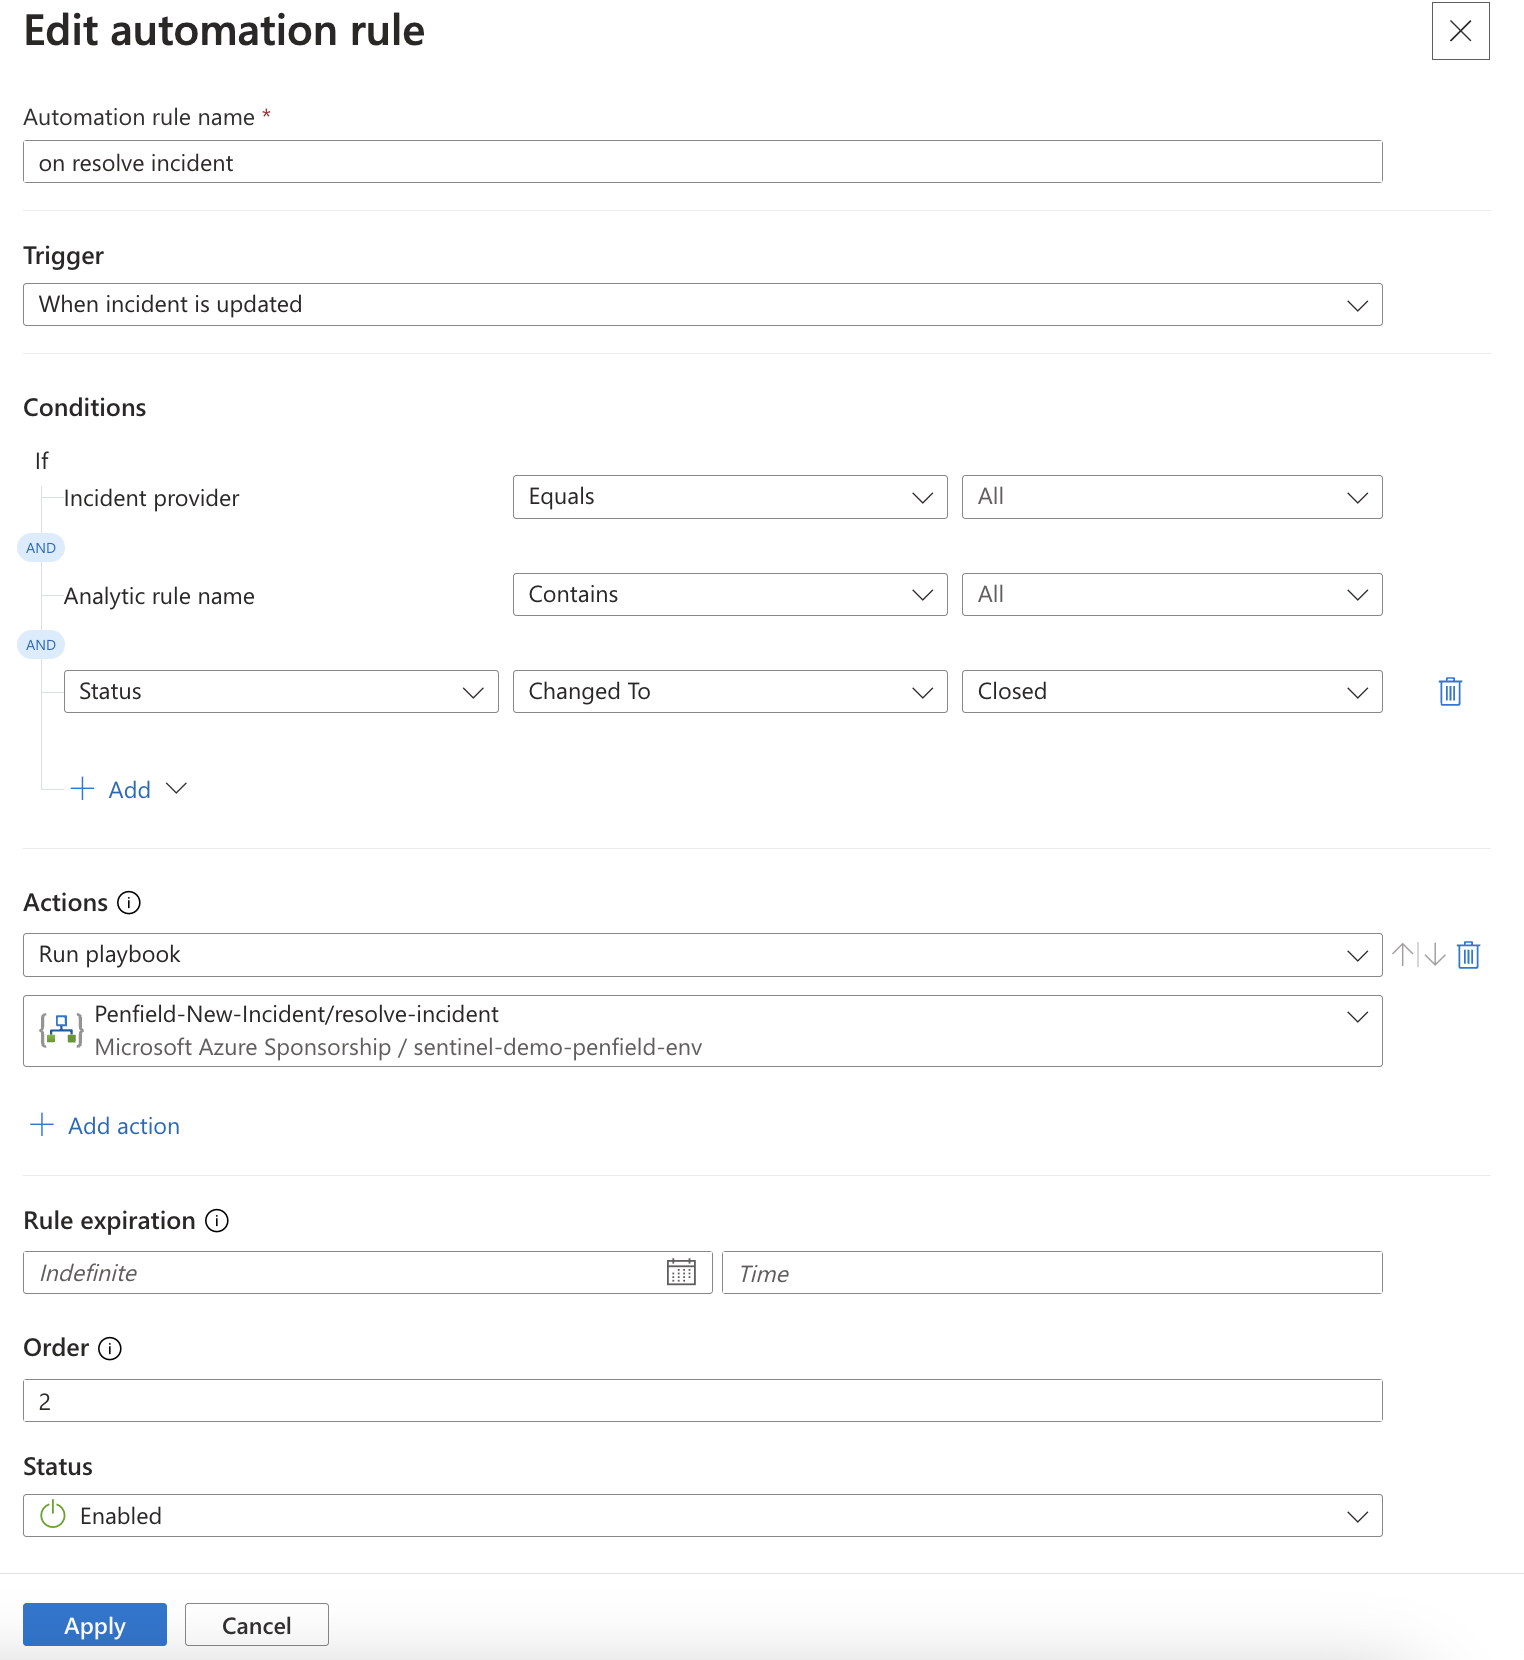
Rule 3: On Resolve Incident
- Name: "On Resolve Incident"
- Trigger: "When incident is updated"
- Condition: Status changes to "Closed"
- Actions: Run playbook "resolve-incident"
Step 4: Whitelists Azure Logic App IP Addresses into Kubernetes cluster Load Balancer (Optional)
This is only required if you use self-hosted Penfield solution and have IP restriction in Load Balancer.
You should whitelist the Azure Logic App IP addresses in the Kubernetes cluster Load Balancer to allow the Logic App to communicate with the Penfield Platform.
-
You can find the Azure Logic App IP addresses by going to your Logic App -> Settings -> Networking -> Outbound addresses.
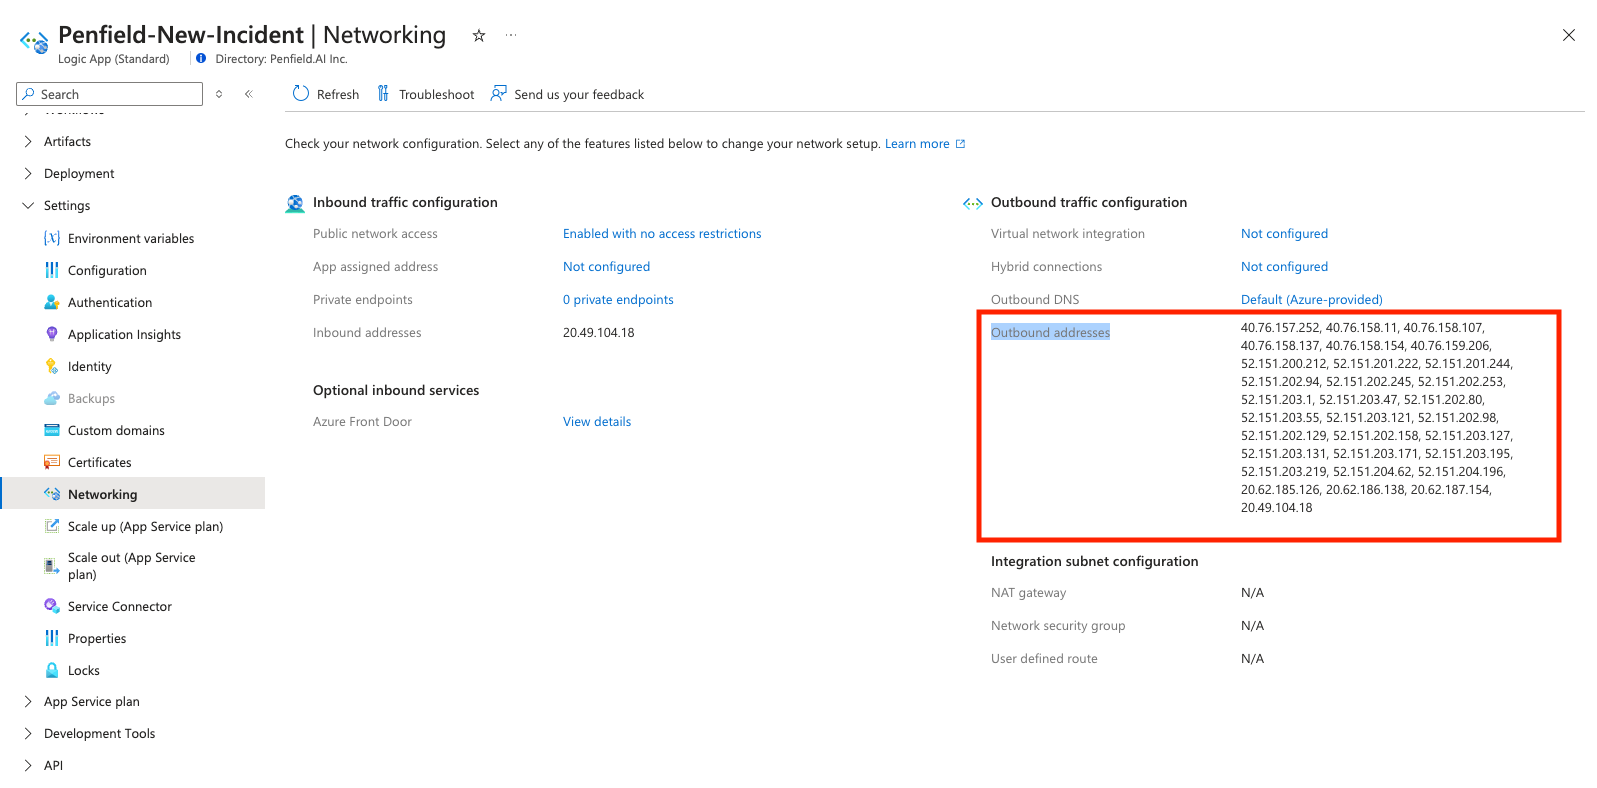
Note: The IP addresses may change over time, so it is recommended to monitor and update the whitelist as needed.
-
Whitelist the above IP addresses in the Kubernetes cluster Load Balancer security group.
Permissions and Testing
- Ensure the Logic App has the following permissions:
- "Logic App Contributor" role
- "Microsoft Sentinel Contributor" role
- Test the integration by:
- Creating a new incident in Sentinel
- Assigning the incident to a user
- Closing the incident
- Verify that the corresponding events are received in the Penfield Platform
Troubleshooting
- Check Logic App run history for any errors
- Verify API key and endpoint are correct
- Ensure proper permissions are set for the Logic App