Create Azure OpenAI Instance
You can create Azure OpenAI Instance either using script (ARM or Bicep templates) or manually.
Required OpenAI is available in the following regions:
- Canada East
- East US
Create using Script
-
Download the script (ARM or Bicep) from this repo.
-
Authenticate to azure CLI using
az login -
[Optional] Skip this step if Kubernetes Cluster is already deployed in Azure. If OpenAI needs to be created in new Resource Group create the resource group using below command, Replace
RESOURCE_GROUP_NAMEandREGIONwith correct values.az group create \
--name "RESOURCE_GROUP_NAME" \
--location "REGION" -
Create OpenAI instance using below command, Replace
RESOURCE_GROUP_NAMEandNAME_OF_OPEN_AI_INSTANCEwith correct values. Use the same Managed resource group name that is used while deploying via marketplace.az deployment group create \
--name "Penfield-App-OpenAI" \
--resource-group "RESOURCE_GROUP_NAME" \
--template-file mainTemplate.json \
--parameters accountName=NAME_OF_OPEN_AI_INSTANCE -
Retrieve the output and share it with Penfield securely, Replace
RESOURCE_GROUP_NAMEwith correct value.az deployment group show \
--name "Penfield-App-OpenAI" \
--resource-group "RESOURCE_GROUP_NAME" \
--query "properties.outputs"
Create Manually
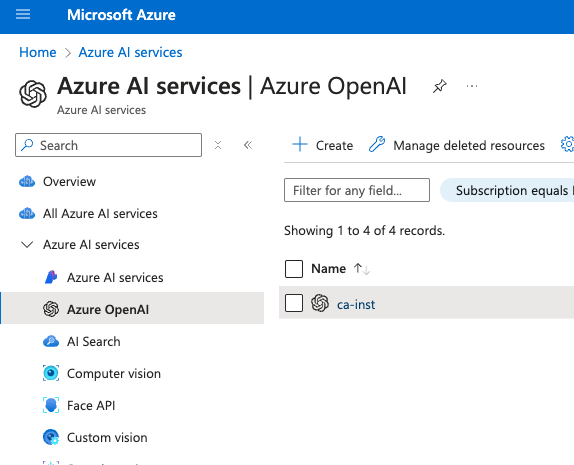
- Go to Azure AI service >> Azure OpenAI
- Click
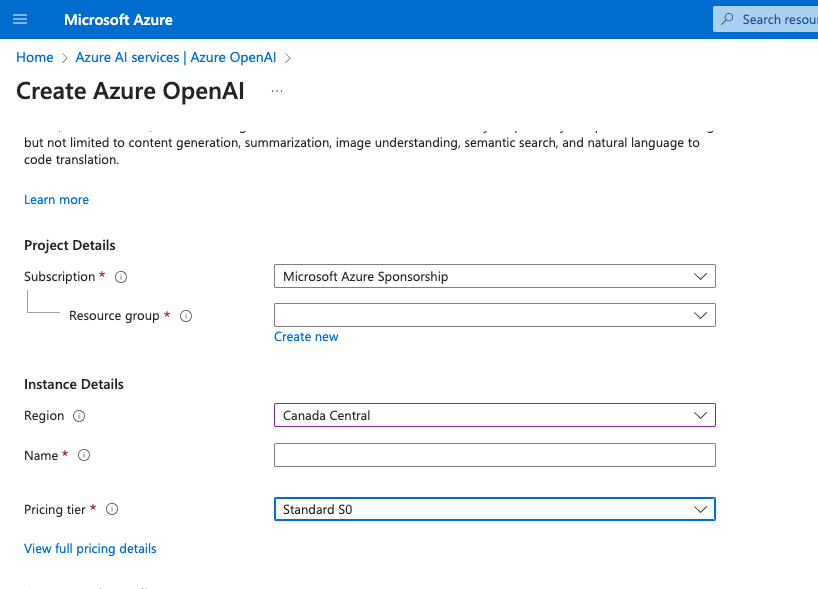
Createand configure the details including region of the instance (where your ML model deployment is hosted).
- After an instance is created, go to the instance by clicking it on the list e.g. in the screenshot click “ca-inst”.

- Click manage deployment on the left sidebar and click the “Manage Deployment” button.

- Click “Create new deployment” to select a model. You need to create two deployments for
text-embedding-ada-002andgpt-35-turbomodels. Use the settings as per the screenshot. You can any name for the deployment but this is needed later on when we will configure the app.- text-embedding-ada-002: Use model name:
text-embedding-ada-002, model version:2and Deployment type:Standard. Rate limit can be set to default value, should be atleast 350K TPM. - gpt-4o: Use model name:
gpt-4o, model version:2024-05-13and Deployment type:GlobalStandard. Rate limit can be set to default value, should be atleast 200K TPM.

- text-embedding-ada-002: Use model name:
- Once a model deployment is created (like the 2 deployments on the screenshot above), you will be able to access the model from an endpoint. Go back to the instance created in step 2 and 3. Click “keys and Endpoint” on the side panel to get the API access.

- Keep the following information handy for the deployment in the next steps:
- AZURE_OPENAI_ENDPOINT: Endpoint URL from step 6.
- AZURE_OPENAI_DEPLOYMENT: Deployment name of gpt-35-turbo model from step 5.
- AZURE_OPENAI_MODEL: Deployment model like gpt-35-turbo from step 5.
- AZURE_OPENAI_API_KEY: Key from step 6, Only one key is needed.
All the required infrastructure components will be deployed at this stage, please proceed to deploy the application